Android Emulators are simply the best way to test our application during development or when we want to use apps on PC. Currently, fingerprint smartphones are not that common, but surely, it will become one of the basic features like Bluetooth or Camera. So it is necessary to start making maximum use of the fingerprint scanner.
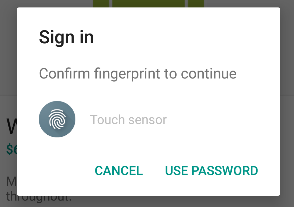
Android Fingerprint Prompt
When i started developing applications with a fingerprint scanner, I had to find a way to emulate the scanner in my emulator. Thanks to Android Developer website.
Before explaining how to Emulate a fingerprint scanner, you have to make sure that the following requirements are satisfied in your system.
Currently, the Fingerprint API is only supported from Marshmallow. Make sure your emulator is running on Android M (API 23) or better.
Android SDK Tools Revision 24.3 or better.
Watch my video on How to use fingerprint for emulator
Steps for adding Fingerprint in Android Emulator
Activate Screen lock from Settings -> Security. Then Go to Fingerprint option to add new fingerprint
When prompt to place your finger on the scanner, emulate the fingerprint using ADB command.
When we consider android emulators, the first option is Google’s default Android Emulator available in the android-sdk. But on a normal computer (in my 4GB Ram, Core i3 3rd Gen Processor Laptop) it takes around 5 minute to boot and performance is very laggy. It becomes worse after starting android studio in case you are a developer. So I started looking for a faster yet stable android emulator for Linux.
Genymotion
Genymotion is the best android emulr Linux versator I have used so far. It is fast, simple and can be integrated into android studio without any additional configuration. If you are looking for an android emulator for android development or just want to run WhatsApp or something on your computer, Genymotion is the right choice. Genymotion is free for personal use and can be downloaded from their site after signup. If you want to use Genymotion for business use, try Desktop Edition For Business.
Requirements
Your system must have Virtualbox virtual machine present in order to use Genymotion. If you don’t have Virtualbox download the setup for your Linux version from Virtualbox linux installation page. Install it and restart system to continue.
Login using your account and go to this download Page Download the right version of the setup for your computer (Select correct architecture 32bit or 64bit. If you are not sure, then download 32 bit )
The downloaded file will be of .bin extension. Linux wont allow to run a file that is downloaded from internet. You have to give the file executable privilege to run it. To do so, open terminalEither copy and paste your file to home or change terminal working directory by using ‘cd’ command.Type chmod +x file-name.bin where file-name is the name the downloaded file
Now, The installation will be in progress. Complete the installation
After the installation, You can start Genymotion from your launcher/Menu. If it is not present, then start the program manually from /home/you-user name/genymotion/genymotion (You may have to make this program executable using chmod)
Now you should see the following loading screen
Once loaded, You should see a login prompt. For login, use your previous username and password.
Now it is time to add a new phone to this emulator. You can do this by Clicking on the Add (+) button.
You should see a list of available emulators here. There you can find devices with almost all android versions you have heard of. Choose any one you want and click on Next. In the new window, you can set a name for your device. Click Next.
Wait for the downloading and installing complete. After you complete your virtual device installation, you will see the device in your Virtual Device List. Then you can add any number of emulators you want. In my case, I have added 3 of them.
Congratulations. You have successfully added an emulator. Now it is time to run it. Select the available emulator and click on start button. Then a message box will appear saying “Initializing virtual device”
It will take a little while to complete the firdt boot. Be patient :-). Here is a screenshot of my emulator
Keywords : Run android apps in linux, Run android apps in pc, Install Genymotion in linux ubuntu mint, Android emulator for linux, Fastest android emulator, Install apk in linux
It is always nice to see the picture of our loved ones when they call us. But downloading their photos and then setting them as contact photo is a tedious job. What if we can simply set their WhatsApp photo as contact picture. Yeah! That seems to be a pretty good idea.
But… How?
Well, there is an App for that in google play store. Let me explain the process as steps.
· Open it. You can see all your contacts in the app. The left side photo represents your current contact photo and right side one represents the photo available in WhatsApp. Remember, the right side photo will not be available until you save the person’s picture in WhatsApp manually.
Main Screen, Left side photo represents current contact photo and right side is the available whatsapp photo.
· Select the contact which you want to update photo.
· The application will ask for a confirmation to launch WhatsApp. Click OK.
Confirmation to launch whatsapp
· This will launch WhatsApp profile of the person. Click on his/her profile pic and Save it (Share -> Save to gallery).
· When you come back to the Contact Photo Sync App, you will be given another prompt to confirm the photo update.
Confirmation to set whatsapp image as profile pic
· Click YES, or YES, Not Show Again.
· And yes! You are done.
All Done
Search : Set WhatsApp profile pic as contact picture
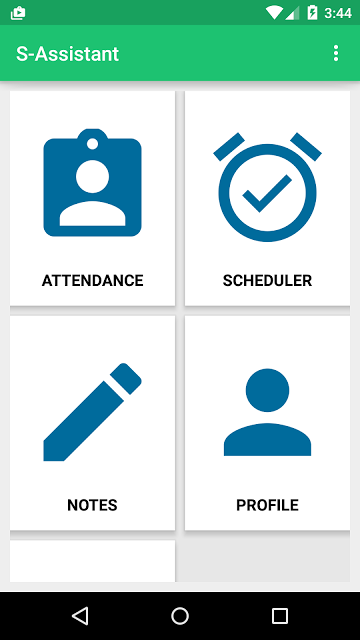
In this post, I am going to introduce an android application for teachers. Android is the ideal platform for developing such an application due to the wide variety of devices it supports. This Android app for teachers support basic functionalities such as adding student to each class/department, save notes, make schedules for classes etc. It also provides a CGPA (Cumulative Grade Point Average) calculator that basically calculate grade point average from the given grade points.
The First Activity Contains a Grid view that provides the connection to basic activities. The Attendance module is added to take attendance and store it in a database. The scheduler is basically used to schedule a particular event so that teachers won’t be needing another application as reminder.
Notes provides an easier way to save notes easily and quickly. Notes can also be associated with a subject so that it will be popped up when the teacher takes attendance for that subject.
Profile Module provides support to view and edit student data, along with activity to add new students.
Features Available
Take attendance and keep them class wise
Add New student. View each student’s attendance separately
Edit Student/Attendance later
Save notes subject wise
Automatic notification about notes available when the teacher takes attendance
Schedule classes
CGPA calculator
Simple and Material designed interface
Database Design
Simple sqlite database is used to store data through different tables.
 import android.app.Activity;
 import android.database.Cursor;
 import android.database.sqlite.SQLiteDatabase;
 import android.util.Log;
 import android.widget.Toast;
 public class databaseHandler {
   SQLiteDatabase database;
   Activity activity;
   public databaseHandler(Activity activity) {
     this.activity = activity;
     database = activity.openOrCreateDatabase("ASSIST", activity.MODE_PRIVATE, null);
     createTable();
   }
   public void createTable()
   {
     try {
       String qu = "CREATE TABLE IF NOT EXISTS STUDENT(name varchar(1000)," +
           "cl varchar(100), " +
           "regno varchar(100) primary key, contact varchar(100),roll integer);";
       database.execSQL(qu);
     }catch (Exception e)
     {
       Toast.makeText(activity,"Error Occured for create table",Toast.LENGTH_LONG).show();
     }
     try {
       String qu = "CREATE TABLE IF NOT EXISTS ATTENDANCE(datex date," +
           "hour int, " +
           "register varchar(100) ,isPresent boolean);";
       database.execSQL(qu);
     }catch (Exception e)
     {
       Toast.makeText(activity,"Error Occured for create table",Toast.LENGTH_LONG).show();
     }
     try {
       String qu = "CREATE TABLE IF NOT EXISTS NOTES(title varchar(100) not null," +
           "body varchar(10000), cls varchar(1000), sub varchar(1000) ,datex TIMESTAMP default CURRENT_TIMESTAMP);";
       database.execSQL(qu);
     }catch (Exception e)
     {
       Toast.makeText(activity,"Error Occured for create table",Toast.LENGTH_LONG).show();
     }
     try {
       String qu = "CREATE TABLE IF NOT EXISTS SCHEDULE(cl varchar(100),subject varchar(1000)," +
           "timex time, day_week varchar(100));";
       database.execSQL(qu);
     }catch (Exception e)
     {
       Toast.makeText(activity,"Error Occured for create table",Toast.LENGTH_LONG).show();
     }
   }
   public boolean execAction(String qu)
   {
     Log.i("databaseHandler", qu);
     try {
       database.execSQL(qu);
     }catch (Exception e)
     {
       Log.e("databaseHandler", qu);
       Toast.makeText(activity,"Error Occured for execAction",Toast.LENGTH_LONG).show();
       return false;
     }
     return true;
   }
   Cursor execQuery(String qu)
   {
     try {
       return database.rawQuery(qu,null);
     }catch (Exception e)
     {
       Log.e("databaseHandler", qu);
       Toast.makeText(activity,"Error Occured for execAction",Toast.LENGTH_LONG).show();
     }
     return null;
   }
 }
The code is used to create or open the database in private mode. After opening the mysqli database all normal mysql operations can be performed on the database.
I always prefer executing custom sql queries. So I have made 2 functions called execQuery and execAction. The execAction uses execSql function to execute INSERT, DELETE OR UPDATE operations on the database. execAction returns a cursor which can be used to get the rows returned from SELECT query.
Main Activity
As denoted earlier, the first activity contains Android Grid Layout which helps the user to easily find the content they are looking for. The following code is the layout XML for AppBase Activity.
From the onCreate() method, we have inflated the xml layout. The database handler is defined as a public static variable so that it can be accessed from all other activities without the need of declaration and initialization. I have used a custom adapter for the grid view called gridAdapter.
adapter = new gridAdapter(this,basicFields);
The gridAdapter should get the images and list of title to show the grid view. Here, I have passed the ArrayList basicFields as header and the images are loaded from the adapter itself.
gridView.setAdapter(adapter);
This will set the adapter as the adapter for grid view. Now Let’s consider the Custom Grid Adaptor for handling Grid view.
Custom Grid Adapter
 import android.app.Activity;
 import android.app.AlertDialog;
 import android.app.Dialog;
 import android.app.DialogFragment;
 import android.app.FragmentManager;
 import android.app.Notification;
 import android.app.NotificationManager;
 import android.app.PendingIntent;
 import android.content.DialogInterface;
 import android.content.Intent;
 import android.content.SharedPreferences;
 import android.database.Cursor;
 import android.net.Uri;
 import android.os.Bundle;
 import android.preference.PreferenceManager;
 import android.provider.Settings;
 import android.support.v4.app.NotificationCompat;
 import android.util.Log;
 import android.view.LayoutInflater;
 import android.view.View;
 import android.view.ViewGroup;
 import android.view.animation.Animation;
 import android.view.animation.ScaleAnimation;
 import android.widget.ArrayAdapter;
 import android.widget.BaseAdapter;
 import android.widget.DatePicker;
 import android.widget.EditText;
 import android.widget.ImageView;
 import android.widget.Spinner;
 import android.widget.TextView;
 import android.widget.Toast;
 import java.util.ArrayList;
 import java.util.StringTokenizer;
 public class GridAdapter extends BaseAdapter{
   private ArrayList<String> names;
   public static Activity activity;
   public gridAdapter(Activity activity, ArrayList names) {
     this.activity = activity;
     this.names = names;
   }
   @Override
   public int getCount() {
     return names.size();
   }
   @Override
   public Object getItem(int position) {
     return names.get(position);
   }
   @Override
   public long getItemId(int position) {
     return position;
   }
   @Override
   public View getView(int position, View v, ViewGroup parent) {
     if (v == null) {
       LayoutInflater vi = LayoutInflater.from(activity);
       v = vi.inflate(R.layout.grid_layout, null);
     }
     TextView textView = (TextView)v.findViewById(R.id.namePlacer);
     ImageView imageView = (ImageView)v.findViewById(R.id.imageHolder);
     if(names.get(position).toString().equals("ATTENDANCE"))
     {
       imageView.setImageResource(R.drawable.ic_attendance);
       v.setOnClickListener(new View.OnClickListener() {
         @Override
         public void onClick(View v) {
           FragmentManager fm = activity.getFragmentManager();
           createRequest request = new createRequest();
           request.show(fm,"Select");
         }
       });
     }else if(names.get(position).toString().equals("SCHEDULER"))
     {
       imageView.setImageResource(R.drawable.ic_schedule);
       v.setOnClickListener(new View.OnClickListener() {
         @Override
         public void onClick(View v) {
           Intent launchinIntent = new Intent(activity, scheduler.class);
           activity.startActivity(launchinIntent);
         }
       });
     }else if(names.get(position).toString().equals("NOTES"))
     {
       imageView.setImageResource(R.drawable.ic_notes);
       v.setOnClickListener(new View.OnClickListener() {
         @Override
         public void onClick(View v) {
           Intent launchinIntent = new Intent(activity, noteActivity.class);
           activity.startActivity(launchinIntent);
         }
       });
     }else if(names.get(position).toString().equals("PROFILE"))
     {
       imageView.setImageResource(R.drawable.ic_profile);
       v.setOnClickListener(new View.OnClickListener() {
         @Override
         public void onClick(View v) {
           Intent launchinIntent = new Intent(activity, profile_activity.class);
           activity.startActivity(launchinIntent);
         }
       });
     }
     else if(names.get(position).toString().equals("CGPA CALCULATOR"))
     {
       imageView.setImageResource(R.drawable.ic_cgpa);
       v.setOnClickListener(new View.OnClickListener() {
         @Override
         public void onClick(View v) {
           Intent launchinIntent = new Intent(activity, cgpa_activity.class);
           activity.startActivity(launchinIntent);
         }
       });
     }
     textView.setText(names.get(position).toString());
     return v;
   }
   public static class createRequest extends DialogFragment {
     @Override
     public void onCreate(Bundle savedInstanceState) {
       super.onCreate(savedInstanceState);
     }
     @Override
     public Dialog onCreateDialog(Bundle savedInstanceState) {
       AlertDialog.Builder builder = new AlertDialog.Builder(getActivity());
       // Get the layout inflater
       LayoutInflater inflater = getActivity().getLayoutInflater();
       final View v = inflater.inflate(R.layout.pick_period, null);
       final DatePicker datePicker = (DatePicker) v.findViewById(R.id.datePicker);
       final EditText hour = (EditText)v.findViewById(R.id.periodID);
       final Spinner spn = (Spinner) v.findViewById(R.id.spinnerSubject);
       String qu = "SELECT DISTINCT sub FROM NOTES";
       ArrayList<String> subs = new ArrayList<>();
       subs.add("Not Specified");
       Cursor cr = AppBase.handler.execQuery(qu);
       if(cr!=null)
       {
         cr.moveToFirst();
         while(!cr.isAfterLast()) {
           subs.add(cr.getString(0));
           Log.d("gridAdapter.class", "Cached " + cr.getString(0));
           cr.moveToNext();
         }
       }else
         Log.d("gridAdapter.class", "No SUBS" + cr.getString(0));
       ArrayAdapter<String> adapterSpinner = new ArrayAdapter<String>(activity, android.R.layout.simple_spinner_dropdown_item, subs);
       assert spn != null;
       spn.setAdapter(adapterSpinner);
       builder.setView(v)
           // Add action buttons
           .setPositiveButton("Enter", new DialogInterface.OnClickListener() {
             @Override
             public void onClick(DialogInterface dialog, int id) {
               int day = datePicker.getDayOfMonth();
               int month = datePicker.getMonth() + 1;
               int year = datePicker.getYear();
               String date = year + "-" + month + "-" + day;
               String subject = spn.getSelectedItem().toString();
               String qx = "SELECT title FROM NOTES where sub = '" + subject + "'";
               Cursor cr = AppBase.handler.execQuery(qx);
               String subnames = "";
               if(cr!=null)
               {
                 cr.moveToFirst();
                 while(!cr.isAfterLast()) {
                   subnames += (cr.getString(0)) + "n";
                   cr.moveToNext();
                 }
               }
               makeNotification(subnames);
               Cursor cursor = AppBase.handler.execQuery("SELECT * FROM ATTENDANCE WHERE datex = '" +
                   date +"' AND hour = " + hour.getText() + ";");
               if(cursor==null||cursor.getCount()==0)
               {
                 Intent launchinIntent = new Intent(AppBase.activity, attendanceActivity.class);
                 launchinIntent.putExtra("DATE", date);
                 launchinIntent.putExtra("PERIOD", hour.getText().toString());
                 AppBase.activity.startActivity(launchinIntent);
               }else {
                 Toast.makeText(getActivity(),"Period Already Added",Toast.LENGTH_LONG).show();
               }
             }
           })
           .setNegativeButton("Cancel", new DialogInterface.OnClickListener() {
             public void onClick(DialogInterface dialog, int id) {
               dialog.dismiss();
             }
           });
       return builder.create();
     }
   }
   public static void makeNotification(String userIntrouble) {
     Log.d("NOTIFICATION","Building..........");
     Intent notificationIntent = new Intent(activity.getApplicationContext(), noteActivity.class);
     PendingIntent pIntent = PendingIntent.getActivity(activity, 0, notificationIntent,
         0);
     SharedPreferences sharedPrefs = PreferenceManager.getDefaultSharedPreferences(activity.getBaseContext());
     Uri ring = Uri.parse(sharedPrefs.getString("Notification_Sound", Settings.System.DEFAULT_RINGTONE_URI.toString()));
     NotificationCompat.Builder builder = new NotificationCompat.Builder(activity.getBaseContext())
         .setTicker("Ticker Title").setContentTitle("Notes Are Available For this subject")
         .setSmallIcon(R.drawable.ic_notes)
         .setStyle(new NotificationCompat.BigTextStyle().bigText(userIntrouble))
         .setContentIntent(pIntent)
         .setSound(ring);
     Notification noti = builder.build();
     noti.contentIntent = pIntent;
     noti.flags = Notification.FLAG_AUTO_CANCEL;
     NotificationManager notificationManager = (NotificationManager) activity.getSystemService(activity.NOTIFICATION_SERVICE);
     notificationManager.notify(0, noti);
   }
 }
The custom adapter GridAdapter extends Android’s BaseAdapter and implements its methods. In the getView method, we have inflated both the title and ImageView using an if-else case.
Attendance Activity Create Dialog
Select Date for Registering Attendance
Create request dialog is created when the user clicks on Attendance view in the Grid Layout. An onClickListener is added for the view v in the above code.
The dialog takes the date and hour(period) along with subject which is to be taken by the teacher. A notification module is added which will notify the teacher about the notes available for that particular subject once they click on the Enter option. Moreover clicking the Enter will launch new Activity called AttendanceActivity.
In order to start the attendance activity, DATE and PERIOD data is passed through the intent. It is then accessed from the second activity and processed.
Settings Activity
Setting activity provides option to clear application data. It wipes all the data from the database once selected.
The following data can be cleared.
Schedule created
Attendance data
Notes saved
Student Info
Setting Activity
pref_general.xml
<PreferenceScreen xmlns:android="http://schemas.android.com/apk/res/android">
 <Preference
   android:title="Clear Schedule data"
   android:summary="Clear all schedules"
   android:key="clear_schedule"/>
   <Preference
     android:title="Clear Attendance data"
     android:summary="Clear all Attendance Data"
     android:key="clear_attendance"/>
   <Preference
     android:title="Clear Notes data"
     android:summary="Clear all Notes Data"
     android:key="clear_notes"/>
   <Preference
     android:title="Clear Student data"
     android:summary="Clear all Student Data"
     android:key="clear_student"/>
 </PreferenceScreen>
In the settings, I have added options to clear all the databases. The above code is the XML layout for the preferences. The xml is inflated by SettingsActivity.java using
addPreferencesFromResource(R.xml.pref_general)
Then for each preference entry event handler is provided using the code.
 Preference myPref = findPreference("clear_schedule");
     myPref.setOnPreferenceClickListener(new Preference.OnPreferenceClickListener() {
       public boolean onPreferenceClick(Preference preference) {
          //DO ACTION HERE
 }
That’s all about the first activity of S-Assistant from Android app for teachers. There are many other modules in the program. I feel it is not a good idea to explain them all. Get the project source code from the following link.