Author: Muhammed Afsal Villan

  • JavaFX Animation Tutorial with Examples

    JavaFX Animation Tutorial with Examples

    In this article, we will have a deep look at JavaFX Animation. JavaFX provides easy to use animation API (javafx.animation package). There are some predefined animation that can be used out of the box or you can implement custom animations using KeyFrames.

    Following are the main predefined animations in JavaFX.

    TranslateTransition

    Translate transition allows to create movement animation from one point to another within a duration. Using TranslateTransition#setByX / TranslateTransition#setByY, you can set how much it should move in x and y axis respectively. It also possible to set precise destination by using TranslateTransition#setToX / TranslateTransition#setToY.

    import javafx.animation.TranslateTransition;
    import javafx.application.Application;
    import javafx.scene.Group;
    import javafx.scene.Scene;
    import javafx.scene.control.Button;
    import javafx.stage.Stage;
    import javafx.util.Duration;
    
    public class Animation extends Application {
        @Override
        public void start(Stage primaryStage) throws Exception {
            Button btn = new Button("ClickMe");
            Group group = new Group(btn);
            Scene scene = new Scene(group, 600, 600);
    
            //Duration = 2.5 seconds
            Duration duration = Duration.millis(2500);
            //Create new translate transition
            TranslateTransition transition = new TranslateTransition(duration, btn);
            //Move in X axis by +200
            transition.setByX(200);
            //Move in Y axis by +100
            transition.setByY(100);
            //Go back to previous position after 2.5 seconds
            transition.setAutoReverse(true);
            //Repeat animation twice
            transition.setCycleCount(2);
            transition.play();
    
            primaryStage.setScene(scene);
            primaryStage.show();
        }
        public static void main(String[] args) {
            Application.launch(args);
        }
    }
    

    ScaleTransition

    Scale transition is another JavaFX animation which can be used out of the box that allows to animate the scale / zoom of the given object. The object can be enlarged or minimized using this animation.

    import javafx.animation.ScaleTransition;
    import javafx.application.Application;
    import javafx.scene.Group;
    import javafx.scene.Scene;
    import javafx.scene.control.Button;
    import javafx.stage.Stage;
    import javafx.util.Duration;
    
    public class Animation extends Application {
    
      @Override
      public void start(Stage primaryStage) throws Exception {
        Button btn = new Button("Genuine Coder");
        Group group = new Group(btn);
        Scene scene = new Scene(group, 600, 600);
    
        //Duration = 2.5 seconds
        Duration duration = Duration.millis(2500);
        //Create new scale transition
        ScaleTransition scaleTransition = new ScaleTransition(duration, btn);
        //Set how much X should enlarge
        scaleTransition.setByX(1.5);
        //Set how much Y should
        scaleTransition.setByY(1.5);
        scaleTransition.play();
    
        primaryStage.setScene(scene);
        primaryStage.show();
      }
    
      public static void main(String[] args) {
        Application.launch(args);
      }
    }
    

    RotateTransition

    Rotate transition provides animation for rotating an object. We can provide upto what angle the node should rotate by toAngle. Using byAngle we can specify how much it should rotate from current angle of rotation.

    import javafx.animation.RotateTransition;
    import javafx.application.Application;
    import javafx.scene.Group;
    import javafx.scene.Scene;
    import javafx.scene.control.Button;
    import javafx.stage.Stage;
    import javafx.util.Duration;
    
    public class Animation extends Application {
    
      @Override
      public void start(Stage primaryStage) {
        Button btn = new Button("Genuine Coder");
        Group group = new Group(btn);
        Scene scene = new Scene(group, 600, 600);
    
        //Duration = 2.5 seconds
        Duration duration = Duration.millis(2500);
        //Create new rotate transition
        RotateTransition rotateTransition = new RotateTransition(duration, btn);
        //Rotate by 200 degree
        rotateTransition.setByAngle(200);
        rotateTransition.play();
    
        primaryStage.setScene(scene);
        primaryStage.show();
      }
    
      public static void main(String[] args) {
        Application.launch(args);
      }
    }
    

    FadeTransition

    Fade transition creates a fade in / fade out effect by controlling opacity of the object. We can make fade in transition or fade out transition in JavaFX by setting the to and from value.

    //Fade in transition
    FadeTransition fadeInTransition = new FadeTransition(Duration.millis(1500), btn);
    fadeInTransition.setFromValue(0.0);
    fadeInTransition.setToValue(1.0);
    
    //Fade out transition
    FadeTransition fadeOutTransition = new FadeTransition(Duration.millis(1500), btn);
    fadeOutTransition.setFromValue(1.0);
    fadeOutTransition.setToValue(0.0);
    

    PathTransition

    Path transition provides option to move object through a specified path. The path can be anything from simple straight line to complex quadratic curves. Following code rotates button through a circular path locate at (200,200) with radius 50

    import javafx.animation.PathTransition;
    import javafx.application.Application;
    import javafx.scene.Group;
    import javafx.scene.Scene;
    import javafx.scene.control.Button;
    import javafx.scene.shape.Circle;
    import javafx.stage.Stage;
    import javafx.util.Duration;
    
    public class Animation extends Application {
    
      @Override
      public void start(Stage primaryStage) {
        Button btn = new Button("Genuine Coder");
        Group group = new Group(btn);
        Scene scene = new Scene(group, 600, 600);
    
        //Create new path transition
        PathTransition pathTransition = new PathTransition();
        pathTransition.setDuration(Duration.millis(2500));
        //Set node to be animated
        pathTransition.setNode(btn);
        //Rotate button through a circular path locate at (200,200) with radius 50
        pathTransition.setPath(new Circle(200, 200, 50));
    
        pathTransition.play();
    
        primaryStage.setScene(scene);
        primaryStage.show();
      }
    
      public static void main(String[] args) {
        Application.launch(args);
      }
    }
    

    Combine Animation Sequentially with SequentialTransition

    Sequential transition allows to combine two or more transition we have discussed so far. After the completion of one transition, the next will be started. The following code will apply rotate transition and scale transition sequentially.

    //Create rotate transition
    RotateTransition rotateTransition = new RotateTransition(Duration.seconds(1));
    rotateTransition.setByAngle(180f);
    //Create scale transition
    ScaleTransition scaleTransition = new ScaleTransition(Duration.seconds(1));
    scaleTransition.setByX(1.5f);
    
    //First do rotateTransition, then do scaleTransition
    SequentialTransition sequentialTransition = new SequentialTransition(rotateTransition, scaleTransition);
    sequentialTransition.play();
    

    Combine Animation Parallely with ParallelTransition

    Parallel transition is very much similar to sequential transition. Except, it works on parallel. All the animations applied will be played in parallel. We can specify two or more transition to execute in parallel.

    //Create rotate transition
    RotateTransition rotateTransition = new RotateTransition(Duration.seconds(1));
    rotateTransition.setByAngle(180f);
    //Create scale transition
    ScaleTransition scaleTransition = new ScaleTransition(Duration.seconds(1));
    scaleTransition.setByX(1.5f);
    
    //Play both rotateTransition as well as scaleTransition in prallel
    ParallelTransition sequentialTransition = new ParallelTransition(rotateTransition, scaleTransition);
    sequentialTransition.play();
    

    KeyFrame Animation

    KeyFrame animation is one of the most key features of JavaFX Animation. The API javafx.animation.KeyFrame can be used to animate any JavaFX property. For example, let’s say you want to animate width of your application window. You can use widthProperty with KeyFrame to animate the width of your application window.

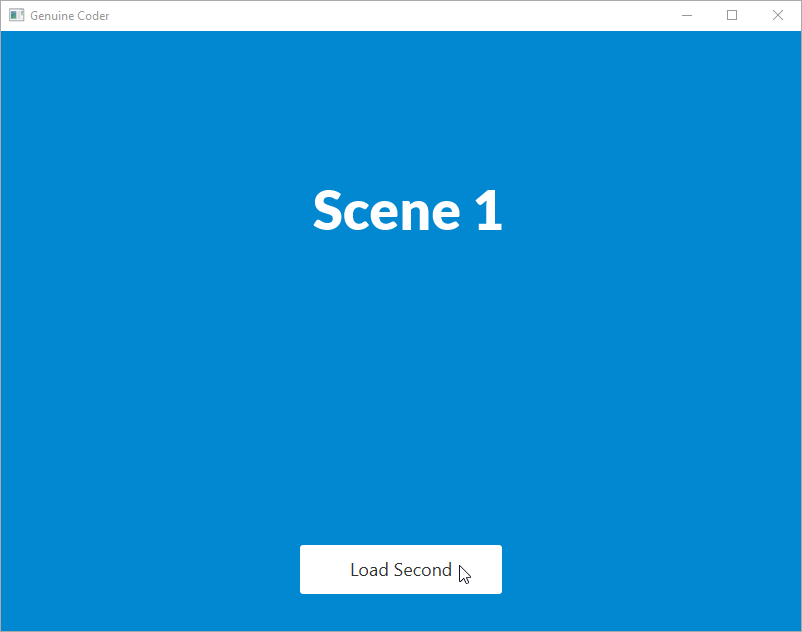
    Watch video on using KeyFrame animation to create slide-in effect in JavaFX.

    The following example loads a scene with slide in effect using JavaFX KeyFrame API

    Parent root = getNextSceneRoot();
    parentContainer.getChildren().add(root);
    
    //Create a timeline instance
    Timeline timeline = new Timeline();
    //Create a keyValue. We need to slide in -- We gradually decrement Y value to Zero
    KeyValue kv = new KeyValue(root.translateYProperty(), 0, Interpolator.EASE_IN);
    //Create keyframe of 1s with keyvalue kv
    KeyFrame kf = new KeyFrame(Duration.seconds(1), kv);
    //Add frame to timeline
    timeline.getKeyFrames().add(kf);
    
    //Start animation
    timeline.play();


    In this chapter we familiarized with JavaFX animation API. JavaFX provides a good set of predefined animation set and a powerful KeyFrame animation API.

    You Might also be interested in:-


  • JavaFX 3D Tutorial #3 – 3D Object Transform (Rotation) with Keyboard Input

    JavaFX 3D Tutorial #3 – 3D Object Transform (Rotation) with Keyboard Input

    In this chapter, we will talk about applying transformation on the 3D objects. JavaFX provides following transforms

    1. Affine
    2. Rotate
    3. Scale
    4. Shear
    5. Translate

    For now, we make use of Rotate transformation. All the transformations can be applied in a similar manner.

    Applying Transforms

    All JavaFX nodes have the method getTransforms() that will return an observable list of all the transforms applied on that. You can simple add a new transform by

     Transform whatever = new Transform();
     yourObject.getTransforms().add(whatever);
    

    When applying transform, it is important that you take care of existing transformation. Let’s say, your object is currently rotated 30 degrees, when you rotate it again by 10, you have to add with 30.

    This can be achieved using createConcatenation() method that combines two transformations.

    Transformable Container

    When we work on 3D programming, we will have to do the transformation regularly. The following class helps to do this in the easy way.

    class SmartGroup extends Group {
        Rotate r;
        Transform t = new Rotate();
    
        void rotateByX(int ang) {
          r = new Rotate(ang, Rotate.X_AXIS);
          t = t.createConcatenation(r);
          this.getTransforms().clear();
          this.getTransforms().addAll(t);
        }
    
        void rotateByY(int ang) {
          r = new Rotate(ang, Rotate.Y_AXIS);
          t = t.createConcatenation(r);
          this.getTransforms().clear();
          this.getTransforms().addAll(t);
        }
      }
    

    With this SmartGroup, you can separate the rotation logic. It also remembers previous rotation values.

    With this, you can rotate an object or a set of objects (the whole container) as follows.

        SmartGroup group = new SmartGroup();
        //Add all the components
        group.getChildren().addAll(box, sphere);
    
        //Rotate by X - 10 degrees
        group.rotateByX(10);
        //Make it 20
       group.rotateByX(10); 
    

    Listen for Keyboard Inputs

    You can register for keyboard press events using KeyEvent.KEY_PRESSED. We have to attach a keyboard listener to the stage itself so that all the key events can be tracked.

    primaryStage.addEventHandler(KeyEvent.KEY_PRESSED, event -> {
       //Process according to the key pressed.
       switch (event.getCode()) {
       }
    });
    

    Working Example

    import javafx.application.Application;
    import javafx.scene.Camera;
    import javafx.scene.Group;
    import javafx.scene.PerspectiveCamera;
    import javafx.scene.Scene;
    import javafx.scene.input.KeyEvent;
    import javafx.scene.paint.Color;
    import javafx.scene.shape.Box;
    import javafx.scene.transform.Rotate;
    import javafx.scene.transform.Transform;
    import javafx.stage.Stage;
    
    
    /**
     * @author afsal villan
     * @version 1.0
     *
     * https://genuinecoder.com
     */
    public class Rotation3D extends Application {
    
      private static final int WIDTH = 1400;
      private static final int HEIGHT = 800;
    
      @Override
      public void start(Stage primaryStage) {
        //Create box
        Box box = new Box(100, 20, 50);
    
        //Prepare transformable Group container
        SmartGroup group = new SmartGroup();
        group.getChildren().add(box);
    
        Camera camera = new PerspectiveCamera();
        Scene scene = new Scene(group, WIDTH, HEIGHT);
        scene.setFill(Color.SILVER);
        scene.setCamera(camera);
    
        //Move to center of the screen
        group.translateXProperty().set(WIDTH / 2);
        group.translateYProperty().set(HEIGHT / 2);
        group.translateZProperty().set(-1200);
    
        //Add keyboard control.
        primaryStage.addEventHandler(KeyEvent.KEY_PRESSED, event -> {
          switch (event.getCode()) {
            case W:
              group.translateZProperty().set(group.getTranslateZ() + 100);
              break;
            case S:
              group.translateZProperty().set(group.getTranslateZ() - 100);
              break;
            case Q:
              group.rotateByX(10);
              break;
            case E:
              group.rotateByX(-10);
              break;
            case NUMPAD6:
              group.rotateByY(10);
              break;
            case NUMPAD4:
              group.rotateByY(-10);
              break;
          }
        });
    
        primaryStage.setTitle("Genuine Coder");
        primaryStage.setScene(scene);
        primaryStage.show();
      }
    
    
      public static void main(String[] args) {
        launch(args);
      }
    
      class SmartGroup extends Group {
    
        Rotate r;
        Transform t = new Rotate();
    
        void rotateByX(int ang) {
          r = new Rotate(ang, Rotate.X_AXIS);
          t = t.createConcatenation(r);
          this.getTransforms().clear();
          this.getTransforms().addAll(t);
        }
    
        void rotateByY(int ang) {
          r = new Rotate(ang, Rotate.Y_AXIS);
          t = t.createConcatenation(r);
          this.getTransforms().clear();
          this.getTransforms().addAll(t);
        }
      }
    }


    Visit JavaFX 3D Course Index Page

  • JavaFX 3D Tutorial #2 – Camera Systems

    JavaFX 3D Tutorial #2 – Camera Systems

    By default, JavaFX provides a camera that allows to view the world from the negative z position. When we have to look at the world from our own angle, we need a custom camera.

    JavaFX camera component extends javafx.scene.Node. It can be added to the scene graph just like any other JavaFX components. We have 2 different cameras available.

    1: Parallel Camera

    Parallel Camera always render the objects in same size. This camera defines a viewing volume for a parallel (orthographic) projection; a rectangular box. This camera is always located at center of the window and looks along the positive z-axis. It is not really useful when you want to look at the objects from a certain point.

    ParallelCamera camera = new ParallelCamera();
    //..Attach to scene
    scene.setCamera(camera);
    

    2: Perspective Camera

    This camera allows to look at the object from a point. As per the documentation,
    “This camera defines a viewing volume for a perspective projection; a truncated right pyramid. The fieldOfView value can be used to change viewing volume. This camera is always located at center of the scene and looks along the positive z-axis. The coordinate system defined by this camera has its origin in the upper left corner of the panel with the Y-axis pointing down and the Z axis pointing away from the viewer (into the screen).”

    It has two constructors

    • PerspectiveCamera()
    • PerspectiveCamera(boolean fixedEyeAtCameraZero)

    If fixedEyeAtCameraZero is true, the eye position is fixed at (0, 0, 0) in the local coordinates of the camera. A fixedEyeAtCameraZero as true guarantees that after the eye of the PerspectiveCamera moves along with it, and remains at the camera’s zero position.

    PerspectiveCamera camera = new PerspectiveCamera(true);
    //..Attach to scene
    scene.setCamera(camera);
    

    Field of View

    Field of view defines how much we can see in the 3D scene. A larger field of view angles provides a wider view –> you can see more things. This can be set as

     
    camera.setFieldOfView(double value);
    

    Clipping Planes

    Clipping planes allows to defines that part of the 3D world that we are interested to see. Anything closer to the eye than the near clipping distance isn’t displayed (it’s too close), and anything further away from the eye than the far clipping distance isn’t displayed either (it’s too far away).

     
     camera.setNearClip(double value);
     camera.setFarClip(double value);
    

    Example Code

    
    import javafx.application.Application;
    import javafx.scene.*;
    import javafx.scene.input.KeyEvent;
    import javafx.scene.paint.Color;
    import javafx.scene.shape.Sphere;
    import javafx.stage.Stage;
    
    /**
     * @author afsal villan
     * @version 1.0
     *
     * https://genuinecoder.com
     */
    public class Camera3D extends Application {
        private static final int WIDTH = 1400;
        private static final int HEIGHT = 800;
    
        @Override
        public void start(Stage primaryStage) throws Exception {
            Sphere sphere = new Sphere(50);
    
            Group group = new Group();
            group.getChildren().add(sphere);
    
            //Create new Camera
            Camera camera = new PerspectiveCamera(true);
            Scene scene = new Scene(group, WIDTH, HEIGHT);
            scene.setFill(Color.SILVER);
            //Attach to scene
            scene.setCamera(camera);
    
            //Move back a little to get a good view of the sphere
            camera.translateZProperty().set(-500);
    
            //Set the clipping planes
            camera.setNearClip(1);
            camera.setFarClip(1000);
    
            primaryStage.addEventHandler(KeyEvent.KEY_PRESSED, event -> {
                switch (event.getCode()) {
                    case W:
                        camera.translateZProperty().set(camera.getTranslateZ() + 100);
                        break;
                    case S:
                        camera.translateZProperty().set(camera.getTranslateZ() - 100);
                        break;
                }
            });
    
            primaryStage.setTitle("Genuine Coder");
            primaryStage.setScene(scene);
            primaryStage.show();
        }
    
    
        public static void main(String[] args) {
            launch(args);
        }
    }


    Visit JavaFX 3D Course Index Page

  • JavaFX 3D Tutorial #1 – Introduction to 3D development

    JavaFX 3D Tutorial #1 – Introduction to 3D development

    This is the the first chapter of JavaFX 3D Tutorial.

    JavaFX provides an easy to use 3D API. It provides GPU based acceleration and hence can make use of latest powerful hardware. In this tutorial series, we will learn about using JavaFX 3D in our everyday applications.

    Course Introduction

    JavaFX 3D Coordinates

    When we dive in to 3D application development, the most important part is the coordinate system. You have to understand how the x, y and z-axis changes in the screen. The following image describes the coordinate system in JavaFX 3D.

    • X increases when you go from left to right
    • Y increases when you go from top to bottom
    • Z increases when the objects goes away from you.

    JavaFX 3D Camera System

    Camera defines how we see an object. When you want to transform an object, you can either work on the object or the camera.

    JavaFX rotation concept. Taken from tutorial video

    So, let’s say you want to rotate an object. You can do this either by rotating the object or rotating the camera around the object itself.

    JavaFX provides two cameras. Perspective camera and Parallel Camera. We’ll talk more about camera in Chapter 2.

    Create a sphere in JavaFX 3D

    JavaFX provides set of predefined 3D objects. You can create your own custom 3D shapes if you want. But to start with, these predefined shapes are the best.

    import javafx.application.Application;
    import javafx.scene.Camera;
    import javafx.scene.Group;
    import javafx.scene.PerspectiveCamera;
    import javafx.scene.Scene;
    import javafx.scene.input.KeyEvent;
    import javafx.scene.paint.Color;
    import javafx.scene.shape.Sphere;
    import javafx.stage.Stage;
    
    /**
     * @author afsal villan
     * @version 1.0
     *
     * https://genuinecoder.com
     */
    public class Sphere3D extends Application {
    
      private static final int WIDTH = 1400;
      private static final int HEIGHT = 800;
    
      @Override
      public void start(Stage primaryStage) {
        Sphere sphere = new Sphere(50);
    
        Group group = new Group();
        group.getChildren().add(sphere);
    
        Camera camera = new PerspectiveCamera();
        Scene scene = new Scene(group, WIDTH, HEIGHT);
        scene.setFill(Color.SILVER);
        scene.setCamera(camera);
    
        sphere.translateXProperty().set(WIDTH / 2);
        sphere.translateYProperty().set(HEIGHT / 2);
    
        primaryStage.addEventHandler(KeyEvent.KEY_PRESSED, event ->{
          switch (event.getCode()) {
            case W:
              sphere.translateZProperty().set(sphere.getTranslateZ() + 100);
              break;
            case S:
              sphere.translateZProperty().set(sphere.getTranslateZ() - 100);
              break;
          }
        });
    
        primaryStage.setTitle("Genuine Coder");
        primaryStage.setScene(scene);
        primaryStage.show();
      }
    
      public static void main(String[] args) {
        launch(args);
      }
    }
    

    Let’s break down the code.

    1. Create a new sphere.
      The predefined Sphere shape is available in javafx.scene.shape.Shape3D package. You can simply create an instance. The parameter specifies the radius.

      Sphere sphere = new Sphere(50);
      
    2. Create a group as container
      Group group = new Group(); 
      group.getChildren().add(sphere);
      
    3. Prepare camera
      JavaFX provides two camera systems. Parallel camera and perspective camera. Perspective camera allows to view objects from a specified point. You can simply create an instance and attach it to the scene.

      //Create a new perspective camera
      Camera camera = new PerspectiveCamera(); 
      //Attach camera to scene
      scene.setCamera(camera);
      
    4. Move sphere to center of the screen
      We can move the 3D object around using translateProperty. Here the object is moved to center of the screen.

      sphere.translateXProperty().set(WIDTH / 2); 
      sphere.translateYProperty().set(HEIGHT / 2);
      
    5. Add keyboard listener to control Z-axis / Zoom.
      The z-axis can be controlled using translateZProperty. Currently, using KeyEvent.KEY_PRESSED event handler, we can listener for keyboard input. When ‘W’ is pressed, the object goes away from the user as the z gets increased and when ‘S’ is pressed, vice versa.

          primaryStage.addEventHandler(KeyEvent.KEY_PRESSED, event -> {
            switch (event.getCode()) {
              case W:
                sphere.translateZProperty().set(sphere.getTranslateZ() + 100);
                break;
              case S:
                sphere.translateZProperty().set(sphere.getTranslateZ() - 100);
                break;
            }
          });
      
    6. Attach scene to stage and display.

    Chapter 1 Tutorial Video

    Visit JavaFX 3D Course Index Page

  • How to fix ” Permission denied (publickey) ” issue in Gitlab

    How to fix ” Permission denied (publickey) ” issue in Gitlab

    When you try to clone private repositories for the first time from an account, you may get following error.

    Permission denied (publickey).
    Permission denied (publickey) fatal : Could not read from remote repository
    
    Please make sure you have the correct access rights
    and the repository exists.


    This article helps you on fixing this issue. The root cause here is that the remote repository don’t trust you. In order to gain access to the repo, you have to create an SSH key and register that key in your git repository.

    Steps to add SSH key in Gitlab

      1. Run CMD/Powershell/Terminal with administrative (sudo) privilege. (In windows run cmd as administrator. In linux execute ‘sudo su’ to get root privilege).
      2. Type ssh-keygen.
        You will see the following. Here you will be asked for the location where the SSH key will be saved. Press enter to accept default or enter your custom location.

        Generating public/private rsa key pair.     
        Enter file in which to save the key (C:\Users\yourUsername/.ssh/id_rsa):
      3. Git will ask you to save the key to the specific directory.You will be asked for a password. Make sure you remember it since it will be needed for cloning.
        Enter passphrase (empty for no passphrase):
      4. The public key will be created to the specific directory.
      5. Now go to the directory you have specified in Step 2 and open .ssh folder.
      6. You’ll see a file id_rsa.pub. Open it on notepad. Copy all text from it.
      7. Go to https://gitlab.com/profile/keys
        Here you can see all the SSH keys specified so far. Paste the copied key.
      8. Now click on the “Title” below. It will automatically get filled based on the value taken from the SHA Key.
      9. Then click “Add key” and that’s it. You have successfully configured SSH.
      10. Now try cloning again. Git will ask for a password. Give the password you have given in Step 2.

    And that’s all. Now you will be able to access the repo without any issues.

  • Custom Shapes for JavaFX UI Components

    Custom Shapes for JavaFX UI Components

    JavaFX allows great customization options. You can easily customise and reuse component designs using CSS. In this article, we will see how to apply custom shapes for any GUI component*.

    Which components support custom shapes ?

    All the components extending javafx.scene.layout.Region supports custom shapes with -fx-shape CSS. So, this can be applied to almost all the components including but not limited to Containers, Charts, Buttons, ListViews etc.

    SVG Path

    -fx-shape takes SVGPath. SVGPath is simply a string that can be interpreted as a complex shape. For example, following SVGPath creates a heart shape.

    M23.6,0c-3.4,0-6.3,2.7-7.6,5.6C14.7,2.7,11.8,0,8.4,0C3.8,0,0,3.8,0,8.4c0,9.4,9.5,11.9,16,21.2
            c6.1-9.3,16-12.1,16-21.2C32,3.8,28.2,0,23.6,0z

    Using in JavaFX

    You can apply these shapes to JavaFX Components using -fx-shape css property. For creating a button with heart shape, add the following CSS.

    .button{
      -fx-shape: M23.6,0c-3.4,0-6.3,2.7-7.6,5.6C14.7,2.7,11.8,0,8.4,0C3.8,0,0,3.8,0,8.4c0,9.4,9.5,11.9,16,21.2
    c6.1-9.3,16-12.1,16-21.2C32,3.8,28.2,0,23.6,0z;
    }
    

    Create your own SVG Shapes

    You can create your own custom shapes using https://codepen.io/anthonydugois/pen/mewdyZ

  • JavaFX Scene Builder Tutorial for Beginners

    JavaFX Scene Builder Tutorial for Beginners

    JavaFX Scene Builder is a visual layout aka WYSIWYG tool that allows users to quickly design JavaFX application user interfaces without coding. You can easily create great looking user interfaces with just drag and drop of components.

    JavaFX Scene builder save the design as FXML format. These files can be directly loaded to the JavaFX programs. It is written in Java and is available in all major platforms. It provides nice options like ability to add embedded CSS, generate controller skeleton etc.

    Watch the tutorial video: JavaFX scene builder tutorial for beginners.

    Making Responsive GUI

    Making GUI responsive is very important. Nowadays the device sizes varies from handheld to wall TVs. Using the right containers and component configurations, it is possible to quickly develop JavaFX GUI using scene builder.

    Watch the tutorial on Making GUI responsive with Scene Builder.

    Download Scene Builder

    Current Gluon is maintaining JavaFX scene builder. You can download it for your platform from https://gluonhq.com/products/scene-builder/

  • JavaFX Observables and Bindings

    JavaFX Observables and Bindings

    JavaFX Observable is an entity that wraps content and allows to observe the content for invalidations. In simple terms, Observable allows to observe data in your application. In our everyday programming, we come up with cases where we have to constantly check whether the variable value has changed. With JavaFX observable, we can bind or attach listeners to data so that all the changes will be tracked.

    Basic Addition

    Let’s consider a case of adding two variables as follows.

    private void sumNonObservable() {
       int a = 10;
       int b = 10;
       int sum = a + b;
       System.out.println(sum); //20
       //Change value of a now
       a = 20;
       //Sum is still 20
       System.out.println(sum); //20
    }
    

    This code shows a simple addition. Two variables a=10 and b=10 are added and assigned to sum. Then later, a is changed to 20. The sum won’t change.

    Observable Addition

    What if you wanted the sum to track its components. Let’s say when a was changed to 20, you needed the sum to automatically become 30 without doing another addition?. Well, JavaFX has the right solution.

    Let’s write the above addition in JavaFX observable way.

    private void sumObservable() {
       //Create two simple observable integers.
       SimpleIntegerProperty a = new SimpleIntegerProperty(10);
       SimpleIntegerProperty b = new SimpleIntegerProperty(10);
       
       //Add them with built-in add() function
       NumberBinding sum = a.add(b);
    
       //Answer = 20
       System.out.println(sum.getValue());
       a.set(20);
    
       //Answer = 30
       System.out.println(sum.getValue());
    }
    

    SimpleIntegerProperty is a built-in observable class that stores integer value with Observable support. Then a.add(b) will return a NumberBinding which keeps the sum of a and b. The advantage is, the sum is now listening on a and b and whatever change is made to a or b or both, it will be immediately reflected to the sum.

    Similar to SimpleIntegerProperty, there are lots of default implementation for different types of variables. Some of them are

    Adding Listener

    We have seen how observables are useful in arithmetics. Well, that is just the tip of the iceberg.  Let’s see how we can make use of observable listeners.

    Following code example prints a message whenever a variable’s value is changed.

     private static void observable() {
         SimpleIntegerProperty smartVar = new SimpleIntegerProperty(10);
         smartVar.addListener(new ChangeListener<Number>() {
                @Override
                public void changed(ObservableValue<? extends Number> observable, Number oldValue, Number newValue) {
                    System.out.println("Changed to " + newValue);
                }
        });
        smartVar.set(5);
        smartVar.set(25);
    }
    

    and the Output is:-

    Changed to 5
    Changed to 25

    So, whenever the value is changed, the ChangeListener will be called.

    You can add two types of listeners to an observable.

    1. ChangeListener
      A ChangeListener is notified whenever the value of an ObservableValue changes.
    2. InvalidationListener
      An InvalidationListener is notified whenever an Observable becomes invalid.
    What is the difference between ChangeListener and InvalidationListener ?

    An ObservableValue generates two types of events; change events and invalidation events. A change event indicates that the value has changed. An invalidation event is generated, if the current value is not valid anymore.This distinction becomes important, if the ObservableValue supports lazy evaluation. Because for a lazily evaluated value one does not know if an invalid value really has changed until it is recomputed. For this reason, generating change events requires eager evaluation while invalidation events can be generated for eager and lazy implementations.

    ChangeListeners in contrast to InvalidationListeners require the new value to be passed to them. So, adding any ChangeListener results in get() being called and every invalidation call triggers a call of computeValue.

    Now, If you still need more info on this topics, please have a look at the following tutorial video.


    View Sample Project on GitHub

  • Fake (Photoshopped) Image Detection using Machine Learning

    Fake (Photoshopped) Image Detection using Machine Learning

    Fake Image Detection using machine learning is a neural network based project written in Java with JavaFX that helps to identify tampered / faked / photoshopped images.

    The objective of this project is to identify fake images(Fake images are the images that are digitally altered images). The problem with existing fake image detection system is that they can be used detect only specific tampering methods like splicing, coloring etc. We approached the problem using machine learning and neural network to detect almost all kinds of tampering on images.

    Using latest image editing softwares, it is possible to make alterations on image which are too difficult for human eye to detect. Even with a complex neural network, it is not possible to determine whether an image is fake or not without identifying a common factor across almost all fake images. So, instead of giving direct raw pixels to the neural network, we gave error level analysis image.

    Fake image detection projects introduces two different levels of analysis for the image. At first level, it checks the image metadata. Image metadata is not that much reliable since it can be altered using simple programs. But most of the images we come across will have non-altered metadata which helps to identify the alterations. For example, if an image is edited with Adobe Photoshop, the metadata will contain even the version of the Adobe Photoshop used.

    Working

    A multilayer perceptron neural network is used having one input layer, 3 hidden layers and 1 output layer. Once the image is selected for evaluation, it is converted to ELA representation from Compression and Error Level Analysis stage. 100%, 90% images are used for the construction of ELA image.

    Once ELA is calculated, the image is preprocessed to convert into 100x100px width and height. After preprocessing, the image is serialized in to an array. The array contains 30,000 integer values representing 10,000 pixels. Since each pixel has red, green and blue components, 10,000 pixels will have 30,000 values.

    During training, the array is given as input to the multilayer perceptron network and output neurons also set. The MLP is a fully connected neural network. There are 2 output neurons. First neuron is for representing fake and the second one for real image. If the given image is fake one, then the fake neuron is set to one and real is set to zero. Else fake is set to zero and real set to one.

    We have used momentum backpropagation learning rule adjust the neuron connection weights. It is a supervised learning rule that tries to minimize the error function. The chosen learning rate and momentum along with achieved efficiency is given in Table 3.

    During testing, the image array is fed into the input neurons and values of output neurons are taken. We have used sigmoid activation function.

    View project in my GitHub repo

  • JavaFX Get Screen Size

    JavaFX Get Screen Size

    JavaFX provides an easy option to get screen dimensions (screen size) of all the monitors connected. This can be done using the javafx.stage.Screen class.

    Get Screen Size of Primary Monitor

    import javafx.application.Application;
    import javafx.geometry.Rectangle2D;
    import javafx.stage.Screen;
    import javafx.stage.Stage;
    
    public class Main extends Application {
    
      @Override
      public void start(Stage primaryStage) {
        //Get primary screen bounds
        Rectangle2D screenBounds = Screen.getPrimary().getBounds();
        System.out.println(screenBounds);
        System.exit(0);
      }
    }
    

    Example Output

    Rectangle2D [minX = 0.0, minY=0.0, maxX=1920.0, maxY=1080.0, width=1920.0, height=1080.0]
    

    Get Number Of Monitors / Visual Devices

    Let’s see how we can find number of monitors currently attached to the system using the JavaFX Screen API.

    import javafx.application.Application;
    import javafx.stage.Screen;
    import javafx.stage.Stage;
    
    public class Main extends Application {
    
      @Override
      public void start(Stage primaryStage) {
        System.out.println(Screen.getScreens().size());
        System.exit(0);
      }
    }
    

    Example Output

    2
    

    Get Screen Size Of All Monitors

    import javafx.application.Application;
    import javafx.collections.ObservableList;
    import javafx.stage.Screen;
    import javafx.stage.Stage;
    
    public class Main extends Application {
    
      @Override
      public void start(Stage primaryStage) {
        ObservableList<Screen> screenSizes = Screen.getScreens();
        screenSizes.forEach(screen -> {
          System.out.println(screen.getBounds());
        });
        System.exit(0);
      }
    }
    

    Example Output

    Rectangle2D [minX = 0.0, minY=0.0, maxX=1920.0, maxY=1080.0, width=1920.0, height=1080.0]
    Rectangle2D [minX = -1920.0, minY=0.0, maxX=-384.0, maxY=864.0, width=1536.0, height=864.0]
    
  • JavaFX Scene Switch Animation

    JavaFX Scene Switch Animation

    We all love JavaFX for its modern look and easy to use user interface APIs. In this article we will discuss about JavaFX Scene Switch (Change) animation. I have implemented two types of scene change animation. Fading Scenes and Sliding Scenes.

    By default, JavaFX animation api does not provide a direct option animate a scene change. But we can use the following way.

    1. Load primary stage with a scene. Enclose this scene in a root container. This container can be of your preference. StackPane, Group etc can be used.
    2. When changing scenes, remove everything from this root container.
    3. Load the scene to be loaded to a variable. Add it new scene to the root container with animation.

    Sliding Scene Transition

    In this animation, we will get a nice sliding effect for the scenes. You can see the preview in the following GIF.

    JavaFX Scene Sliding Animation
    JavaFX Scene Sliding Animation

    The idea here is to load the new scene beyond the visibility of the screen. For example, if the window height is 500px, then load the new scene at 500px. Then using KeyFrame animation, take the scene translateY to 0. This creates a slide in effect from bottom. Using translateX, we can implement slide in effect from sides.

    Let’s see this in code. Following file is the first scene’s controller. When loadSecondScene() is called, second scene will be added.

    /**
     * Removed Imports for code simplicity
     * FILE - Scene 1 Controller. On button Click, Scene 2 will be loaded  
     * @author Genuine Coder
     */
    public class FirstSceneController implements Initializable {
        @FXML
        private AnchorPane anchorRoot;
        @FXML
        private StackPane parentContainer;
    
        @FXML
        private void loadSecondScene(ActionEvent event) throws IOException {
            Parent root = FXMLLoader.load(getClass().getResource("myscene2.fxml"));
            Scene scene = anchorRoot.getScene();
            //Set Y of second scene to Height of window
            root.translateYProperty().set(scene.getHeight());
            //Add second scene. Now both first and second scene is present
            parentContainer.getChildren().add(root);
    
            //Create new TimeLine animation
            Timeline timeline = new Timeline();
            //Animate Y property
            KeyValue kv = new KeyValue(root.translateYProperty(), 0, Interpolator.EASE_IN);
            KeyFrame kf = new KeyFrame(Duration.seconds(1), kv);
            timeline.getKeyFrames().add(kf);
            //After completing animation, remove first scene
            timeline.setOnFinished(t -> {
                parentContainer.getChildren().remove(anchorRoot);
            });
            timeline.play();
        }
    }
    

    Watch the Slide Transition in action from Genuine Coder Channel

    Fading Scene Transition

    Fading screen transition can also be implemented with a similar concept as of Sliding Screen transition.  The idea is, we apply a fade out transition for the first scene. After completion of fade out transition of first scene, we add second scene. The second scene will be added with zero opacity. Then using fade in transition we make the second scene visible.

    You can see the program in action in the following Genuine Coder Tutorial video.

  • Save files with JavaFX FileChooser

    Save files with JavaFX FileChooser

    JavaFX provides javafx.stage.FileChooser class for creating file chooser dialog to select files for opening or saving. The major advantage of javafx filechooser over old JFileChooser is that, it allows to use the default system chooser. So, if you use the FileChooser in linux, then linux’s default file chooser window will be loaded and in windows, windows’s default file chooser window will be loaded. This helps to improve the user experience by a huge margin. The old JFileChooser had a fixed dialog that was very hard to navigate and this problem is fixed in JavaFX.

    Let’s see a sample program that shows file chooser to create a text file and save a string to that file.

    package javafxtutorials;
    
    import java.io.File;
    import java.io.IOException;
    import java.io.PrintWriter;
    import java.util.logging.Level;
    import java.util.logging.Logger;
    import javafx.application.Application;
    import static javafx.application.Application.launch;
    import javafx.geometry.Pos;
    import javafx.scene.Scene;
    import javafx.scene.control.Button;
    import javafx.scene.layout.VBox;
    import javafx.scene.text.Font;
    import javafx.scene.text.Text;
    import javafx.stage.FileChooser;
    import javafx.stage.Stage;
    
    
    public class SaveFileWithFileChooser extends Application {
    
        @Override
        public void start(final Stage primaryStage) {
            final String sampleText = "Lorem ipsum dolor sit amet, consectetur adipiscing elit, sed do eiusmod tempor incididunt ut \n"
                    + "labore et dolore magna aliqua.\n"
                    + "Ut enim ad minim veniam, quis nostrud exercitation ullamco laboris nisi ut aliquip ex ea commodo consequat.\n"
                    + "Duis aute irure dolor in reprehenderit in voluptate velit esse cillum dolore eu fugiat nulla pariatur.\n"
                    + "Excepteur sint occaecat cupidatat non proident, sunt in culpa qui officia deserunt mollit anim id est laborum.";
    
            Text sample = new Text(sampleText);
            sample.setFont(new Font(14));
    
            Button btnSave = new Button("Save");
    
            btnSave.setOnAction(event -&amp;amp;gt; {
                FileChooser fileChooser = new FileChooser();
    
                //Set extension filter for text files
                FileChooser.ExtensionFilter extFilter = new FileChooser.ExtensionFilter("TXT files (*.txt)", "*.txt");
                fileChooser.getExtensionFilters().add(extFilter);
    
                //Show save file dialog
                File file = fileChooser.showSaveDialog(primaryStage);
    
                if (file != null) {
                    saveTextToFile(sampleText, file);
                }
            });
    
            VBox vBox = new VBox(sample, btnSave);
            vBox.setAlignment(Pos.CENTER);
    
            primaryStage.setScene(new Scene(vBox, 800, 300));
            primaryStage.setTitle("www.genuinecoder.com");
            primaryStage.show();
    
        }
    
        private void saveTextToFile(String content, File file) {
            try {
                PrintWriter writer;
                writer = new PrintWriter(file);
                writer.println(content);
                writer.close();
            } catch (IOException ex) {
                Logger.getLogger(SaveFileWithFileChooser.class.getName()).log(Level.SEVERE, null, ex);
            }
        }
    
        public static void main(String[] args) {
            launch(args);
        }
    
    }


    JavaFX FileChooser program
    JavaFX FileChooser program

    The FileChooser.ExtensionFilter defines an extension filter which can be used for filtering which files can be chosen in a FileDialog based on the file name extensions. The constructor takes two arguments. First argument is the description of file to be selected and second argument is the actual extension. The second argument can also be a list.

    By calling the FileChooser#showSaveDialog, a save dialog will be opened. In this case, the dialog will only show directories and text files. Once a file name is specified and save button is pressed, method saveTextToFile will be called which will save the text content to file with the help of PrintWriter class.

    JavaFX FileChooser save dialog
    JavaFX FileChooser save dialog in Linux Mint 18.2
     if (file != null) {
        saveTextToFile(sampleText, file);
     }
    

    If the user clicks on the cancel button from the file chooser instead of save button, the returned file will be null. So, it is always necessary to check for null case for the returned file which otherwise will leads to NullPointerException.

  • JAR to EXE : Java program to Windows executable

    JAR to EXE : Java program to Windows executable

    Java is the best programming language available today that works across different platforms. I love Java and JavaFX. Once you finish writing your application, you may want to release it. The problem is, the native Java program executable, the good old .jar files always have a cup icon and sometimes a simple double click wont open them. The solution to this problem is to convert JARs to native executable, for windows .exe files.

    In this article, I will explain how to make windows executable (.exe) from your Java / JavaFX program. Having exe file for windows has many advantages. We can set icons, properties, version information etc.

    Step 1 : Make JAR file for your application

    The first step is making a JAR file from your java code. This is pretty simple if you are using an IDE like NetBeans.

    NetBeans  : NetBeans provide option for making JAR file very easily. Just right click on your project from Projects window and then select “clean and build”. This will create a folder called “dist” in your project directory. Inside dist, there will be the final JAR. All the libraries required for running the program will be inside “/dist/lib” directory.

    Maven  : Maven uses convention over configuration, this means that you only need to tell Maven the things that are different from the defaults. You can use “mvn package” command to create JAR files.

    Step 2 : Download Launch4J

    Launch4J is so far the best wrapper available for converting JAR files to windows executable. It is written in JAVA and is open source. Download latest version of Launch4J from http://launch4j.sourceforge.net/. Once You install and open it, you will get the following screen. 

    Launch4J main screen
    Launch4J main screen

    On the first look, the interface may look little confusing, but it is actually simple and every field will become too important once you get used to it.

    Step 3 : Launch4J Basic Configurations

    This tab contains the most basic configurations for the exe like jar file to be converted and the icon to be used.

    Basic
    • Output File
      This is the location where the compiled EXE (executable) file will be created once the conversion is complete
    • Jar
      Location of the Jar file to be converted in to executable
    • Wrapper manifest
      You can specify manifest file here. This will be used for processing the application against User Account Control(UAC) in windows.
    • Icon
      Here you can specify the icon. It has to be in ico format.
    • Change dir
      Change current directory to an arbitrary path relative to the executable. If you omit this property or leave it blank it will have no effect. Setting it to . will change the current dir to the same directory as the executable. .. will change it to the parent directory, and so on.
    • Command line args
      Here you can specify the java arguments

    In case if the system doesn’t have supported Java, the error message and URL to download can be specifed under the Java Download and Support Sections.

    Classpath

    Here you can specify classpath for your main class. Select the JAR file by selecting the directory icon from right and the default classpath corresponding to main class will be loaded. You can edut them from Edit Item text field.
    You can also add or remove classpath for given main class from this section.

    Single Instance

    Here you can specify whether you need only once instance of the application running at a time. Give a mutext name and window title if single instance option needed.

    JRE

    This section allows configuring JRE. If you are bundling JRE with your product (Which is not a good idea at all), you can specify the path here. You can check the ‘Fallback option’ so that the bundled JRE will only be used when the JRE isntalled on the system does not matches with min and max version requirement.

    Min JRE Version is a mandatory field and it has to be specified.You can also specify Heap parameters or any JVM options in the corresponding fields.

    Splash

    If you need a custom splash screen, you can check the “Enable Splash Screen option”. Then specify the file (Either bitmap image or JAR file). In the TimeOut field, time out can be specified.

    Version Info

    This is a good way to properly specify version information for your executable. This entries will then be shown in the properties section of executable.

    Messages

    Messages section allows to create custom messages when errors occur. You can enable this option by checking “Add custom messages”.

    Step 4 : Compile and Make Executable

    Once the entries are filled, you have to save the configuration. For saving, click on the Floppy DIsk icon from the menu. Your configuration entries will be saved as an xml file called config.xml. After saving click on the Setting like icon next to save button to start converting to executable file.

    Launch4J Example Configuration
    Launch4J Example Configuration

    If it the wrapping was a success, you should see the following messages in Log

    Compiling resources
    Linking
    Wrapping
    Successfully created D:\Library Assistant\dist\Library Software.exe
    

    You can start your program from executable by clicking on the Play button from menu.

    Watch video tutorial from Genuine Coder YouTube channel :-

  • JavaFX Complete Project Tutorial : Building Material Designed Library Management Software

    JavaFX Complete Project Tutorial : Building Material Designed Library Management Software

    Programming can only be learned properly with continuous practice. When you work on a complete software project, you’ll have to understand how to put things together and how to implement data communication between various modules etc. So, I decided to share a complete javafx project development series.

    I am publishing a series of tutorial videos on YouTube about developing a complete Library Management Software using JavaFX. This tutorial series start with basic designing and continue towards more complex programming like database integration, multi level user interface design, material design etc. I have tried my best to keep things as simple as possible.

    Apache Derby database is used for storing member, book and other informations. Derby is a lightweight, purely java based relational database. It has common sql syntax. So you can get things done without any issues. I have used Scene Builder for designing user interfaces. Additionally CSS is used to get some nice effects for buttons, text fields etc.

    JavaFX Material Design Library Management Software
    Dashboard

    For development, I am using NetBeans IDE with Scene Builder. Make sure that you have the latest java installed. Some of the libraries used in the project requires JDK 8u40 or better. So it is better to have the latest java version installed.

    I hope you find this tutorial series useful. Learning component by component is a little tedious task. This set of videos will help you to understand how to coordinate various components together.  You can find the source code of this application at GitHub. I have committed at the end of  almost all tutorial videos so that you can find the exact code that i have used for explanation.

    Moving to Material Design

    Material design is an awesome concept. It defines a new method for designing and developing user interfaces across multiple platforms. For making this software materialistic, I have used JavaFX material design library named JFoenix. It provides built-in material design based components that can be easily styled with CSS.

    Material-design-login-screen
    Library Software login screen

    The above image shows login screen from new design. There are only 3 colors and every components has it own padding and spacing.  If you just give enough spacing for your components on the screen, it will tremendously improve the overall look.

    Libraries Used

    I have recorded the complete development as tutorial. You can find them in the following PlayList. Subscribe to Genuine Coder YouTube channel for more tutorials in the future.

    Get project from GitHub
  • JavaFX : How to implement Drag and Drop

    JavaFX : How to implement Drag and Drop

    Drag and drop allows data transfer between various components in your javafx application. It allows transferring data in between your internal nodes or between two applications.

    A drag-and-drop gesture happens as follows: The user click a mouse button on a gesture source, drags the mouse, and releases the mouse button on a gesture target. While dragging the data, the user gets visual feedback, which denotes locations that do not accept the data and, when over a target that accepts the data, gives a hint where to drop the data.

    The data is transferred using a dragboard, which has the same interface as a system clipboard but is only used for the drag-and-drop data transfer.Various types of data can be transferred such as text, images, URLs, files, bytes, and strings.

    1. Receiving Data From other applications

    Receiving data from other applications through drag and drop is very simple in JavaFX. The method setOnDragOver  of node allows controlling what happens when something is dragged over the node. For example, as you can see in the top image, I have added a simple ImageView and implemented setOnDragOver to accept when files are dragged over it. Let’s see the code.

    imageView.setOnDragOver(new EventHandler() {
       public void handle(DragEvent event) {
          if (event.getDragboard().hasFiles()) {
             event.acceptTransferModes(TransferMode.ANY); 
          }
          event.consume();
       }
    });
    
    In this code, I have added event handler for the image view for Drag Over case. The getDragboard method gives the Dragboard object which contains the files being transferred. The method hasFiles() is invoked to make sure that, the dragged content is a file. This is done to avoid when something other than files are dragged, like string or rich text content.
    event.acceptTransferModes(TransferMode.ANY);
    
    This line makes the component ready to accept the incoming data. As a result, we will get a hand with a plus symbol when dragged over image view.
    The last thing we have to do is to accept the files when dropped. The method setOnDragDropped  allows to achieve this. In our case we have to do as follows.
    imageView.setOnDragDropped(new EventHandler&lt;DragEvent&gt;() {
        public void handle(DragEvent event) {
            List&lt;File&gt; files = event.getDragboard().getFiles();
            System.out.println("Got " + files.size() + " files");
            imageView.setImage(new Image(new FileInputStream(files.get(0))));
            
            event.consume();
         }
    });
    

    In this code, the list of incoming files is taken using event.getDragboard().getFiles() method. So we can send a list of file instead of a single one. From the received files, we have to create an image and set it as the image for the imageview.

    So, this is as simple as a drag and drop operation can get. Now let’s see how we can implement drag and drop for two internal nodes.
     
    2. Drag and Drop between two internal components
    For making a node ready to be dragged, we can use setOnDragDetected method. This function will be called whenver a drag operation is done on the component. Here, source is a Text variable that contains some text.
    When the source is dragged, The Dragboard class from javafx.scene.input.Dragboard is constructed by calling source.startDragAndDrop() method. Transfer modes define the type of transfer that happens between the gesture source and gesture target. Available transfer modes include COPY, MOVE, and LINK.
    Inorder to send data from the source an instance of ClipboardContent is used. Since we are sending String data, putString method is used. After setting the content, it is then associated with Dragboard db.
    Now source will allow dragging string data. ie, It act as a source.
    source.setOnDragDetected(new EventHandler&lt;MouseEvent&gt;() {
        public void handle(MouseEvent event) {
            Dragboard db = source.startDragAndDrop(TransferMode.ANY);
            
            ClipboardContent content = new ClipboardContent();
            content.putString(source.getText());
            db.setContent(content);
            
            event.consume();
        }
    });
    
    Now just like we did in the image view, we need to setup the Text at the destination ready to accept the incoming string. This can be done by using setOnDragOver and setOnDragDropped.
     
    Watch the complete tutorial about implementing Drag and Drop for your JavaFX Application.


  • JavaFX Material Design Hamburgers and Transitions

    JavaFX Material Design Hamburgers and Transitions

    Hamburgers are a great replacement for menu icons. In material design, hamburgers can be used to trigger various navigation components. In this post, i will show how to add hamburgers to your JavaFX application. I have made a thorough tutorial for JFXHamburger transition.

    JFoenix library provides (Read about setting up material design library for JavaFX) JFXHamburger class for implementing Hamburger. It can be dragged and dropped  using Scene Builder, as demonstrated by the above video.

    JFXHamburger without transition support is merely 3 parallel lines. But when you associate it with some cool transition, it will become wonderful. So let’s have a look in to the transitions.

    HamburgerBackArrowBasicTransition1. HamburgerBackArrowBasicTransition

    This transition creates a back arrow from the 3 parrallel lines (Hamburger). This can be created by passing the created Hamburger object as parameter to the HamburgerBackArrowBasicTransition class.

    HamburgerBackArrowBasicTransition transition = new HamburgerBackArrowBasicTransition(hamburger);
    
    The animation can be started using play() method. The state of the transition ( either arrow or hamburger) is set through setRate() method. The animation is controlled by changing the rate between -1 and 1.
    transition.setRate(-1);
    hamburger.addEventHandler(MouseEvent.MOUSE_PRESSED,(e)->{
            transition.setRate(transition.getRate()*-1);
            transition.play();
    });
    
    As you can see, at first, the transition rate should be set to -1 which is the hamburger. After the user clicks on the hamburger, it can be updated by multiplying with -1, i.e. to 1. Now the Hamburger will turn into a arrow. For further clicks on the hamburger, it will iterate  between -1 and 1.

    HamburgerBasicCloseTransition2. HamburgerBasicCloseTransition

    This transition converts the hamburger to a cross form. Usage of this one is very similar to the above except the class used.

    HamburgerBasicCloseTransition transition = new HamburgerBasicCloseTransition(hamburger);


    3. HamburgerSlideCloseTransitionHamburgerBasicCloseTransition

    This transition converts the hamburger to a close form like before, with a cool transition.

    HamburgerSlideCloseTransition transition = new HamburgerSlideCloseTransition(hamburger);


    HamburgerBasicCloseTransition

    4.HamburgerNextArrowBasicTransition

    This transition converts the hamburger to a forward arrow.

    HamburgerNextArrowBasicTransition transition = new HamburgerNextArrowBasicTransition(hamburger);


    Watch this tutorial in action from Genuine coder YouTube channel

  • How to make Navigation Drawer (Side Panel) in JavaFX – JavaFX Drawer

    How to make Navigation Drawer (Side Panel) in JavaFX – JavaFX Drawer

    Navigation drawer provides an intuitive way to keep main navigation controls of the UI clean. The drawer will only be made visible to the user on certain actions like button click so that we can make use of that space for much more important things yet keeping controls reachable with single click.

    Android introduced the material design Navigation bar or side pane or whatever you call, with its Material design goodness. JFoenix library provides JFXDrawer component.

    Today, I will be showing how to implement the Navigation drawer on your JavaFX application using JFoenix material design library. If you want some help on setting up the JFoenix material design library, see my post JavaFX Material Design : Setting Up and Making Login Application.

    I have made a video to make things more clear. You can watch it right here.


    If you are the kind of person who do not like to watch tutorial videos, read from here. I will explain it step by step.

    Step 1 : Design Content For Navigation Drawer 

    At first, you have to create an FXML layout for the Navigation bar itself. This layout can then be inflated to the navigation bar holder later. The above image shows a pretty simple VBox layout that consists of 4 Buttons and one image view. This content can the be loaded to a VBox variable in our code (from the main controller) using the following code

    VBox box = FXMLLoader.load(getClass().getResource("SidePanelContent.fxml");
    
    Step 2 : Design The Container (Main) Window
    Main window with Hamburger
    Main window with Hamburger

    Now we  have the navigation bar content. In this step, you have to design the main application window. The JFXDrawer can be added using scene builder by drag and drop. Once you position the drawer on the space you want, you can set the drawer direction to LEFT, RIGHT, TOP or BOTTOM from the Properties section of Scene Builder.

    I have added a JFXHamburger for material design look and feel. I have thouroughly explained how to use JFXHamburger in this video https://www.youtube.com/watch?v=rCnPY9Kj4J0 . If you don’t like to have a Hamburger, you can use a simple button. Add an action listener to your button and add this code.
    @FXML
    //Accessing FXML Element
    JFXDrawer drawer;
    //Add this in ActionListener
    if(drawer.isShown())
    drawer.close();
    else
    drawer.open();
    

    The navigation drawer can be made visible by using the open() method. It can be made invisible through the function call close().

    Step 3 : Setting the content of Drawer

    Now we have two separate components. The Drawer and Main window. We can attach the box loaded in step 1 to our drawer in main window using the following code.

    drawer.setSidePane(box);
    
    Step 4 : There is no 4th step. You are done !
    I used to get happier when things get completed sooner that expected. That’s why there is a step 4 🙂
    Run the code now. When you click on your button or Hamburger,you should see the navigation drawer like this. If you have some alignment issues for the drawer, increase the value of “Default Drawer Size” from the Scene Builder.

    Recently, as part of library management software tutorial, I have created more elaborate tutorial about creating Navigation Drawer. It contains more complex buttons with icons and CSS styling. Watch those tutorial videos from the following link.

    1. Designing The Drawer
    2. Attaching drawer to Dashboard
    3. Handling Button Click Events

    Get Project From GitHub


    You might also be interested in:-

    1. JavaFX Library Management System Development: https://genuinecoder.com/javafx-complete-project-tutorial-library-management-system-html/
    2. JavaFX Animation Tutorial: https://genuinecoder.com/javafx-animation-tutorial/
    3. JavaFX 3D Tutorial: https://genuinecoder.com/javafx-3d-tutorial-introduction/
  • JavaFX Material Design : Setting Up and Making Login Application

    JavaFX Material Design : Setting Up and Making Login Application

    One problem I have faced when developing java applications was the old look. Even after the introduction of Nimbus look and feel, the user interface components felt too static and dead. Then JavaFX came in to the scene and provided a much better interface and control elements.

    In this post, I would like to discuss on how to design our JavaFX applications using material design components. The developers at JFoenix had done an impressive job on developing material library for JavaFX. All that we have to do is to download the library and add it into Scene Builder and our application. I have made a video tutorial on setting-up the JFoenix library and making a material login interface.

    Adding JFoenix to Scene Builder

    First, download the library from https://github.com/jfoenixadmin/Jfoenix. Once you get the Jar file, you have to add it into Scene Builder. Once you add this library to Scene Builder, you can use components available in JFoenix library in your project with just drag and drop.

    Within SceneBuilder GUI, there is a setting button, as you can see in the following screenshot. Once you click on it, you will get a context menu. Select JAR/FXML manager which will open the library manager window.

    JavaFX Scene Builder add external jar
    JavaFX Scene Builder JAR/FXML manager

    Then, select Add Library/FXML from file system from the window. This will open a file selection window. Select the JFoenix Jar file. This will open another window listing all the components available in the library. Just select all. Once you successfully add this library, it can be seen under installed libraries/FXML files list.

    Scene Builder Library Manager
    External  library window

    After adding the components to Scene Builder, It’s pretty much drag drop. For JFXButton, you can set ripples, set it as RAISED…. oh my goodness! I have been developing desktop applications for a long time and this is the first time getting my hands on these much cool UI components. 

    Watch Video Tutorial about using JFoenix library to make a login Application

    I have posted a video tutorial in Genuine Coder YouTube channel about using JFoenix library. Watch it right from here.

    Download Sample Project Source Code : Google Drive
    Download Sample Project Application : Google Drive

    Complete JFoenix Components Tutorial

    Watch JFoenix tutorial from following playlist. Contains 19 videos about JFoenix components.

    JavaFX Material Design Library Management Software Development

    I have created a complete library management program using JavaFX and JFoenix based on Material Design. The Complete tutorial of the development is available in Genuine Coder YouTube Channel.  Read more about this project

    JavaFX Library Management Software
    JavaFX Library Management Software

    Material UI Components available in JFoenix

      • JFXBadge
      • JFXButton
      • JFXCheckBox
      • JFXColorPicker
      • JFXComboBox
      • JFXDatePicker
      • JFXDialog
      • JFXDialogLayout
      • JFXDrawer
      • JFXDrawerStack
      • JFXHamburger
      • JFXListCell
      • JFXListView
      • JFXNodesList
      • JFXPasswordField
      • JFXPopup
      • JFXProgressbar
      • JFXRadioButton
      • JFXRippler
      • JFXSlider
      • JFXSnackbar
      • JFXSpinner
      • JFXTabPane
      • JFXTextArea
      • JFXTextField
      • JFXToggleButton
      • JFXToggleNode
      • JFXTogglePane
      • JFXToolbar
      • JFXTreeTableCell
      • JFXTreeTableRow
      • JFXTreeTableView
      • NumberValidator
      • RequireFieldValidator
         
  • How to add JavaFX Charts / Graphs : Tutorial

    How to add JavaFX Charts / Graphs : Tutorial

    JavaFX provides a powerful set of Charts/Graphs that can be added very easily to your programs. Frankly, It is even easier than adding a Table in JavaFX. Graphical charts are available in the javafx.scene.chart package.

    Bar Chart

    This video describes how to add Bar Chart to your JavaFX program.

    Bar Chart data can be represented using an XYChart.Series object. All that you have to do is to make a new object and add data to it.

    XYChart.Series set1 = new XYChart.Series<>();

    Data can be added to this set using the code. Here XYChart.Data() takes two parameters. First one is for the X-Axis(Horizontal) and the second one is for Y-Axis(Vertical).

    set1.getData().add(new XYChart.Data("James", 5000));
    set1.getData().add(new XYChart.Data("Alice", 10000));
    set1.getData().add(new XYChart.Data("Alex", 2000));

    Finally, Connect the created series with your JavaFX Bar Chart object using getData().addAll() method.  

    SalaryChart.getData().addAll(set1);

    AddAll() method allows to add more than one series of data to your chart. For example if i have set1,set2 and set3 then i can add all of them by using a comma seperated list.

    SalaryChart.getData().addAll(set1,set2,set3);

    Pie Chart

    JavaFX Pie Chart uses an ObservableList which is very similar to XYSeries.Series we used for Bar Chart. This video explains how to use pie chart.

    ObservableList<PieChart.Data> pieChartData
    = FXCollections.observableArrayList(
    new PieChart.Data("Cars", 13),
    new PieChart.Data("Bikes", 25),
    new PieChart.Data("Buses", 10),
    new PieChart.Data("Cycles", 22));
    pieChart.setData(pieChartData);

    Here i have created an ObservableList and added 4 values. The pie chart takes all of these values and allocate a percentage for each one.

    For eg, Percentage of cars = 13/(13+25+10+22) = 18.5%

    The data then can be associated with the chart using the same code used for Bar chart or using a simple alternative

    pieChart.setData(pieChartData);

    provided, pieChart is the Pie Chart object and pieChartData is the ObservableList.

    Line Chart

    Construction of Line Chart in Java is very much similar to Bar Chart. It takes the same XYChart.Series object.

    XYChart.Series series = new XYChart.Series(); //Make a new XYChart object
    //Add Data
    series.getData().add(new XYChart.Data(“1”, 23));
    series.getData().add(new XYChart.Data(“2”, 14));
    series.getData().add(new XYChart.Data(“3”, 15));

    Finally, associate the data with Line Chart.

    LineChart.getData().addAll(series);

    Area Chart and Scatter Chart

    These two are explained together because, both of these Charts takes same type of data. Yes, the XYChart.Series object. We can use the same example used above.

    XYChart.Series series = new XYChart.Series(); //Make a new XYChart object
    //Add Data
    series.getData().add(new XYChart.Data(“1”, 23));
    series.getData().add(new XYChart.Data(“2”, 14));
    series.getData().add(new XYChart.Data(“3”, 15));

    Finally, associate the data with both charts.

    AreaChart.getData().addAll(series);
    ScatterChart.getData().addAll(series);

    So that’s how we add a chart /Graph to our JavaFX program and i hope you understood these things well enough.

    ———————————————————————————————–
    Thanks to our sponsor
    https://ksaexpats.com/

  • Text Editor in Java with Source Code

    Text Editor in Java with Source Code

    Today, I am going to make a Text Editor program using our Java. Yeah, Like notepad. I want to add some basic functionalities like Opening a file, Saving a file and option to change the font size. It will only take less than 100 lines of code to do this (Excluding User Interface).
    I started with the toolbar javax.swing.JToolBar and added 4 buttons. Button with simple label logo and text for open,save and font size changing. The display area is simply a JTextArea with monotype font.

    Opening a Text File

    It is pretty straightforward to use JFileChooser to select a file. When I started thinking about opening a file, I wanted a File Chooser that filter and display only text files.Thanks to FileNameExtensionFilter from javax.swing.filechooser.FileNameExtensionFilter. I am able to display only text files on the JFileChooser using the code
    FileNameExtensionFilter filter = new FileNameExtensionFilter("TEXT FILES", "txt", "text");
    fileOpener.setFileFilter(filter);
    
    When the user selects a file and click open, The Scanner from java.util.Scanner is used to read the file.
    Scanner scn = new Scanner(file);  
    String buffer = "";  
    while (scn.hasNext()) {  
       buffer += scn.nextLine() + "\n";  
    }  
    display.setText(buffer);  
    
    The “file” is nothing but the file taken from the JFileChooser and the while loop will continue until the end of file. “display” is the name of JTextArea, our display.

    Saving a Text File

    A global file variable called “currentEditingFile” is maintained to know whether we are working on a new, unsaved data or on an opened file. If “currentEditingFile” is null we have a new uncreated file. So the saving method will look to “currentEditingFile” and if it is null a JFileChooser will be opened to select the location for the new file. After selecting the directory, file name is taken from JOptionPane input dialog.
    The file is then written onto the file Using PrintWriter from java.io.PrintWriter.

    Changing Font Size

    A global variable with default font size as 14 is maintained and increased or decreased depending upon the button pressed.
    display.setFont(new java.awt.Font("Monospaced", 0, ++fontSize));  //Increase font size
    display.setFont(new java.awt.Font("Monospaced", 0, --fontSize)); //Decrease font size
    

    Extra Works

    It is not acceptable to exit the program without any notice when the user clicks on the Close button. In order to add a save confirmation, i made an override on the Window Closing operating and added a confirmation message. It is done from the constructor itself
    this.addWindowListener(new WindowAdapter() {  
       @Override  
       public void windowClosing(WindowEvent e) {  
    	 super.windowClosing(e); //To change body of generated methods, choose Tools | Templates.  
    	 int ans = JOptionPane.showConfirmDialog(rootPane, "Save Changes ?", "Confirm", JOptionPane.YES_NO_OPTION, JOptionPane.QUESTION_MESSAGE);  
    	 if (ans == JOptionPane.YES_OPTION) {  
    	   //Write Changes 
    	   saveChanges();  
    	 }  
       }  
    });
    

    So that’s it. Download the program / source code from below buttons. If this was helpful please like me on facebook and keep visiting for more cool programs and sources.

    Recommended Read

    Download Source Code Download Application 

    Screenshots:-

    Detachable Tool Panel

    Font size control

    File selector window

    Save complete dialog