In this comprehensive tutorial, we’ll explore the world of microservices using the latest Spring Boot 3 framework. We’ll create a real-world video streaming app, covering all essential aspects of microservice development.
We will start with the fundamentals of microservice architecture and then explore the implementation of key components like service registry, configuration server, API gateway, and distributed tracing system, this tutorial provides an in-depth experience for building applications in this architecture.
What You’ll Learn
The basics of microservice architecture
How to create a video streaming app using microservices
Implementing service registry with Eureka server
Creating and testing individual microservices
Using API Gateway with Spring Cloud Routing
Service-to-service communication
Centralized configuration management with config server
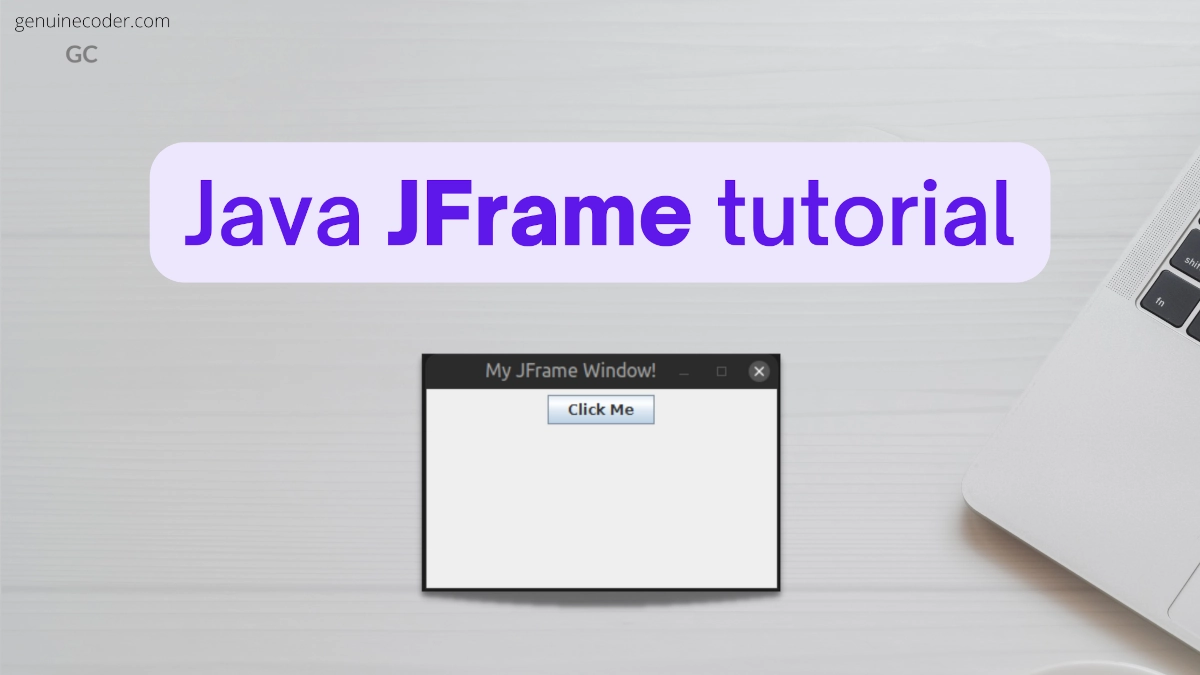
JFrame is a java swing container that can be used to create application windows. JFrames are the top most container in the swing applications. All the GUI components like labels, comboboxes are added into the JFrame. In this tutorial, we will learn how to make use of the Java JFrames to create swing applications and see how to manage the JFrame windows.
Simple application with JFrame
First, let’s create a simple application. We will add a button to the JFrame container.
import javax.swing.JButton;
import javax.swing.JFrame;
import javax.swing.JPanel;

public class JFrameTutorial {

  public static void main(String[] args) {
    //Create a JFrame
    JFrame jFrame = new JFrame("My JFrame Window!");
    //Set JFrame size
    jFrame.setSize(300, 200);

    //Create a JPanel to contain our button
    JPanel panel = new JPanel();
    //Add button to the panel
    panel.add(new JButton("Click Me"));

    //Attach panel to JFrame
    jFrame.add(panel);

    //Show the JFrame
    jFrame.setVisible(true);
  }
}
This will create the following output
Even though the above code works, it is not perfect. If you run the above code, you will have some questions. Let me make things clear for you.
Question: Even after the JFrame is closed, the application is still running in the background. Why does my application still run after closing the main window?
This is because you haven’t specified what to do when the JFrame is closed. Remember that in a real-world application, there will be many windows, so many JFrames. By default, if the JFrame was exiting/killing the application when it is closed, then this would cause countless issues. Because each window closing will cause the application to terminate by default.
To prevent this, when the close button is pressed, the JFrame just gets hidden and will not exit the application fully. To exit the application on window close, add the following line into the code to set setDefaultCloseOperation.
public static void main(String[] args) {
  JFrame frame = new JFrame("My JFrame Window!");
  frame.setSize(300, 200);
  JPanel panel = new JPanel();
  panel.add(new JButton("Click Me"));
  frame.add(panel);

  //Close the application when the window is closed
  frame.setDefaultCloseOperation(JFrame.EXIT_ON_CLOSE);

  frame.setVisible(true);
}
Question: The JFrame window is opening at the edge of the screen. How to make JFrame center on screen?
By default, the Window will appear at the edge of the screen (most of the time, in most of the common operating systems). To make the JFrame window appear at the dead center of the screen, you need to set the window’s location-relative-to null. It can be done as follows.
//Set location of the JFrame relative to null to get it open at the center of the screen
frame.setLocationRelativeTo(null);
Set Icon for JFrame Window
Very often, we will have to set our custom icon to the application window. With JFrame, this is possible with the method JFrame#setIconImage(Image). This will make the icon appear on the OS taskbar as well.
//Read the image you want to set as icon
Image image = ImageIO.read(JFrameTutorial.class.getResourceAsStream("/logo.png"));
//Set the image icon to window
frame.setIconImage(image);
import java.awt.Image;
import java.io.IOException;
import javax.imageio.ImageIO;
import javax.swing.JButton;
import javax.swing.JFrame;
import javax.swing.JPanel;

public class JFrameTutorial {
  public static void main(String[] args) throws IOException {
    JFrame frame = new JFrame("My JFrame Window!");
    frame.setSize(300, 200);
    JPanel panel = new JPanel();
    panel.add(new JButton("Click Me"));
    frame.add(panel);
    frame.setDefaultCloseOperation(JFrame.EXIT_ON_CLOSE);
    frame.setLocationRelativeTo(null);
    frame.setIconImage(ImageIO.read(JFrameTutorial.class.getResourceAsStream("/logo.png")));
    frame.setVisible(true);
  }
}
Close/Hide JFrame Programmatically
Let’s say we want to close a JFrame programmatically. This can be done with JFrame#setVisible(false) method followed by a JFrame#dispose() method to clear the object. There is a deprecated function JFrame#hide(), but you should never use it as it has been deprecated from Java 1.5.
Simply set the visibility of the frame to false, and it will hide/close the window. Then call dispose() to release the system resources used by it.
//Set visibility to false for closing the JFrame
frame.setVisible(false);
//Dispose the frame to release resources
frame.dispose();
Another method for closing
Another easy method for closing the JFrame is by simulating the close button click event. As we have already seen, pressing the X button will close the window. We can simply simulate the close button click to close the JFrame itself. We can do that as follows
Now, let’s say we came across a requirement where we need to maximize a JFrame window programmatically. There is a function called JFrame#setExtendedState(int state) for programmatically maximizing and minimizing. Let’s see how we can do that with some code snippet.
private void minimizeJFrameWindow(JFrame jFrame) {
  //Minimize to task bar
  jFrame.setExtendedState(JFrame.ICONIFIED);
}

private void maximizeJFrameWindow(JFrame jFrame) {
  //Maximize the window
  jFrame.setExtendedState(JFrame.MAXIMIZED_BOTH);
}

private void maximizeJFrameWindowWidth(JFrame jFrame) {
  //Maximize the window only in the width (x-axis). Height will remain unchanged
  jFrame.setExtendedState(JFrame.MAXIMIZED_HORIZ);
}

private void maximizeJFrameWindowHeight(JFrame jFrame) {
  //Maximize the window only in the height (y-axis). Width will remain unchanged
  jFrame.setExtendedState(JFrame.MAXIMIZED_VERT);
}
Conclusion
In this tutorial, we have learned how to make use of JFrame to create windows in Java. We have seen how to create it, attach icon, center on screen, maximize and minimize etc. If you have liked this article, you might also like the following articles I have written.
In this tutorial, we will learn how to programmatically create animated GIF by combining multiple images in java easily. We will make use of the library gifencoder for this purpose.
Add the ‘gifencoder’ library to your project
If you are using Gradle, add the following dependency into your build.gradle file.
If you are using Java 9+ with modules, add the following line into your module-info.java file.
requires com.squareup.gifencoder;
Build GIF from multiple image files
First, let’s build our GIF from 4 image files. The steps for preparing the GIF from images as follows.
Convert the BufferedImages to int[][] pixel array
Provide the image pixel array into the encoder
Encode all the pixel array-based images into GIF image
Make sure that all the images you are using to prepare the GIF have the same size as that of the GIF. Automatic resizing of images is not done in the following code. If you want to do automatic resizing/cropping, take a look into the Thumbnailator library to do it easily.
import com.squareup.gifencoder.FloydSteinbergDitherer;
import com.squareup.gifencoder.GifEncoder;
import com.squareup.gifencoder.ImageOptions;
import java.awt.image.BufferedImage;
import java.io.File;
import java.io.FileOutputStream;
import java.io.IOException;
import java.util.concurrent.TimeUnit;
import javax.imageio.ImageIO;

public class JavaGifTutorial {

  public static void main(String[] args) throws Exception {
    JavaGifTutorial gifTutorial = new JavaGifTutorial();
    gifTutorial.createAnimatedGif();
  }

  private void createAnimatedGif() throws Exception {
    File image1 = new File("gifencoder/image1.jpg");
    File image2 = new File("gifencoder/image2.jpg");
    File image3 = new File("gifencoder/image3.jpg");
    File image4 = new File("gifencoder/image4.jpg");

    //The GIF image will be created with file name "my_animated_image.gif"
    try (FileOutputStream outputStream = new FileOutputStream("my_animated_image.gif")) {
      ImageOptions options = new ImageOptions();

      //Set 500ms between each frame
      options.setDelay(500, TimeUnit.MILLISECONDS);
      //Use Floyd Steinberg dithering as it yields the best quality
      options.setDitherer(FloydSteinbergDitherer.INSTANCE);

      //Create GIF encoder with same dimension as of the source images
      new GifEncoder(outputStream, 500, 313, 0)
          .addImage(convertImageToArray(image1), options)
          .addImage(convertImageToArray(image2), options)
          .addImage(convertImageToArray(image3), options)
          .addImage(convertImageToArray(image4), options)
          .finishEncoding(); //Start the encoding
    }
  }

  /**
   * Convert BufferedImage into RGB pixel array
   */
  public int[][] convertImageToArray(File file) throws IOException {
    BufferedImage bufferedImage = ImageIO.read(file);
    int[][] rgbArray = new int[bufferedImage.getHeight()][bufferedImage.getWidth()];
    for (int i = 0; i < bufferedImage.getHeight(); i++) {
      for (int j = 0; j < bufferedImage.getWidth(); j++) {
        rgbArray[i][j] = bufferedImage.getRGB(j, i);
      }
    }
    return rgbArray;
  }
}
Create GIF from all the images from a folder
Now, let’s see how we can improve the above code to take all the image files from a folder and use it to make an animated GIF. This way, you can simply put all the images you want to include the GIF image and run the code, no need to mention the individual images separately.
To achieve this, we need to add code for filtering only image files from a directory.
How to take only image files from a directory in Java?
Let’s see how to filter-out only JPEG and PNG files from a directory in Java. We will write code to iterate through all the files present in a directory, and then filter out only the image files by their extension.
private List<File> getAllImageFilesFromFolder(File directory) {
  //Get all the files from the folder
  File[] allFiles = directory.listFiles();
  if (allFiles == null || allFiles.length == 0) {
    throw new RuntimeException("No files present in the directory: " + directory.getAbsolutePath());
  }

  //Filter out only image files
  List<File> acceptedImages = new ArrayList<>();
  for (File file : allFiles) {
    String fileExtension = file.getName().substring(file.getName().lastIndexOf(".") + 1);
    if (fileExtension.equalsIgnoreCase("jpg") || fileExtension.equalsIgnoreCase("png")) {
      acceptedImages.add(file);
    }
  }

  //Return the filtered images
  return acceptedImages;
}
Create GIF from all the images in the folder
Now, let’s make use of the above function to get all the images from a folder and encode it into a GIF image.
//Trimmed code. Functions and imports used on the first section is excluded to keep the code compact

private void createAnimatedGifFromFolder(String path) throws Exception {
  //The GIF image will be created with file name "gif_from_folder.gif"
  try (FileOutputStream outputStream = new FileOutputStream("my_animated_image.gif")) {
    //Create GIF encoder with same dimension as of the source images
    GifEncoder encoder = new GifEncoder(outputStream, 1920, 1200, 0);

    //Get all the image files
    List<File> imageFiles = getAllImageFilesFromFolder(new File(path));

    //Make sure that at least one image is present
    if (imageFiles.isEmpty()) {
      throw new RuntimeException("No image files present!");
    }

    //Add all the images to the GifEncoder
    ImageOptions options = new ImageOptions();
    for (File imageFile : imageFiles) {
      encoder.addImage(convertImageToArray(imageFile), options);
    }

    //Finish encoding and create the file
    encoder.finishEncoding();
  }
}

private List<File> getAllImageFilesFromFolder(File directory) {
  File[] allFiles = directory.listFiles();
  List<File> acceptedImages = new ArrayList<>();
  for (File file : allFiles) {
    String fileExtension = file.getName().substring(file.getName().lastIndexOf(".") + 1);
    if (fileExtension.equalsIgnoreCase("jpg") || fileExtension.equalsIgnoreCase("png")) {
      acceptedImages.add(file);
    }
  }
  return acceptedImages;
}
That’s all. The function createAnimatedGifFromFolder(String folder) will go through all the JPG and PNG images available inside it and then use it to make the GIF animated image.
Conclusion
In this tutorial, we have learned how to create an animated GIF image a set of images in Java. Java GIF creation is done with the help of the gifencoder library. If you have liked this article, you might want to check out some of the other articles I have written.
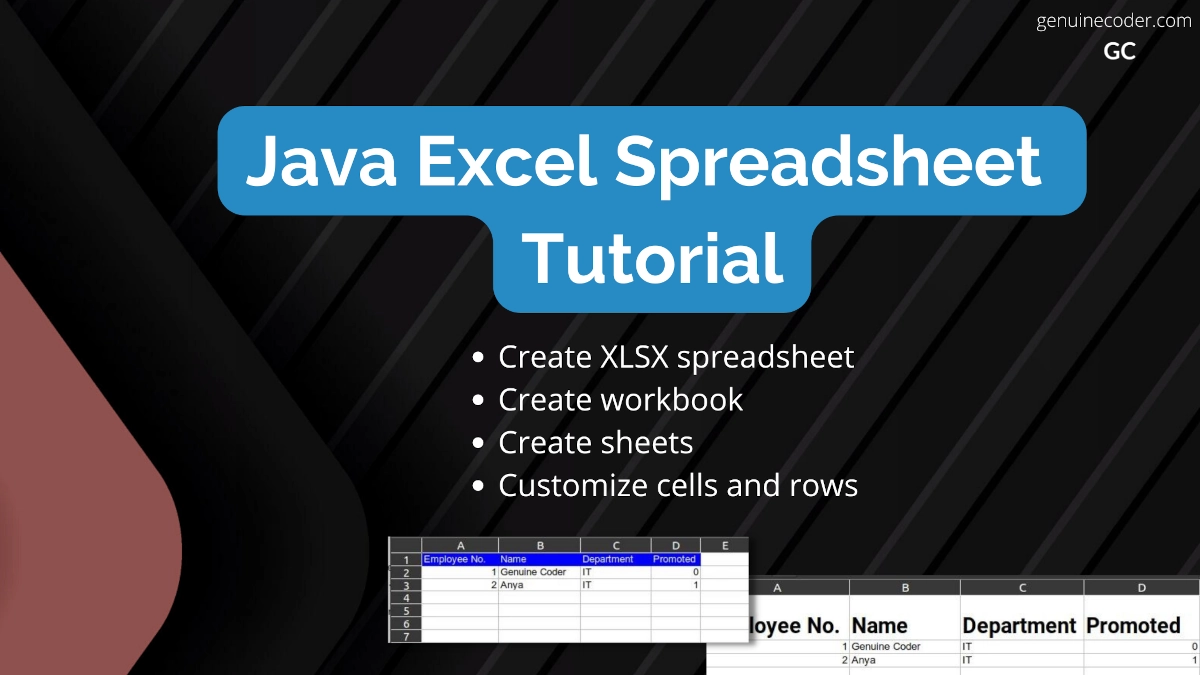
In this tutorial, we will explore the Java spreadsheet support and learn how to create Microsoft Excel .xlsx spreadsheet files using java program. For handling Excel files, we need to make use of the well known Apache POI library. This tutorial has been updated for Java 17 and work with Apache POI modules.
Add Apache POI library into your project
The first step is adding the Apache POI library into your project.
If you are using Gradle, add the following dependency into your build.gradle file.
Q. I am getting the exception “java.lang.module.FindException: Module SparseBitSet not found, required by org.apache.poi.poi”. How can I fix it?
Another similar exception you might come across is: “java.lang.module.FindException: Module commons.math3 not found, required by org.apache.poi.poi”.
Since you are using Java 9+ with modules, you need to set the module configuration correctly. First, make sure that your module-info.java contains the following lines to have your application access the org.apache.poi.poi module.
requires org.apache.poi.poi;
Then, we must allow the Apache poi module to access two if its dependencies. This needs to be added as a JVM argument. Add the following JVM argument into your project.
The first thing to do when creating a spreadsheet file is creating a workbook. We will create an org.apache.poi.hssf.usermodel.HSSFWorkbook and then save it as an .xlsx file.
import java.io.File;
import java.io.OutputStream;
import java.nio.file.Files;
import org.apache.poi.hssf.usermodel.HSSFWorkbook;
import org.apache.poi.ss.usermodel.Workbook;

public class ExcelTutorial {

  public static void main(String[] args) throws Exception {
    ExcelTutorial excelTutorial = new ExcelTutorial();
    excelTutorial.createWorkbook();
  }

  private void createWorkbook() throws Exception {
    //Create a workbook
    try (Workbook wb = new HSSFWorkbook()) {
      //Add two sheets into the workbook
      wb.createSheet("My Excel Sheet 1");
      wb.createSheet("My Excel Sheet 2");
      //Save the workbook to a file
      try (OutputStream fileOut = Files.newOutputStream(new File("my_first_java_spreadsheet.xlsx").toPath())) {
        wb.write(fileOut);
      }
    }
  }
This will create a new file Excel file. We can open it on the MS Excel or any compatible spreadsheet program you have installed, including LibreOffice Calc, Google Sheet, etc. The following screenshot shows the Excel file opened with LibreOffice. Excel workbook we have created with two sheets
Create Excel spreadsheet with actual data
Now that we have learned how to create Excel spreadsheet with sheets, let’s learn how to add tabular data into the sheets.
We can add rows into the sheets using the method sheet.createRow(rowIndex);. For each row, we can then set the value for each cell using the setCellValue(String); function. Let’s understand this better with the following example code.
import java.io.File;
import java.io.OutputStream;
import java.nio.file.Files;
import org.apache.poi.hssf.usermodel.HSSFWorkbook;
import org.apache.poi.ss.usermodel.CellType;
import org.apache.poi.ss.usermodel.Row;
import org.apache.poi.ss.usermodel.Sheet;
import org.apache.poi.ss.usermodel.Workbook;

public class ExcelTutorial {

  public static void main(String[] args) throws Exception {
    ExcelTutorial excelTutorial = new ExcelTutorial();
    excelTutorial.createEmployeeSheet();
  }

  private void createEmployeeSheet() throws Exception {
    try (Workbook wb = new HSSFWorkbook()) {
      Sheet sheet = wb.createSheet("Building#1");
      //Create table header
      Row headerRow = sheet.createRow(0); //First row - Heading
      headerRow.createCell(0).setCellValue("Employee No.");
      headerRow.createCell(1).setCellValue("Name");
      headerRow.createCell(2).setCellValue("Department");
      headerRow.createCell(3, CellType.BOOLEAN).setCellValue("Promoted");
      //Add first employee
      Row firstEmployee = sheet.createRow(1); //Second row
      firstEmployee.createCell(0).setCellValue(1); //Giving numeric value to cell
      firstEmployee.createCell(1).setCellValue("Genuine Coder");
      firstEmployee.createCell(2).setCellValue("IT");
      firstEmployee.createCell(3).setCellValue(false); //Giving a boolean value to the cell
      //Add second employee
      Row secondEmployee = sheet.createRow(2); //Third row
      secondEmployee.createCell(0).setCellValue(2);
      secondEmployee.createCell(1).setCellValue("Anya");
      secondEmployee.createCell(2).setCellValue("IT");
      secondEmployee.createCell(3).setCellValue(true); //Giving a boolean value to the cell

      //Write workbook into file
      try (OutputStream fileOut = Files.newOutputStream(new File("employee_data.xlsx").toPath())) {
        wb.write(fileOut);
      }
    }
  }
}
We have created a new Excel file with the name employee_data.xlsx and two employees. For each employee, we have given numeric, string and boolean cell data. You can see the generated file in the below screenshot.
Java Excel Workbook With Worksheet and Data
Q. How to set background color of a row with Apache POI?
Now, let’s say we want to set the background color of the title. We need to set background color and text color for the entire first row.
Let’s see how we can do the styling per-cell for the entire header row. This way, in future if you would like to have customization within a row itself, it will be much easier.
private void applyStyleForRow(Row row) {
  //Create new style for the row
  CellStyle cellStyle = row.getSheet().getWorkbook().createCellStyle();
  //Configure single solid color fill
  cellStyle.setFillPattern(FillPatternType.SOLID_FOREGROUND);
  //Set font color
  cellStyle.setFillForegroundColor(IndexedColors.BLUE.getIndex());
  //Set background color
  cellStyle.setFillBackgroundColor(IndexedColors.WHITE.getIndex());
  //Apply style for each cell
  row.forEach(cell -> cell.setCellStyle(cellStyle));
}
Spreadsheet with customized header
Q. How to change font with Apache POI?
Often we would want to change the font for particular rows or cells. This is also easily achievable with Apache POI. We can set font family, font weight and of course font size with style attribute. Let’s see how we can do that with a code example.
private void applyFontForRow(Row row) {
  Workbook workbook = row.getSheet().getWorkbook();

  //Create and style font
  Font font = workbook.createFont();
  //Set bold
  font.setBold(true);
  //Set font family
  font.setFontName("Roboto");
  //Set font size
  font.setFontHeightInPoints((short) 20);

  //Apply style for each cell
  CellStyle cellStyle = workbook.createCellStyle();
  cellStyle.setFont(font); //Attach font to style
  row.forEach(cell -> cell.setCellStyle(cellStyle));
}
We have customized the header font by using Bold Roboto Font of 20pt size. The generated file looks as shown below. Spreadsheet with customized fonts
Conclusion
In this tutorial, we have learned how to create Excel spreadsheets in Java. We have seen how to create workbook with multiple sheets, adding contents to sheets, customizing font and background style of cells and rows. If you have liked this article, you might want to check some of my other tutorial articles given below.
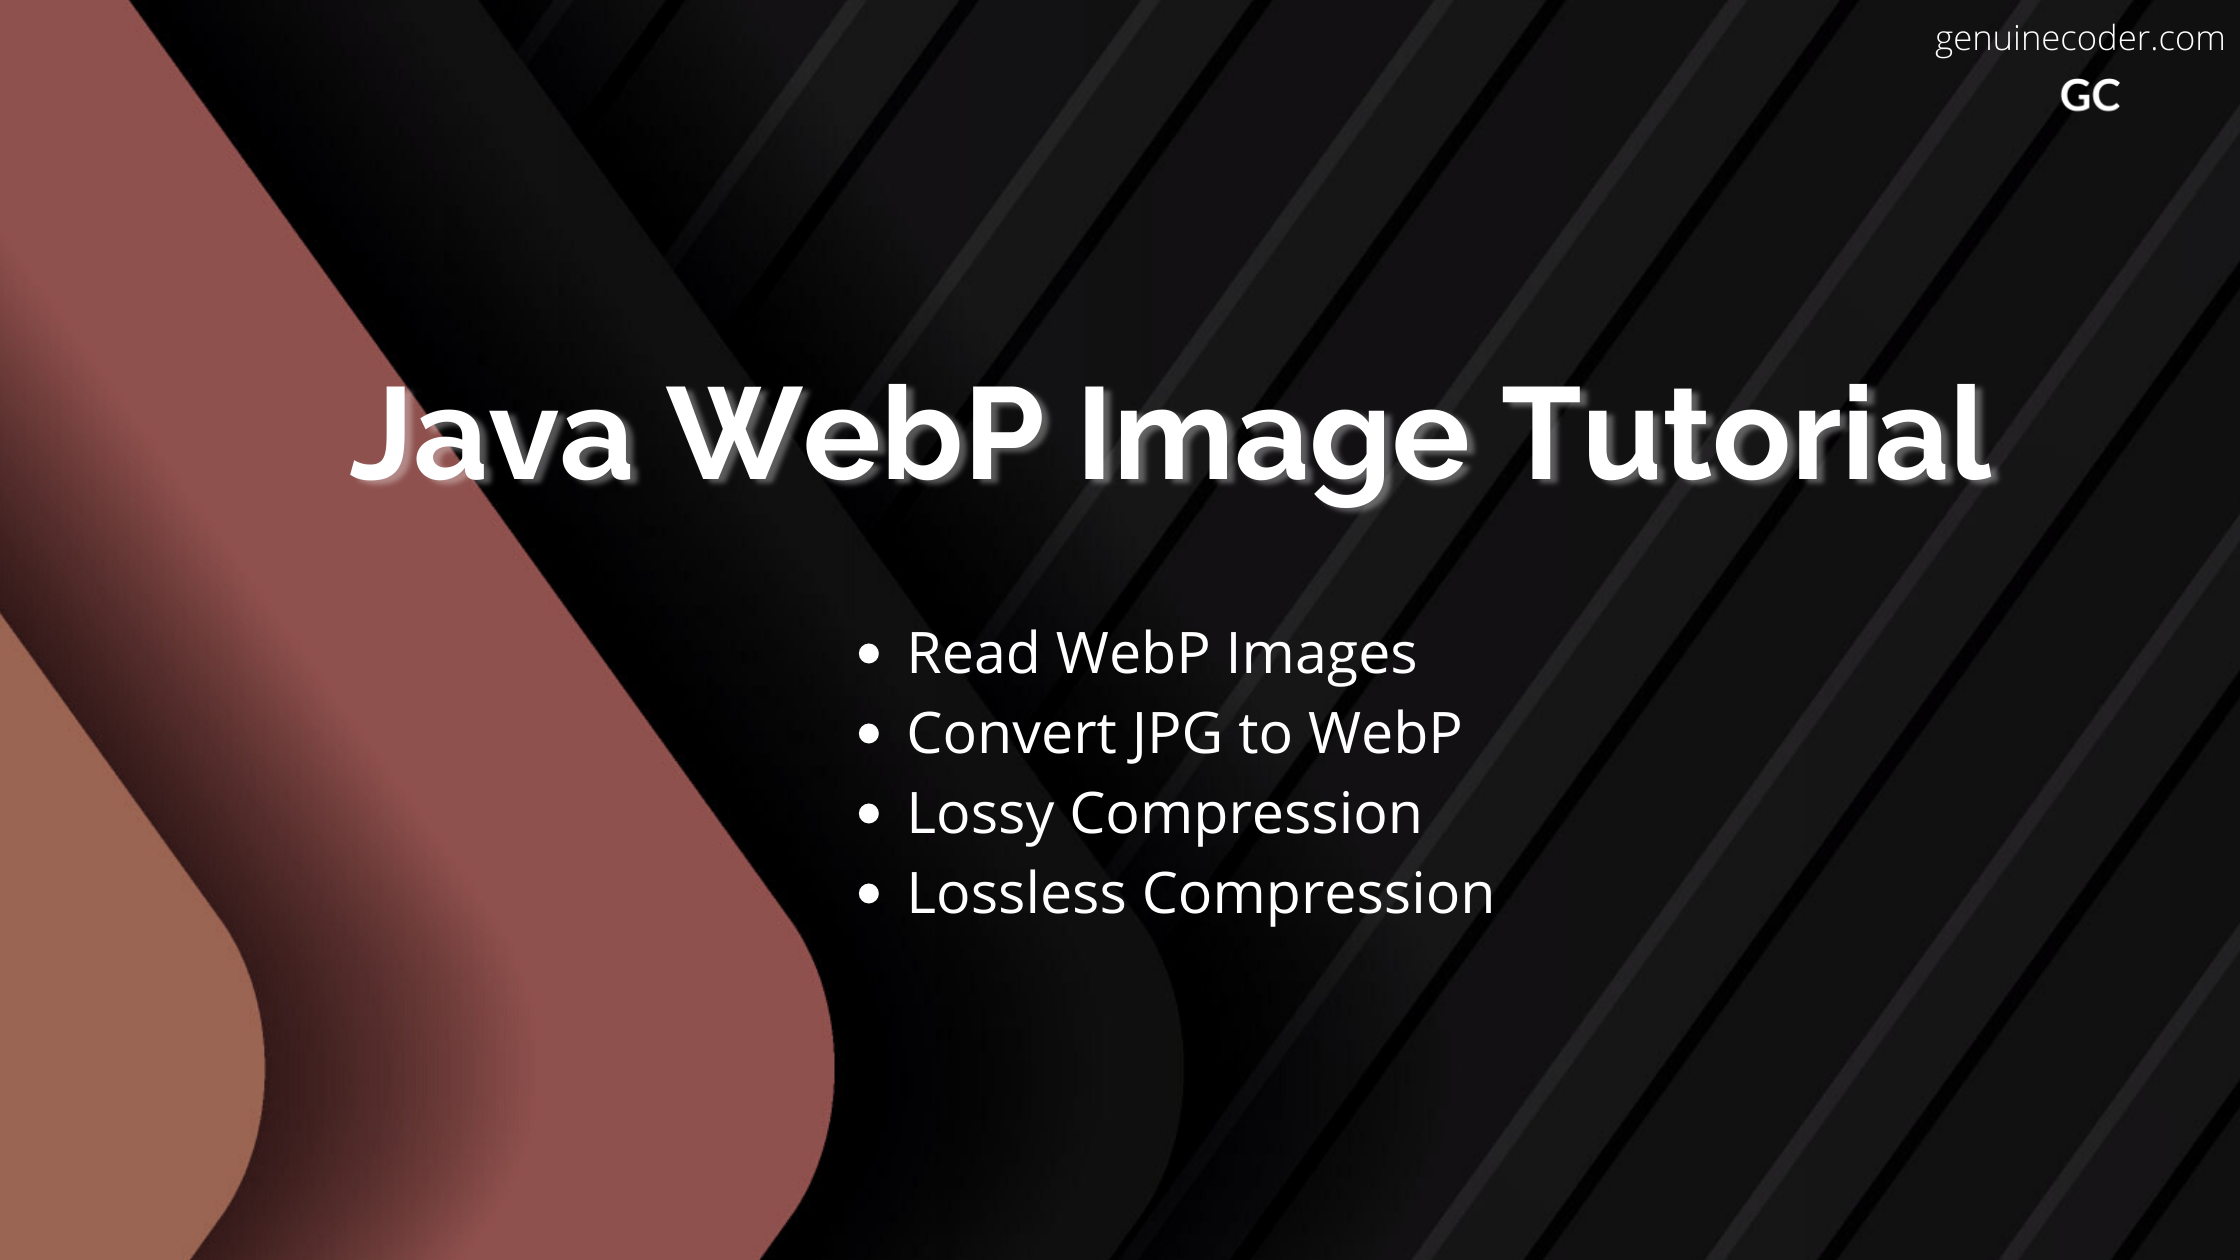
WebP is a new generation image format developed by Google exclusively for the Web. It has both lossy and lossless compression support. When compared to the commonly used formats like JPEG, WebP has 25%-34% lesser file size for the same quality. WebP provides much better compression and reduced file sizes, which are crucial for the web since every byte of data saved matters.
In this tutorial, let’s see how we can process WebP images in the Java program. We will learn how to read and save/encode/write WebP images.
Add support for WebP into your Java program
As of writing this article in 2022, Java doesn’t natively support WebP images. However, there is a there is a library called webp-imageio that can support WebP image-io for Java. Let’s make use of this web-imageio library to process WebP images.
Add the dependency on to your project.
If you are using the Gradle, add the dependency as follows.
Now, let’s see how we can read WebP images to a BufferedImage object. You can read the WebP image just like reading any other JPEG or PNGs with ImageIO.read() function. Let’s understand it with a sample code snippet.
import java.awt.image.BufferedImage;
import java.io.File;
import java.io.IOException;
import javax.imageio.ImageIO;

public class JavaWebpSupportTest {

  public static void main(String[] args) throws IOException {
    JavaWebpSupportTest webPSupportTest = new JavaWebpSupportTest();
    webPSupportTest.readWebpImage();
  }

  private void readWebpImage() throws IOException {
    BufferedImage image = ImageIO.read(new File("/home/gc/my_image.webp"));
    System.out.printf("\nDimension of the image:%dx%d", image.getWidth(), image.getHeight());
  }
}
This will read the WebP image as BufferedImage and will print the dimension of the image. You can see a sample output below. You can then continue processing the BufferedImage just you do with any other image format. Java program successfully read WebP image and displayed its dimension.
Save WebP image from Java
Now that we have learned how to read WebP images, let’s see how we can save a BufferedImage as a WebP image. For this, we will read a JPEG image and then save it as a WebP image. WebP supports for both lossless and lossy compressions. So, let’s explore how to do both cases with Java.
private void convertJpegToWebp() throws Exception {
  //Read JPG image
  BufferedImage image = ImageIO.read(new File("/home/afsal/sample.jpg"));
  // Encode it as webp using default settings and save it as webp file
  ImageIO.write(image, "webp", new File("/home/afsal/sample.webp"));
}
1. Save WebP with lossless encoding
In the above code snippet, we have used the default settings for writing the WebP image file. Now, let’s see how we can customize the encoding parameters to customize the image. First, let’s save the image in lossless format. We will set the compression type as LOSSLESS_COMPRESSION using the WebPWriteParam#setCompressionType option.
import com.luciad.imageio.webp.WebPWriteParam;
import java.awt.image.BufferedImage;
import java.io.File;
import java.io.IOException;
import javax.imageio.IIOImage;
import javax.imageio.ImageIO;
import javax.imageio.ImageWriteParam;
import javax.imageio.ImageWriter;
import javax.imageio.stream.FileImageOutputStream;

public class JavaWebpSupportTest {

  public static void main(String[] args) throws Exception {
    JavaWebpSupportTest webPSupportTest = new JavaWebpSupportTest();
    webPSupportTest.convertJpegToWebpLossless();
  }

  private void convertJpegToWebpLossless() throws Exception {
    BufferedImage image = ImageIO.read(new File("/home/gc/sample.jpg"));

    ImageWriter writer = ImageIO.getImageWritersByMIMEType("image/webp").next();

    WebPWriteParam writeParam = new WebPWriteParam(writer.getLocale());
    //Notify encoder to consider WebPWriteParams
    writeParam.setCompressionMode(ImageWriteParam.MODE_EXPLICIT);
    //Set lossless compression
    writeParam.setCompressionType(writeParam.getCompressionTypes()[WebPWriteParam.LOSSLESS_COMPRESSION]);

    // Save the image
    writer.setOutput(new FileImageOutputStream(new File("/home/gc/sample.webp")));
    writer.write(null, new IIOImage(image, null, null), writeParam);
  }
}
2. Save WebP with lossy encoding
Now, let’s see how we can configure the compression ratio and use lossy compression to encode an image as WebP. The following code will read a JPEG image and save it as WebP with 80% compression quality (0% has the highest compression and 100% has the highest quality).
private void convertJpegToWebpWithLossyCompression() throws Exception {
  BufferedImage image = ImageIO.read(new File("/home/gc/sample.jpg"));

  ImageWriter writer = ImageIO.getImageWritersByMIMEType("image/webp").next();

  WebPWriteParam writeParam = new WebPWriteParam(writer.getLocale());
  //Notify encoder to consider WebPWriteParams
  writeParam.setCompressionMode(ImageWriteParam.MODE_EXPLICIT);
  //Set lossy compression
  writeParam.setCompressionType(writeParam.getCompressionTypes()[WebPWriteParam.LOSSY_COMPRESSION]);
  //Set 80% quality. Allowed values are between 0 and 1
  writeParam.setCompressionQuality(0.8f);

  // Save the image
  writer.setOutput(new FileImageOutputStream(new File("/home/gc/sample.webp")));
  writer.write(null, new IIOImage(image, null, null), writeParam);
}
Conclusion
In this tutorial, we have learned how to process WebP images using Java. With the help of the webp-imageio library, we can read and write WebP images easily. Since the library works with ImageIO.read() and ImageIO.write(), the processing of images is a breeze. If you are using Linux and wants to enable WebP thumbnail support on your platform, learn how to do that from the following tutorial: How to add WebP thumbnail support on Ubuntu and Linux Mint.
Sometimes, we come across requirements where we need to open a particular folder or directory in the native file explorer. In this tutorial, we will see how to do that, easy and effective.
Opening file explorer with java in any platform – Windows, Linux and Mac
The easiest way to do this is by using Java Desktop. The class provides an open() function Desktop#open(File) to open explorer when the given file is a directory.
From Java 9 onwards, Desktop is available on the java.desktop module. So, make sure to add “requires java.desktop;” to your module-info.java file.
Open file explorer and select/highlight a file
Now, if you want to open the file explorer and have a file preselected, then there is a way for that as well! You can make use of Desktop.fileBrowseDirectory(File) to launch the file explorer and have a file highlighted. Let’s see a code example for the same.
However, before using this function, you have to keep the following things in mind.
The code will not work on ALL platforms.
You need to check whether the feature is supported via Desktop.getDesktop().isSupported(Action.BROWSE_FILE_DIR) function.
Minimum Java 9 is required
import java.awt.Desktop;
import java.awt.Desktop.Action;
import java.io.File;

public class JavaFileExplorer {

  public static void main(String[] args) {
    openDirectory();
  }

  private static void openDirectory() {
    //Check if the feature supported on your platform
    if (Desktop.getDesktop().isSupported(Action.BROWSE_FILE_DIR)) {
      File directory = new File("/home/afsal/Downloads/jdk-8u212-linux-x64.tar.gz");
      //Open directory with browse_file_dir option
      Desktop.getDesktop().browseFileDirectory(directory);
    }
  }
}
Open file explorer in Linux
Now, if you would like to add specific code for Linux/Ubuntu to open the file explorer, have a look into the following code snippet. We can make use of the xdg-open command to open any directory. The good thing about using this method is that, it works across multiple Linux distributions. They just have to have the xdg-open support.
Now, if you would like to add specific code for Windows OS to open the file explorer, have a look into the following code snippet. We will execute a cmd command to open Windows explorer.exe.
In this tutorial, we have learned how to open a directory from a java program. We have numerous methods to achieve the same goal here. We can use java.awt.Desktop for platform independent support and if platform-specific implementation is required, that is also available. You might also be interested in the following topics.
Trayicons are really useful widgets for interacting with the application when the main dialog is minimized/hidden or the application is running in the background. In this tutorial, let’s see how to add a Java Tray Icon with example code.
Note: JavaFX does not have a separate TrayIcon system. If your project is using JavaFX, then the tutorial is still fully applicable. Because the java.awt.SystemTray can be used for JavaFX as well!
Creating a simple TrayIcon
The first step on adding a TrayIcon is checking whether the platform supports it. As you know, java supports a wide variety of platforms and not all platforms will support SystemTray feature. So, the first step on configuring it is to check if it is really supported. Let’s see the basic algorithm here
public void createTrayIcon() {
  //Check for SystemTray support
  if (!SystemTray.isSupported()) {
    System.err.println("System tray feature is not supported");
    return;
  }

  //Get system tray object
  SystemTray tray = SystemTray.getSystemTray();

  //Create TrayIcon instance
  Image image = ImageIO.read(TrayIconService.class.getResourceAsStream("/path/to/your/icon.png"));
  TrayIcon trayIcon = new TrayIcon(image, "Genuine Coder", null);
  trayIcon.setImageAutoSize(true);

  //Attach TrayIcon to SystemTray
  tray.add(trayIcon);
}
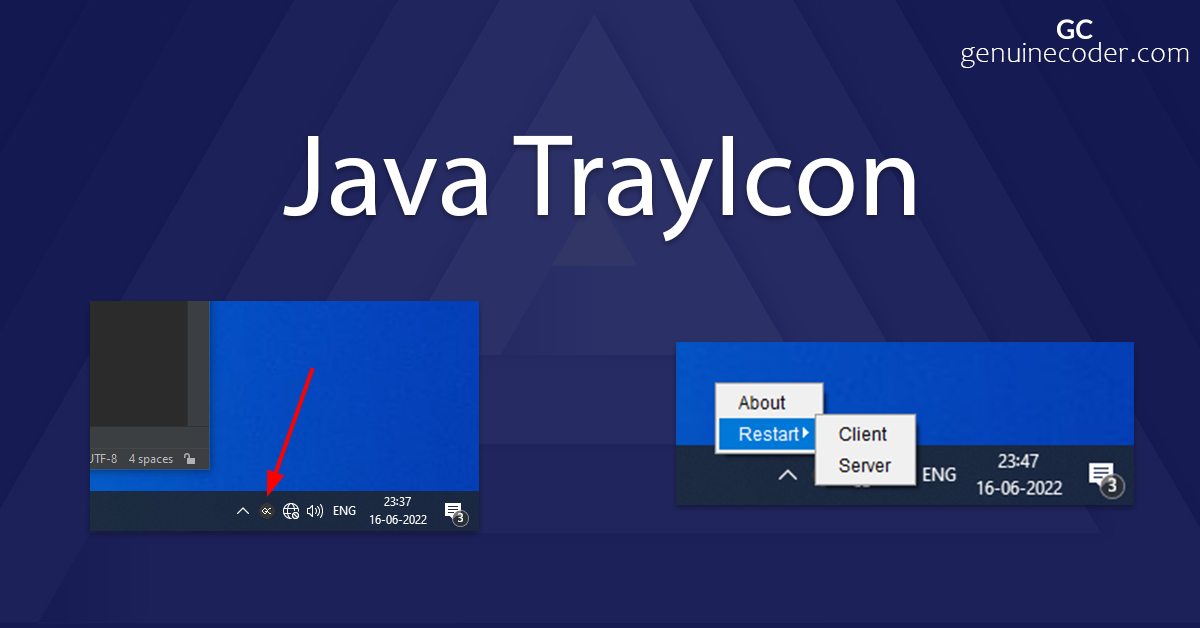
and…That’s it. When you run the code, you will get a nice TrayIcon in your system’s taskbar. Below, you can find the output of running the code on my system.
Creating TrayIcon with PopupMenu
Now, let’s see how to add a PopupMenu into the TrayIcon to add some functionality. Let’s iterate the steps first.
Create PopumMenu
Create one Menu and multiple MenuItems and organize them in a tree structure
Attach Menu to PopumMenu
Attach PopupMenu to TrayIcon
Basically, we need to prepare the MenuItems as we intend to and then attcah it to the PopupMenu. As an example, let’s create the following menu.
public void createTrayIcon() {
  //Check for SystemTray support
  if (!SystemTray.isSupported()) {
    System.err.println("System tray feature is not supported");
    return;
  }
  SystemTray tray = SystemTray.getSystemTray();
  Image image = ImageIO.read(TrayIconService.class.getResourceAsStream("/path/to/your/icon.png"));
  TrayIcon trayIcon = new TrayIcon(image, "Genuine Coder", null);
  trayIcon.setImageAutoSize(true);

  //Create root menu
  PopupMenu rootMenu = new PopupMenu();

  //Add about and restart items
  MenuItem about = new MenuItem("About");
  rootMenu.add(about);
  Menu restartMenu = new Menu("Restart");
  rootMenu.add(restartMenu);

  //Add sub-items to server
  MenuItem restartClient = new MenuItem("Client");
  MenuItem restartServer = new MenuItem("Server");
  restartMenu.add(restartClient);
  restartMenu.add(restartServer);

  //Attach to trayIcon
  trayIcon.setPopupMenu(rootMenu);

  tray.add(trayIcon);
}
Adding event handling to the TrayIcon
Now, let’s see how to attach event-handlers to the TrayIcon menu. As an example, let’s show an alert when the “about” MenuItem is clicked.
about.addActionListener(new ActionListener() {
    @Override
    public void actionPerformed(ActionEvent e) {
        JOptionPane.showMessageDialog(null, "Wow! Java TrayIcon is working!");
    }
});
With this event-handler, when you click on the “about” MenuItem in the TrayIcon menu, you will get the following alert.
Conclusion
In this tutorial, we have familiarized with Java TrayIcon and added PopupMenu and action listeners into it. TrayIcons can be customized even further by customizing the MenuItem. You can add special MenuItems like CheckBoxMenuItem to add switch behaviour into your SystemTray. You may also want to checkout the following articles
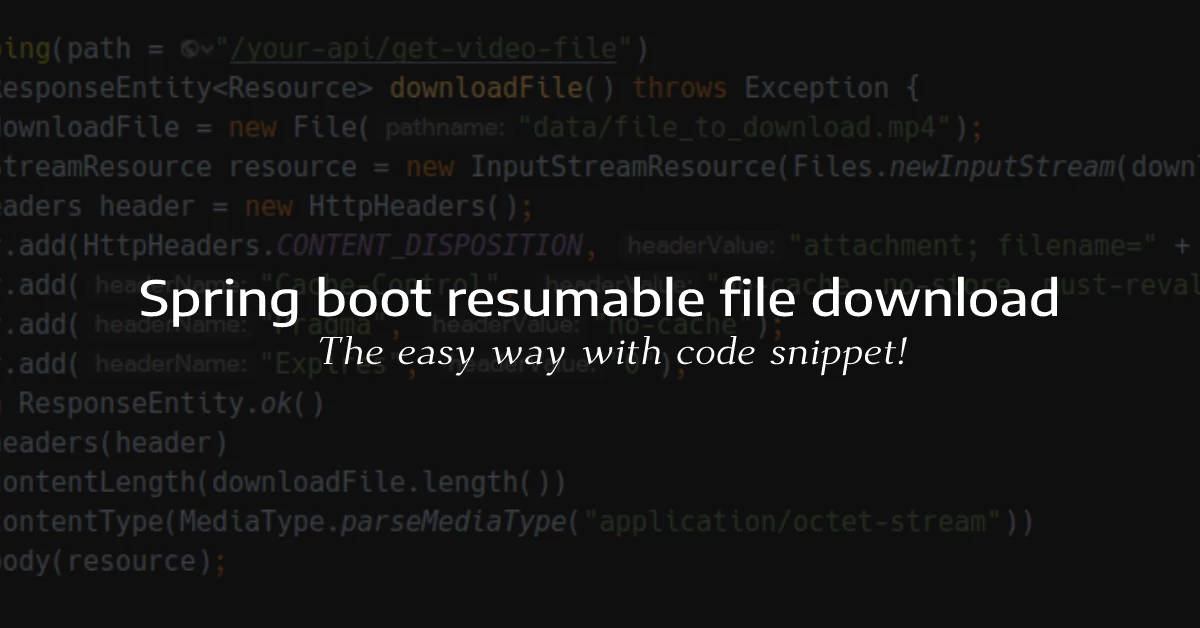
Sometimes, we will have to provide rest API endpoint for downloading certain files. In this article, we will see how to provide an option to download any file from a java spring rest API controller, with example code snippet. We will use spring-boot annotations here to make things easier and straightforward. This method provides the file download option with resume support.
Configure a file for download with spring controller
Let’s assume that you have a file that you want to provide for download at “data/file_to_download.mp4”. Then you can write the controller as follows to make it downloadable by any browser. Also, the REST API endpoint is given in the @GetMapping annotation.
The “application/octet-stream” media type is useful for providing the file as a raw type. The HttpHeader provides information about the file metadata, including the size of the file so that the browser can properly determine its size and create a proper download progress bar.
Providing spring boot file download based on GET parameter
Now, let’s say you want to provide multiple files for download and don’t want to write separate functions for each. In this case, you can simply accept the name of the file to be downloaded as a request parameter and use it to process the file downloading. Let’s see how this can be done in the following code snippet.
@GetMapping(path = "/your-api/download-file")
public ResponseEntity<Resource> downloadBenchmarkFile10Mb(@RequestParam("file-name") String fileName) throws Exception {
  File downloadFile = new File(fileName);
  //Return 404 error if the file is not found
  if (!downloadFile.exists()) {
    return ResponseEntity.noContent()
        .build();
  }
  InputStreamResource resource = new InputStreamResource(new FileInputStream(downloadFile));
  HttpHeaders header = new HttpHeaders();
  header.add(HttpHeaders.CONTENT_DISPOSITION, "attachment; filename=" + downloadFile.getName());
  header.add("Cache-Control", "no-cache, no-store, must-revalidate");
  header.add("Pragma", "no-cache");
  header.add("Expires", "0");
  header.add("hash", FileUtil.createFileHash(downloadFile));
  return ResponseEntity.ok()
      .headers(header)
      .contentLength(downloadFile.length())
      .contentType(MediaType.parseMediaType("application/octet-stream"))
      .body(resource);
}
Here, the file-name to be downloaded will be taken as an argument from the GET request and then will be used for resolving the file. If such a file is not available, then a 404 response will be returned, as you can see in the code comment. To download from the following REST GET endpoint, you can make a request as follows.
Java Mail API allows to send emails from your Java application. Very often it will be necessary to send emails when you are developing a business related applications or simply hobby projects.
Using Java Mail API is relatively straightforward. First you need to add the API to your application. You can download the JAR file from https://javaee.github.io/javamail/
You need following data fields to send email
An account to send email from.
Password of your email account.
SMTP server host address
SMTP server port.
In the following example, we will use gmail account for sending email. For google, SMTP server host address is “smtp.gmail.com” and port is “587”.
Enable Less Secure Access in Gmail
Google recently updated their security by automatically disabling access from third-party application. So you have to enable less secure access from gmail settings in order to use that account from java application.
If you haven’t enabled it, you will get following email when you try to send email.
Sign-in attempt was blocked. Someone just used your password to try to sign in to your account from a non-Google app. Google blocked them, but you should check what happened. Review your account activity to make sure no one else has access.
Enable less secure app access from Google settings
Program for sending email using Java Mail API and Gmail account
    public static void sendMail(String recepient) throws Exception {
        System.out.println("Preparing to send email");
        Properties properties = new Properties();

        //Enable authentication
        properties.put("mail.smtp.auth", "true");
        //Set TLS encryption enabled
        properties.put("mail.smtp.starttls.enable", "true");
        //Set SMTP host
        properties.put("mail.smtp.host", "smtp.gmail.com");
        //Set smtp port
        properties.put("mail.smtp.port", "587");

        //Your gmail address
        String myAccountEmail = "[email protected]";
        //Your gmail password
        String password = "xxxxxxxx";

        //Create a session with account credentials
        Session session = Session.getInstance(properties, new Authenticator() {
            @Override
            protected PasswordAuthentication getPasswordAuthentication() {
                return new PasswordAuthentication(myAccountEmail, password);
            }
        });

        //Prepare email message
        Message message = prepareMessage(session, myAccountEmail, recepient);

        //Send mail
        Transport.send(message);
        System.out.println("Message sent successfully");
    }

    private static Message prepareMessage(Session session, String myAccountEmail, String recepient) {
        try {
            Message message = new MimeMessage(session);
            message.setFrom(new InternetAddress(myAccountEmail));
            message.setRecipient(Message.RecipientType.TO, new InternetAddress(recepient));
            message.setSubject("My First Email from Java App");
            String htmlCode = "<h1> WE LOVE JAVA </h1> <br/> <h2><b>Next Line </b></h2>";
            message.setContent(htmlCode, "text/html");
            return message;
        } catch (Exception ex) {
            Logger.getLogger(JavaMailUtil.class.getName()).log(Level.SEVERE, null, ex);
        }
        return null;
    }
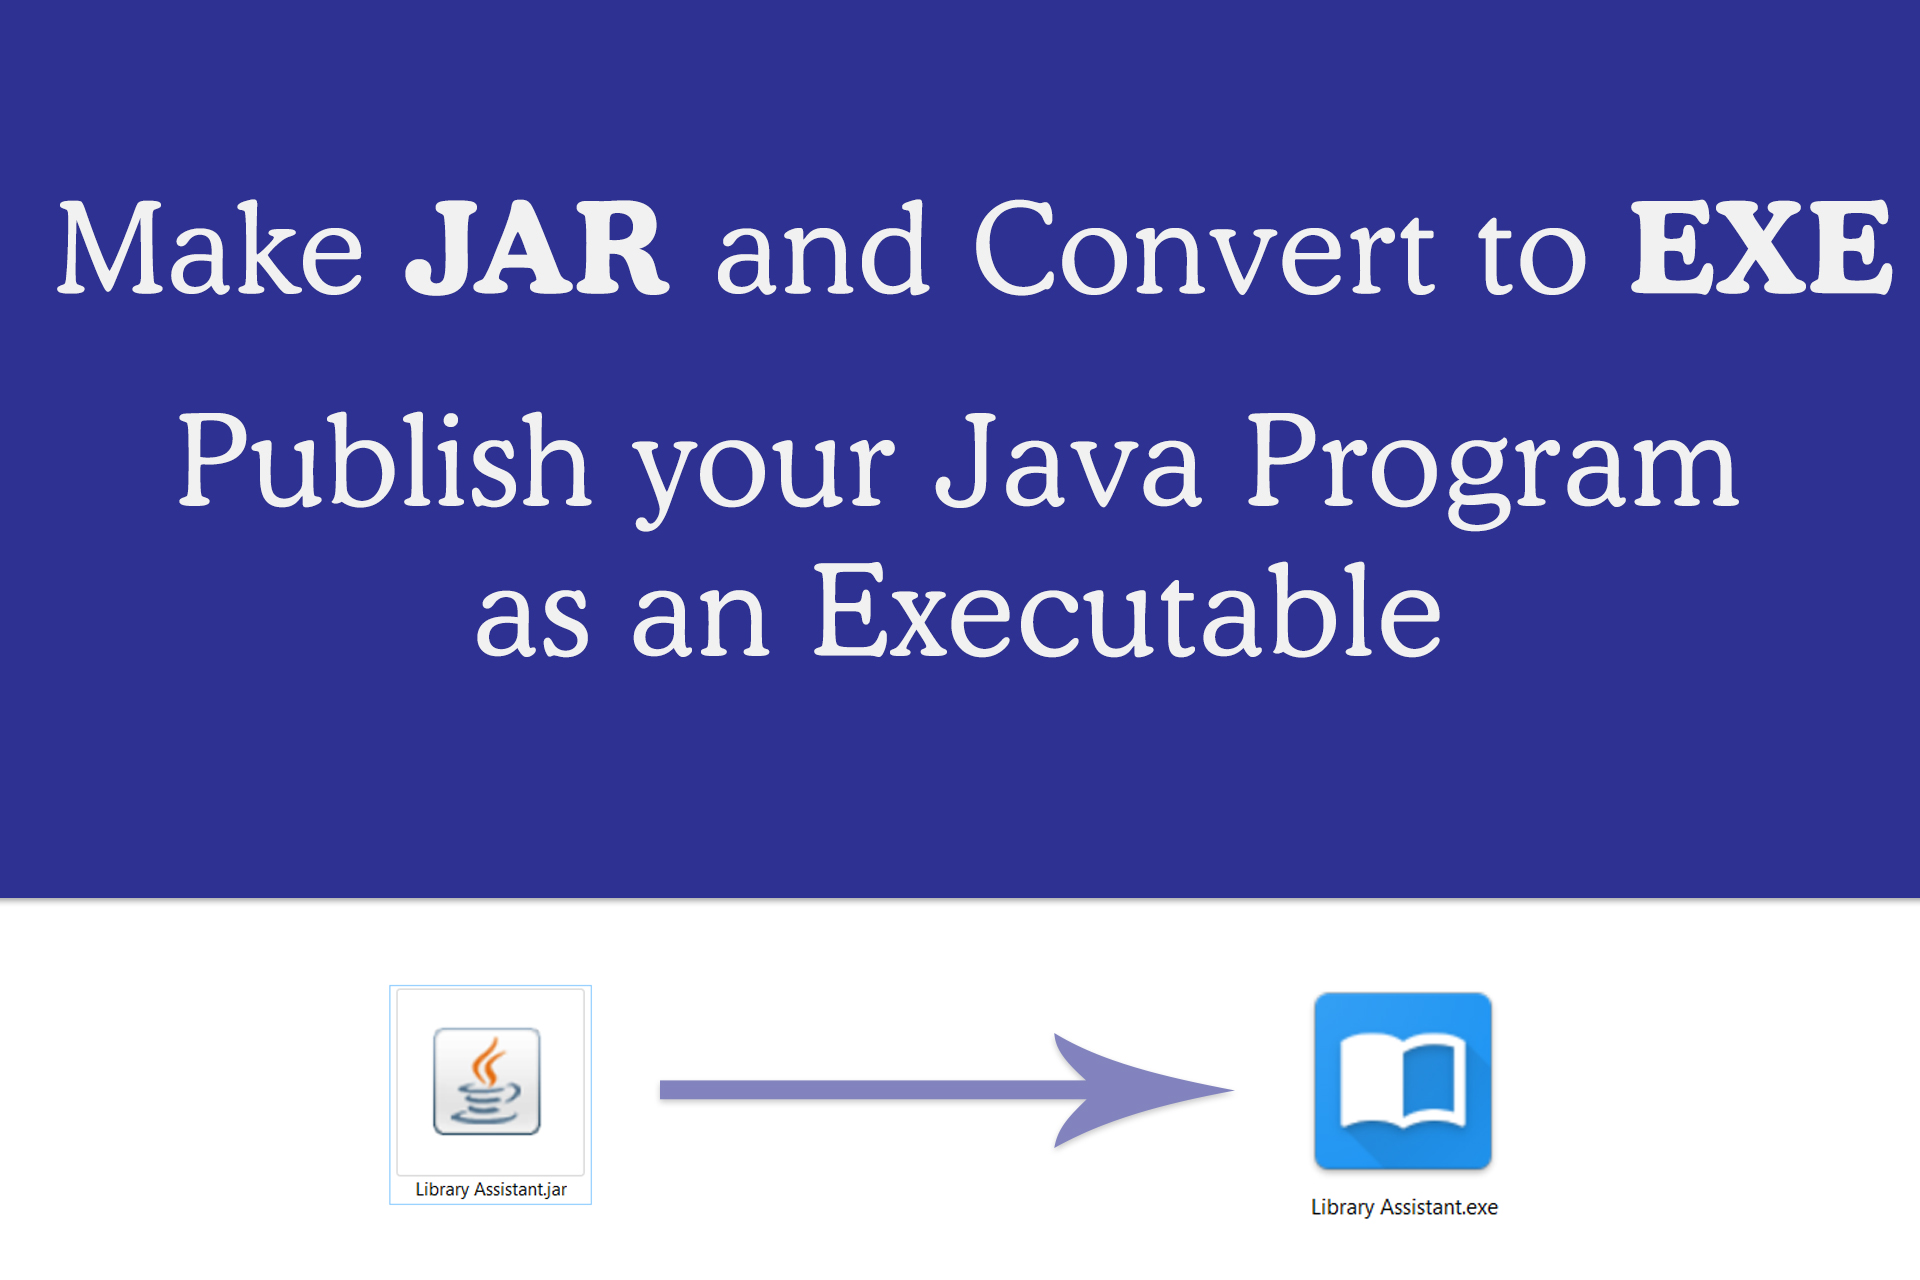
Java is the best programming language available today that works across different platforms. I love Java and JavaFX. Once you finish writing your application, you may want to release it. The problem is, the native Java program executable, the good old .jar files always have a cup icon and sometimes a simple double click wont open them. The solution to this problem is to convert JARs to native executable, for windows .exe files.
In this article, I will explain how to make windows executable (.exe) from your Java / JavaFX program. Having exe file for windows has many advantages. We can set icons, properties, version information etc.
Step 1 : Make JAR file for your application
The first step is making a JAR file from your java code. This is pretty simple if you are using an IDE like NetBeans.
NetBeans : NetBeans provide option for making JAR file very easily. Just right click on your project from Projects window and then select “clean and build”. This will create a folder called “dist” in your project directory. Inside dist, there will be the final JAR. All the libraries required for running the program will be inside “/dist/lib” directory.
Maven : Maven uses convention over configuration, this means that you only need to tell Maven the things that are different from the defaults. You can use “mvn package” command to create JAR files.
Launch4J is so far the best wrapper available for converting JAR files to windows executable. It is written in JAVA and is open source. Download latest version of Launch4J from http://launch4j.sourceforge.net/. Once You install and open it, you will get the following screen.
Launch4J main screen
On the first look, the interface may look little confusing, but it is actually simple and every field will become too important once you get used to it.
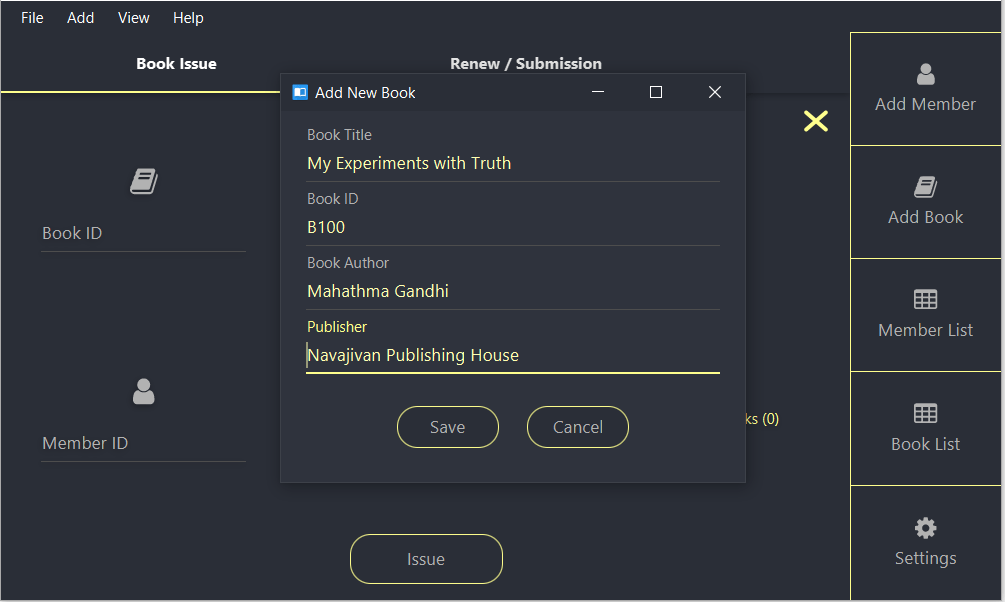
Step 3 : Launch4J Basic Configurations
This tab contains the most basic configurations for the exe like jar file to be converted and the icon to be used.
Basic
Output File
This is the location where the compiled EXE (executable) file will be created once the conversion is complete
Jar
Location of the Jar file to be converted in to executable
Wrapper manifest
You can specify manifest file here. This will be used for processing the application against User Account Control(UAC) in windows.
Icon
Here you can specify the icon. It has to be in ico format.
Change dir
Change current directory to an arbitrary path relative to the executable. If you omit this property or leave it blank it will have no effect. Setting it to . will change the current dir to the same directory as the executable. .. will change it to the parent directory, and so on.
Command line args
Here you can specify the java arguments
In case if the system doesn’t have supported Java, the error message and URL to download can be specifed under the Java Download and Support Sections.
Classpath
Here you can specify classpath for your main class. Select the JAR file by selecting the directory icon from right and the default classpath corresponding to main class will be loaded. You can edut them from Edit Item text field.
You can also add or remove classpath for given main class from this section.
Single Instance
Here you can specify whether you need only once instance of the application running at a time. Give a mutext name and window title if single instance option needed.
JRE
This section allows configuring JRE. If you are bundling JRE with your product (Which is not a good idea at all), you can specify the path here. You can check the ‘Fallback option’ so that the bundled JRE will only be used when the JRE isntalled on the system does not matches with min and max version requirement.
Min JRE Version is a mandatory field and it has to be specified.You can also specify Heap parameters or any JVM options in the corresponding fields.
Splash
If you need a custom splash screen, you can check the “Enable Splash Screen option”. Then specify the file (Either bitmap image or JAR file). In the TimeOut field, time out can be specified.
Version Info
This is a good way to properly specify version information for your executable. This entries will then be shown in the properties section of executable.
Messages
Messages section allows to create custom messages when errors occur. You can enable this option by checking “Add custom messages”.
Step 4 : Compile and Make Executable
Once the entries are filled, you have to save the configuration. For saving, click on the Floppy DIsk icon from the menu. Your configuration entries will be saved as an xml file called config.xml. After saving click on the Setting like icon next to save button to start converting to executable file.
Launch4J Example Configuration
If it the wrapping was a success, you should see the following messages in Log
Compiling resources
Linking
Wrapping
Successfully created D:\Library Assistant\dist\Library Software.exe
You can start your program from executable by clicking on the Play button from menu.
Watch video tutorial from Genuine Coder YouTube channel :-
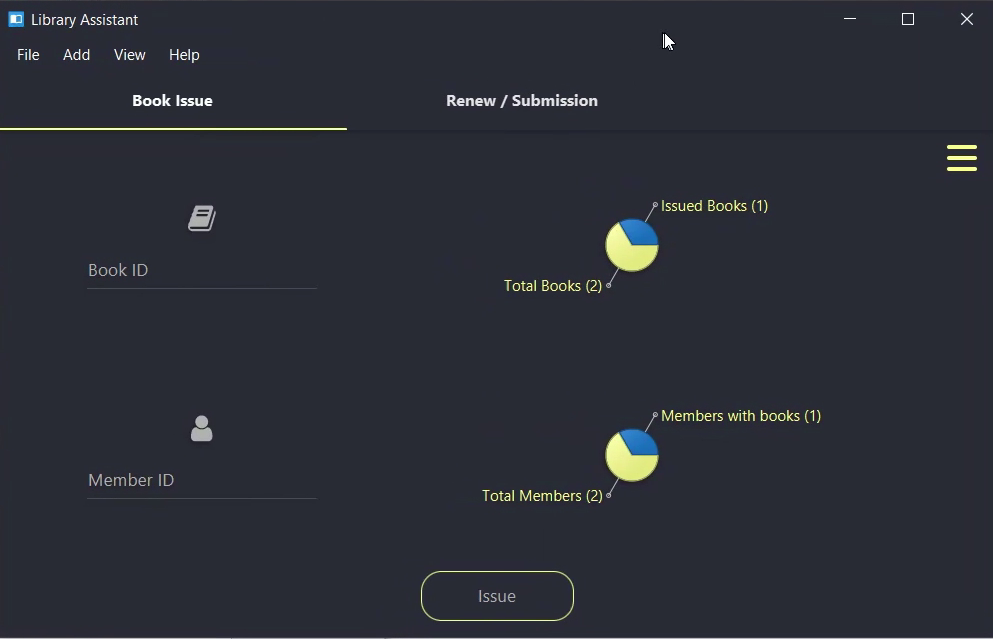
Programming can only be learned properly with continuous practice. When you work on a complete software project, you’ll have to understand how to put things together and how to implement data communication between various modules etc. So, I decided to share a complete javafx project development series.
I am publishing a series of tutorial videos on YouTube about developing a complete Library Management Software using JavaFX. This tutorial series start with basic designing and continue towards more complex programming like database integration, multi level user interface design, material design etc. I have tried my best to keep things as simple as possible.
Apache Derby database is used for storing member, book and other informations. Derby is a lightweight, purely java based relational database. It has common sql syntax. So you can get things done without any issues. I have used Scene Builder for designing user interfaces. Additionally CSS is used to get some nice effects for buttons, text fields etc.
Dashboard
For development, I am using NetBeans IDE with Scene Builder. Make sure that you have the latest java installed. Some of the libraries used in the project requires JDK 8u40 or better. So it is better to have the latest java version installed.
I hope you find this tutorial series useful. Learning component by component is a little tedious task. This set of videos will help you to understand how to coordinate various components together. You can find the source code of this application at GitHub. I have committed at the end of almost all tutorial videos so that you can find the exact code that i have used for explanation.
Moving to Material Design
Material design is an awesome concept. It defines a new method for designing and developing user interfaces across multiple platforms. For making this software materialistic, I have used JavaFX material design library named JFoenix. It provides built-in material design based components that can be easily styled with CSS.
Library Software login screen
The above image shows login screen from new design. There are only 3 colors and every components has it own padding and spacing. If you just give enough spacing for your components on the screen, it will tremendously improve the overall look.
I have recorded the complete development as tutorial. You can find them in the following PlayList. Subscribe to Genuine Coder YouTube channel for more tutorials in the future.
Drag and drop allows data transfer between various components in your javafx application. It allows transferring data in between your internal nodes or between two applications.
A drag-and-drop gesture happens as follows: The user click a mouse button on a gesture source, drags the mouse, and releases the mouse button on a gesture target. While dragging the data, the user gets visual feedback, which denotes locations that do not accept the data and, when over a target that accepts the data, gives a hint where to drop the data.
The data is transferred using a dragboard, which has the same interface as a system clipboard but is only used for the drag-and-drop data transfer.Various types of data can be transferred such as text, images, URLs, files, bytes, and strings.
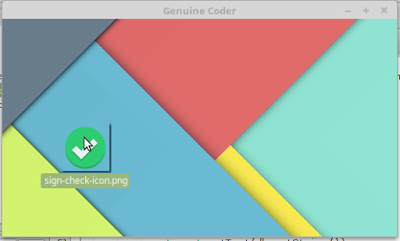
1. Receiving Data From other applications
Receiving data from other applications through drag and drop is very simple in JavaFX. The method setOnDragOver of node allows controlling what happens when something is dragged over the node. For example, as you can see in the top image, I have added a simple ImageView and implemented setOnDragOver to accept when files are dragged over it. Let’s see the code.
imageView.setOnDragOver(new EventHandler() {
   public void handle(DragEvent event) {
      if (event.getDragboard().hasFiles()) {
         event.acceptTransferModes(TransferMode.ANY);
      }
      event.consume();
   }
});
In this code, I have added event handler for the image view for Drag Over case. The getDragboard method gives the Dragboard object which contains the files being transferred. The method hasFiles() is invoked to make sure that, the dragged content is a file. This is done to avoid when something other than files are dragged, like string or rich text content.
event.acceptTransferModes(TransferMode.ANY);
This line makes the component ready to accept the incoming data. As a result, we will get a hand with a plus symbol when dragged over image view.
The last thing we have to do is to accept the files when dropped. The method setOnDragDropped allows to achieve this. In our case we have to do as follows.
In this code, the list of incoming files is taken using event.getDragboard().getFiles() method. So we can send a list of file instead of a single one. From the received files, we have to create an image and set it as the image for the imageview.
So, this is as simple as a drag and drop operation can get. Now let’s see how we can implement drag and drop for two internal nodes.
2. Drag and Drop between two internal components
For making a node ready to be dragged, we can use setOnDragDetected method. This function will be called whenver a drag operation is done on the component. Here, source is a Text variable that contains some text.
When the source is dragged, The Dragboard class from javafx.scene.input.Dragboard is constructed by calling source.startDragAndDrop() method. Transfer modes define the type of transfer that happens between the gesture source and gesture target. Available transfer modes include COPY, MOVE, and LINK.
Inorder to send data from the source an instance of ClipboardContent is used. Since we are sending String data, putString method is used. After setting the content, it is then associated with Dragboard db.
Now source will allow dragging string data. ie, It act as a source.
source.setOnDragDetected(new EventHandler<MouseEvent>() {
    public void handle(MouseEvent event) {
        Dragboard db = source.startDragAndDrop(TransferMode.ANY);

        ClipboardContent content = new ClipboardContent();
        content.putString(source.getText());
        db.setContent(content);

        event.consume();
    }
});
Now just like we did in the image view, we need to setup the Text at the destination ready to accept the incoming string. This can be done by using setOnDragOver and setOnDragDropped.
Watch the complete tutorial about implementing Drag and Drop for your JavaFX Application.
Navigation drawer provides an intuitive way to keep main navigation controls of the UI clean. The drawer will only be made visible to the user on certain actions like button click so that we can make use of that space for much more important things yet keeping controls reachable with single click.
Android introduced the material design Navigation bar or side pane or whatever you call, with its Material design goodness. JFoenix library provides JFXDrawer component.
I have made a video to make things more clear. You can watch it right here.
If you are the kind of person who do not like to watch tutorial videos, read from here. I will explain it step by step.
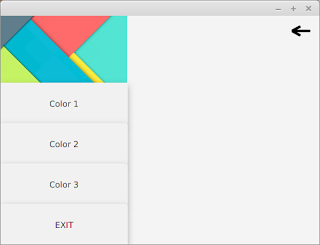
Step 1 : Design Content For Navigation Drawer
At first, you have to create an FXML layout for the Navigation bar itself. This layout can then be inflated to the navigation bar holder later. The above image shows a pretty simple VBox layout that consists of 4 Buttons and one image view. This content can the be loaded to a VBox variable in our code (from the main controller) using the following code
Now we have the navigation bar content. In this step, you have to design the main application window. The JFXDrawer can be added using scene builder by drag and drop. Once you position the drawer on the space you want, you can set the drawer direction to LEFT, RIGHT, TOP or BOTTOM from the Properties section of Scene Builder.
I have added a JFXHamburger for material design look and feel. I have thouroughly explained how to use JFXHamburger in this video https://www.youtube.com/watch?v=rCnPY9Kj4J0 . If you don’t like to have a Hamburger, you can use a simple button. Add an action listener to your button and add this code.
@FXML
//Accessing FXML Element
JFXDrawer drawer;
//Add this in ActionListener
if(drawer.isShown())
drawer.close();
else
drawer.open();
The navigation drawer can be made visible by using the open() method. It can be made invisible through the function call close().
Step 3 : Setting the content of Drawer
Now we have two separate components. The Drawer and Main window. We can attach the box loaded in step 1 to our drawer in main window using the following code.
drawer.setSidePane(box);
Step 4 : There is no 4th step. You are done !
I used to get happier when things get completed sooner that expected. That’s why there is a step 4 🙂
Run the code now. When you click on your button or Hamburger,you should see the navigation drawer like this. If you have some alignment issues for the drawer, increase the value of “Default Drawer Size” from the Scene Builder.
Recently, as part of library management software tutorial, I have created more elaborate tutorial about creating Navigation Drawer. It contains more complex buttons with icons and CSS styling. Watch those tutorial videos from the following link.
One problem I have faced when developing java applications was the old look. Even after the introduction of Nimbus look and feel, the user interface components felt too static and dead. Then JavaFX came in to the scene and provided a much better interface and control elements.
In this post, I would like to discuss on how to design our JavaFX applications using material design components. The developers at JFoenix had done an impressive job on developing material library for JavaFX. All that we have to do is to download the library and add it into Scene Builder and our application. I have made a video tutorial on setting-up the JFoenix library and making a material login interface.
Adding JFoenix to Scene Builder
First, download the library from https://github.com/jfoenixadmin/Jfoenix. Once you get the Jar file, you have to add it into Scene Builder. Once you add this library to Scene Builder, you can use components available in JFoenix library in your project with just drag and drop.
Within SceneBuilder GUI, there is a setting button, as you can see in the following screenshot. Once you click on it, you will get a context menu. Select JAR/FXML manager which will open the library manager window.
JavaFX Scene Builder JAR/FXML manager
Then, select Add Library/FXML from file system from the window. This will open a file selection window. Select the JFoenix Jar file. This will open another window listing all the components available in the library. Just select all. Once you successfully add this library, it can be seen under installed libraries/FXML files list.
External library window
After adding the components to Scene Builder, It’s pretty much drag drop. For JFXButton, you can set ripples, set it as RAISED…. oh my goodness! I have been developing desktop applications for a long time and this is the first time getting my hands on these much cool UI components.
Watch Video Tutorial about using JFoenix library to make a login Application
I have posted a video tutorial in Genuine Coder YouTube channel about using JFoenix library. Watch it right from here.
Download Sample Project Source Code : Google Drive
Download Sample Project Application : Google Drive
Complete JFoenix Components Tutorial
Watch JFoenix tutorial from following playlist. Contains 19 videos about JFoenix components.
JavaFX Material Design Library Management Software Development
I have created a complete library management program using JavaFX and JFoenix based on Material Design. The Complete tutorial of the development is available in Genuine Coder YouTube Channel. Read more about this project
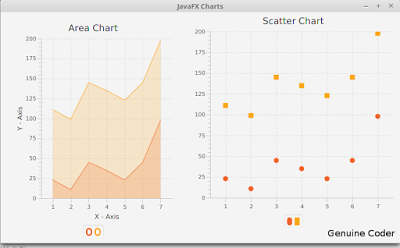
JavaFX provides a powerful set of Charts/Graphs that can be added very easily to your programs. Frankly, It is even easier than adding a Table in JavaFX. Graphical charts are available in the javafx.scene.chart package.
Bar Chart
This video describes how to add Bar Chart to your JavaFX program.
Bar Chart data can be represented using an XYChart.Series object. All that you have to do is to make a new object and add data to it.
XYChart.Series set1 = new XYChart.Series<>();
Data can be added to this set using the code. Here XYChart.Data() takes two parameters. First one is for the X-Axis(Horizontal) and the second one is for Y-Axis(Vertical).
Finally, Connect the created series with your JavaFX Bar Chart object using getData().addAll() method.
SalaryChart.getData().addAll(set1);
AddAll() method allows to add more than one series of data to your chart. For example if i have set1,set2 and set3 then i can add all of them by using a comma seperated list.
SalaryChart.getData().addAll(set1,set2,set3);
Pie Chart
JavaFX Pie Chart uses an ObservableList which is very similar to XYSeries.Series we used for Bar Chart. This video explains how to use pie chart.
ObservableList<PieChart.Data> pieChartData

= FXCollections.observableArrayList(

new PieChart.Data("Cars", 13),

new PieChart.Data("Bikes", 25),

new PieChart.Data("Buses", 10),

new PieChart.Data("Cycles", 22));

pieChart.setData(pieChartData);
Here i have created an ObservableList and added 4 values. The pie chart takes all of these values and allocate a percentage for each one.
For eg, Percentage of cars = 13/(13+25+10+22) = 18.5%
The data then can be associated with the chart using the same code used for Bar chart or using a simple alternative
pieChart.setData(pieChartData);
provided, pieChart is the Pie Chart object and pieChartData is the ObservableList.
Line Chart
Construction of Line Chart in Java is very much similar to Bar Chart. It takes the same XYChart.Series object.
XYChart.Series series = new XYChart.Series(); //Make a new XYChart object

//Add Data

series.getData().add(new XYChart.Data(“1”, 23));

series.getData().add(new XYChart.Data(“2”, 14));

series.getData().add(new XYChart.Data(“3”, 15));
Finally, associate the data with Line Chart.
LineChart.getData().addAll(series);
Area Chart and Scatter Chart
These two are explained together because, both of these Charts takes same type of data. Yes, the XYChart.Series object. We can use the same example used above.
XYChart.Series series = new XYChart.Series(); //Make a new XYChart object

//Add Data

series.getData().add(new XYChart.Data(“1”, 23));

series.getData().add(new XYChart.Data(“2”, 14));

series.getData().add(new XYChart.Data(“3”, 15));
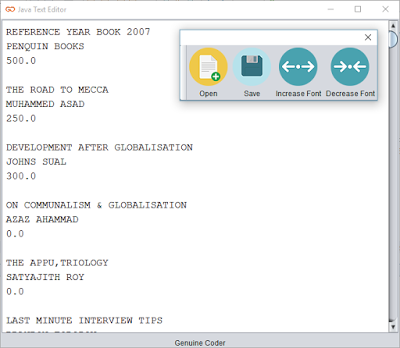
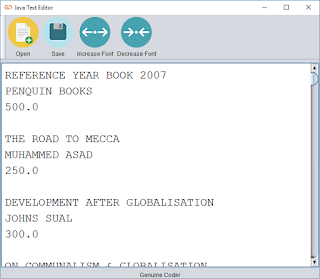
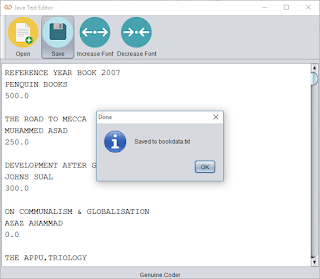
Today, I am going to make a Text Editor program using our Java. Yeah, Like notepad. I want to add some basic functionalities like Opening a file, Saving a file and option to change the font size. It will only take less than 100 lines of code to do this (Excluding User Interface).
I started with the toolbar javax.swing.JToolBar and added 4 buttons. Button with simple label logo and text for open,save and font size changing. The display area is simply a JTextArea with monotype font.
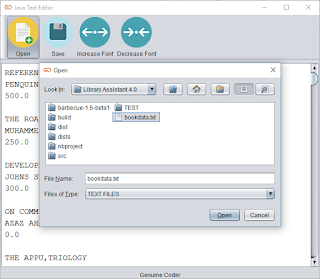
Opening a Text File
It is pretty straightforward to use JFileChooser to select a file. When I started thinking about opening a file, I wanted a File Chooser that filter and display only text files.Thanks to FileNameExtensionFilter from javax.swing.filechooser.FileNameExtensionFilter. I am able to display only text files on the JFileChooser using the code
FileNameExtensionFilter filter = new FileNameExtensionFilter("TEXT FILES", "txt", "text");
fileOpener.setFileFilter(filter);
When the user selects a file and click open, The Scanner from java.util.Scanner is used to read the file.
Scanner scn = new Scanner(file);
String buffer = "";
while (scn.hasNext()) {
   buffer += scn.nextLine() + "\n";
}
display.setText(buffer);
The “file” is nothing but the file taken from the JFileChooser and the while loop will continue until the end of file. “display” is the name of JTextArea, our display.
Saving a Text File
A global file variable called “currentEditingFile” is maintained to know whether we are working on a new, unsaved data or on an opened file. If “currentEditingFile” is null we have a new uncreated file. So the saving method will look to “currentEditingFile” and if it is null a JFileChooser will be opened to select the location for the new file. After selecting the directory, file name is taken from JOptionPane input dialog.
The file is then written onto the file Using PrintWriter from java.io.PrintWriter.
Changing Font Size
A global variable with default font size as 14 is maintained and increased or decreased depending upon the button pressed.
display.setFont(new java.awt.Font("Monospaced", 0, ++fontSize));  //Increase font size
display.setFont(new java.awt.Font("Monospaced", 0, --fontSize)); //Decrease font size
Extra Works
It is not acceptable to exit the program without any notice when the user clicks on the Close button. In order to add a save confirmation, i made an override on the Window Closing operating and added a confirmation message. It is done from the constructor itself
this.addWindowListener(new WindowAdapter() {
   @Override
   public void windowClosing(WindowEvent e) {
	 super.windowClosing(e); //To change body of generated methods, choose Tools | Templates.
	 int ans = JOptionPane.showConfirmDialog(rootPane, "Save Changes ?", "Confirm", JOptionPane.YES_NO_OPTION, JOptionPane.QUESTION_MESSAGE);
	 if (ans == JOptionPane.YES_OPTION) {
	   //Write Changes
	   saveChanges();
	 }
   }
});
So that’s it. Download the program / source code from below buttons. If this was helpful please like me on facebook and keep visiting for more cool programs and sources.
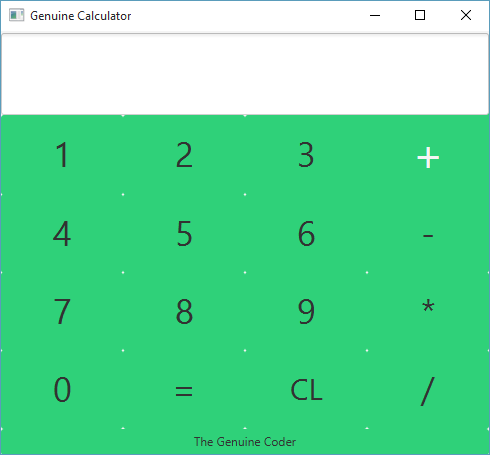
JavaFX is a wonderful improvement to Java programming language. It includes a wide number of new user interface controls and the ability to add cascade style sheets (CSS), Animations etc. Today, Let’s see how we can build a beautiful calculator in JavaFX with CSS styling. This tutorial is done using NetBeans IDE and JavaFX Scene Builder 2.0. Watch The Complete Tutorial Video below.
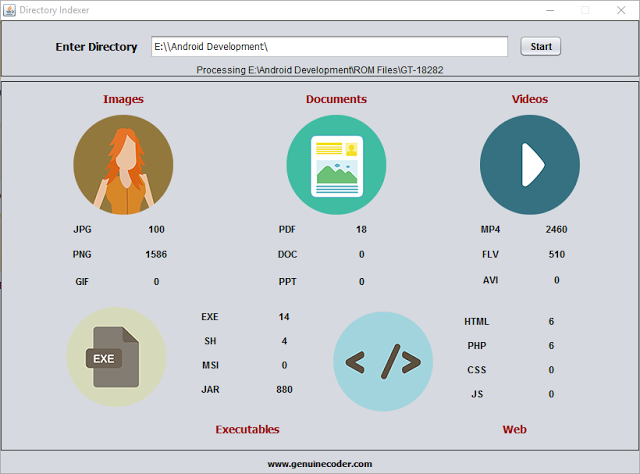
I thought it will be cool if I can make a program that scans some pen drive or hard disk connected to my PC in order find out how many images,videos or documents are there. In simple terms, a directory or folder/file indexing program. Thanks to java again.
Directory Indexer Main Window
Directory indexer uses the FILE class from java.io package. An object of FILE can store both files and directories. The parent or Root directory, from where we start indexing is read from the user using normal JTextField. Then a function called processDirectory() is called with argument as the given input text.
The function, processDirectory() then create a new File with argument as given path. Then the list of files and directories present inside the directory are taken as a file array using listFiles() method from File class. If you are interested in finding more about file listing, read How tocreate a file explorer in java.
File[] listFiles = fl.listFiles();
After getting the list of contents in the given directory, a for loop is applied which will go through all the available contents (objects of File class). As we said earlier, it can be either a file or a directory. If it is a file, then we check its extension by splitting the name string using “.” Symbol. The fun thing about extension is, a file can contain more than 1 dotes. For example, I want to name my file as “genuine.coder.image.jpg”. It is perfectly alright to use this filename and if we go for splitting and taking the string after first dot, we will get “.coder” which is definitely not what we are expecting. So the solution is to find the string after last dot and it is achieved using the code
String[] extension = listFile.getName().split("[.]");
 String ex = extension[extension.length - 1];
So now we have the extension. All that we have to do is to check the string against the required extension (jpg,png,pdf etc) and increment the counter.
 if (ex.equalsIgnoreCase("jpg")) {
    jpg.setText(Integer.parseInt(jpg.getText()) + 1 + "");
 }
I found this way of incrementing the counter as a simple one (not efficient at all) since I don’t have to maintain some arrays for each separate extensions.
If the file object which is being processed is not a file, then it may be a directory. If it is, then we have to get inside of that and index them also. A simple recursive call to the function will do the trick.
Indexing Completed Message
 if (listFile.isDirectory()) {
      processDirectory(listFile.getAbsolutePath()); //Recursive call to processDirectoy
 }
I have used a thread to call the processDirectory() function. If I don’t, the updating on the UI (incrementing the counter) will be lagging. Using just one new thread, it is possible to achieve better refreshing and processing rates. For this purpose, a new class named directoryProcessor is created and implemented as Runnable which is then passed as a runnable object for new Thread object. The processDirectory is called from inside the run() method of directoryProcessor.
Class directoryProcessor
class directoryProcessor implements Runnable {
     @Override
     public void run() {
       processDirectory(input.getText());
       sts.setText("Completed");
       JOptionPane.showMessageDialog(rootPane, "Indexing Completed", "Done", JOptionPane.INFORMATION_MESSAGE);
     }
   }
Function processDirectory()
public void processDirectory(String dir) {
     File fl = new File(dir);
     sts.setText("Processing " + dir);
     File[] listFiles = fl.listFiles();
     for (File listFile : listFiles) {
       if (listFile.isFile()) {
         String[] extension = listFile.getName().split("[.]");
         String ex = (extension[extension.length - 1]);
         if (ex.equalsIgnoreCase("jpg")) {
           jpg.setText(Integer.parseInt(jpg.getText()) + 1 + "");
         } else if (ex.equalsIgnoreCase("png")) {
           png.setText(Integer.parseInt(png.getText()) + 1 + "");
         } else if (ex.equalsIgnoreCase("gif")) {
           gif.setText(Integer.parseInt(gif.getText()) + 1 + "");
         } else if (ex.equalsIgnoreCase("ppt")) {
           ppt.setText(Integer.parseInt(ppt.getText()) + 1 + "");
         } else if (ex.equalsIgnoreCase("doc")) {
           doc.setText(Integer.parseInt(doc.getText()) + 1 + "");
         } else if (ex.equalsIgnoreCase("pdf")) {
           pdf.setText(Integer.parseInt(pdf.getText()) + 1 + "");
         } else if (ex.equalsIgnoreCase("mp4")) {
           mp4.setText(Integer.parseInt(mp4.getText()) + 1 + "");
         } else if (ex.equalsIgnoreCase("flv")) {
           flv.setText(Integer.parseInt(flv.getText()) + 1 + "");
         } else if (ex.equalsIgnoreCase("avi")) {
           avi.setText(Integer.parseInt(avi.getText()) + 1 + "");
         } else if (ex.equalsIgnoreCase("exe")) {
           exe.setText(Integer.parseInt(exe.getText()) + 1 + "");
         } else if (ex.equalsIgnoreCase("sh")) {
           sh.setText(Integer.parseInt(sh.getText()) + 1 + "");
         } else if (ex.equalsIgnoreCase("jar")) {
           jar.setText(Integer.parseInt(jar.getText()) + 1 + "");
         } else if (ex.equalsIgnoreCase("html")) {
           html.setText(Integer.parseInt(html.getText()) + 1 + "");
         } else if (ex.equalsIgnoreCase("php")) {
           php.setText(Integer.parseInt(php.getText()) + 1 + "");
         } else if (ex.equalsIgnoreCase("css")) {
           css.setText(Integer.parseInt(css.getText()) + 1 + "");
         } else if (ex.equalsIgnoreCase("js")) {
           js.setText(Integer.parseInt(js.getText()) + 1 + "");
         }
       } else if (listFile.isDirectory()) {
         try {
           processDirectory(listFile.getAbsolutePath());
         } catch (Exception e) {
           System.err.println("Exception - " + e.getMessage());
         }
       }
     }
   }
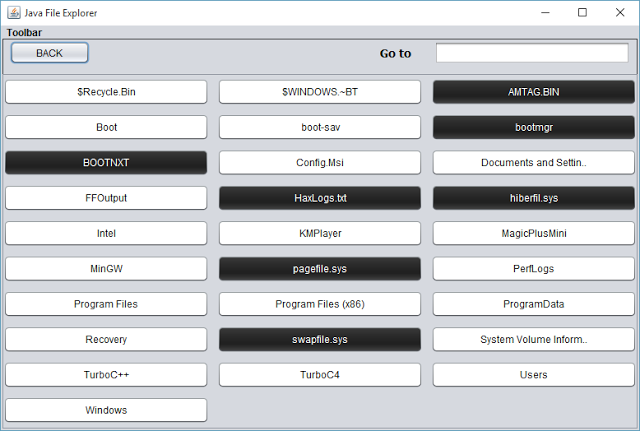
Let’s develop a basic file explorer using java. Java’s FILE class from java.io package provides simple way to represent both files and directories. That means, the same class can represent both files and directories.
This program starts by creating a new file in the root. For example we can start at C drive in windows or root(/) in Linux.
File f = new File(“C:\”);
The list of available files and folders present in the given directory can be accessed using the function listFiles(). It returns a list of files pointing to the contents inside the directory. Using a for loop buttons are created dynamically for each of these files and added to the container panel.
Handling Files
The button can be either file or folder. Using isFile() function in the FILE class, it is possible to determine whether a file is a file or directory. If it is a file, we then have to open it, if possible.
Java provides a powerful handle to the operating system using ‘Desktop’ class from java.awt package. Using Desktop we can open a file using the default program associated for it.
Desktop.getDesktop().open(FileName);
Open() throws an IOException and should be caught properly.
Handling Directories
When we encounter a directory, which is the false case for isFile(), we have to display the contents in that directory. What we have to do here is a simple recursive call to the display function using this path after removing the all currently present components in the container.
Container.removeAll() should do the trick.
After adding the new buttons, it is necessary to refresh the panel. Remember that the newly added components will not be visible until you refresh the panel using revalidate() and repaint() functions present in the Panel class.
container.revalidate();
 container.repaint();
Adding a back button
It is a basic requirement for File explorers to add back buttons. In order to do so, we have to remember the history of directories. A stack is used for this purpose. Whenever a directory is accessed, its parent is added to the stack. When the back button is pressed, the top of the stack is popped and that directory is displayed.
Go to directory
Again, the same display function LoadBase() is utilized here. LoadBase taked the full pathname of directory and when the user gives the directory path directly, all that we have to do is to pass the given text to LoadBase(). The path may be invalid and it is displayed using message dialog. isExist() function in the file class helps to check whether a file/directory exists.
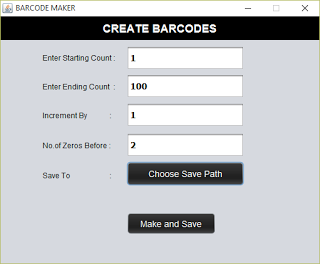
We deal with barcodes every day. Compared to QR codes or Quick Response codes, it is simple to generate, read using a barcode reader. This is a java application that uses ‘barcode4j’ library to generate barcodes. Barcode Maker allows to create large number of barcodes between specified ranges. It basically reads the starting count, make the barcode and save to specified location. Then increments the number by the given increment interval, make and save. This is repeated until the end count given reached.
Inputs
Starting Count
From which number the barcode is to be generated. Type 0 to start from 0
Ending Count
Up to what number the barcode is to be generated. Say 100
Increment by
Next barcode to be generated is found using the formula Starting Count + Increment by
No of zeros before
Will help to adjust the barcode width for smaller number like 0 and 1. If you are generating barcodes from 0-1000 then starting barcodes will be very small in width. This can be fixed by adding no of zeros before the number. Say 2
Save to
Choose where you want to save the generated barcodes


