Flutter is the new developer-friendly cross-platform open-source framework developed by Google. The flutter community is growing and as of 2022, with flutter 3, it is stable for Android, iOS, Web and Desktop platforms! Flutter 3 added stable support for Linux desktop and macOS platform.
In this tutorial for beginners, we will learn how to create a simple flutter application and build it as a native desktop application for Linux.
Setting up the flutter development environment
Based on your platform, the steps for installing the flutter and configuring is a bit different. In this tutorial, we will cover the setting up of flutter SDK for Linux Ubuntu platform.
If you have a different platform, please head over to flutter install documentation and install Flutter SDK. Once you have installed it, move on to enabling desktop support section directly.
Install and configure flutter for Ubuntu/Mint
-
Step 1: Install the flutter SDK using snap
sudo snap install flutter --classic -
Step 2: Install additional dependencies for flutter-sdk’s development
sudo apt-get install clang cmake ninja-build pkg-config libgtk-3-dev liblzma-dev -
Step 3 [OPTIONAL]: Link Android Studio to the flutter by providing Android Studio installed path
flutter config --android-studio-dir /your/path/to/android-studio/ -
Step 4 [OPTIONAL]: Link Android SDK to the flutter by providing Android SDK installed path
flutter config --android-sdk /usr/local/bin/Programs/android-sdk/ -
Step 5 [OPTIONAL]: Accept Android SDK licenses by running the following command
flutter doctor --android-licenses -
Step 6: Run the flutter doctor command again. Now all dependencies should be ticked!
flutter doctor --android-licenses

Enable flutter desktop development support
First things first, let’s confirm that flutter SDK desktop support is enabled. To do this, run the command “flutter devices” and make sure that your desktop platform is indeed listed as shown in the below screenshot. Note that, based on your platform, it could be Linux (desktop), Windows (desktop) or macOS (desktop).

If you can’t see the desktop in the devices list, you need to enable your desktop platform manually. It can be easily done with just the following command.
#Command format
flutter config --enable-<platform>-desktop
#Enable Linux desktop support for flutter
flutter config --enable-windows-desktop
#Enable Windows desktop support for flutter
flutter config --enable-linux-desktop
#Enable macOS desktop support for flutter
flutter config --enable-macOS-desktop
Create a new flutter desktop project
Now, let’s create our flutter project. Flutter project can be created with “flutter create” command. Let’s create a new flutter project named “genuine_flutter_app” with the following command. You can use your project’s name.
flutter create genuine_flutter_app
Now, you will see the following output mentioning that the flutter app is indeed created.
Creating project genuine_flutter_app...
Running "flutter pub get" in genuine_flutter_app...              1,968ms
Wrote 127 files.

All done!
To run your application, type:

  $ cd genuine_flutter_app
  $ flutter run

Your application code is in genuine_flutter_app/lib/main.dart.
The flutter SDK has just created a new folder with default project template and added all the required files for us. We can run the project right away and see if all is good so far.
Run the flutter app on desktop
Since the “flutter create” command created the project with template code, we can run it and test it right away. So, let’s run the project with flutter run command. Since I am using Linux, I will be using “-d linux”. If you are using Windows or Mac, make sure to use your platform’s name there.
#cd into the project directory
cd genuine_flutter_app
#Run the project
flutter run -d linux
and…here we go! You will now see the application window opened. This is the default template project.

Customize the default project
Let’s customize the default project and see how we can program in dart. To achieve this, let’s open the project on our IDE. I am using VSCode. You can choose your own editor.
Open the file lib/main.dart. This is the source file that is generating the sample demo project. Let’s then customize the project.

Q1. How to set title of the flutter AppBar?
Currently, the AppBar title is ‘Flutter Demo Home Page’ that is passed on to the MyHomePage widget. So, let’s change it into ‘My First Flutter Desktop App!’ by changing it in the MyApp widget.
Q2. How to change the AppBar color?
The AppBar color can be changed from the theme attribute. Set the primarySwatch as your preferred color and that will update the AppBar color.
class MyApp extends StatelessWidget {
  const MyApp({Key? key}) : super(key: key);

  @override
  Widget build(BuildContext context) {
    return MaterialApp(
      title: 'Flutter Demo',

      //Set the app color there
      theme: ThemeData(
        primarySwatch: Colors.blue,
      ),

      // Set the title here
      home: const MyHomePage(title: 'My First Flutter Desktop App!'),
    );
  }
Q3. How to change the app body color?
To set the background color for the body section, you need to set the background for the scaffold.
....
@override
Widget build(BuildContext context) {
  return Scaffold(
    //This is where the AppBar title is set
    appBar: AppBar(
      title: Text(widget.title),
    ),
    //Set your preferred background color
    backgroundColor: Colors.grey,
....
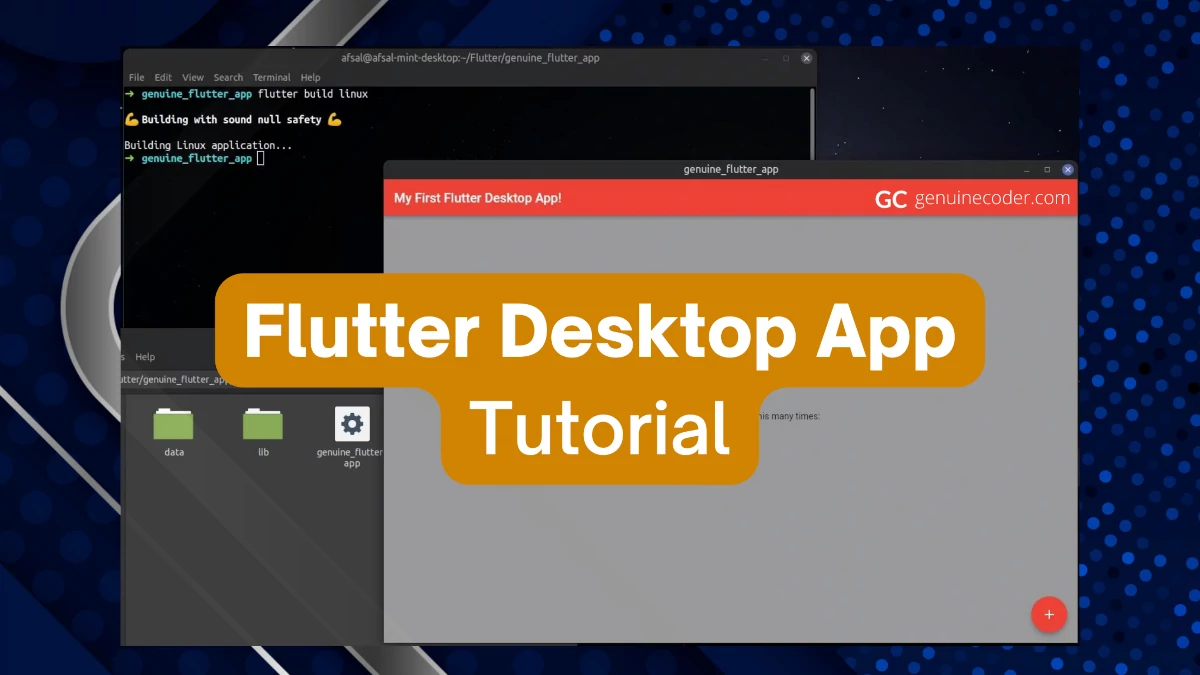
Build and release executable file from flutter project
Now that we have a working flutter application, let’s see how we can build an executable file for our project. Thanks to flutter, this is also an easy step. You can execute the “flutter build” command to start the building. If you are using Windows or Mac, make sure to use your platform instead of Linux.
#Generates Linux runnable image (application/x-executable)
flutter build linux
#Generates Windows runnable .exe file
flutter build windows
#Generates macOS runnable .app file
flutter build macos
This will build an executable file for the project. The executable can then be found at the following path. [your_platform] can be Linux, windows and macOS.
build/[your_platform]/x64/release/bundle

Conclusion
In this tutorial, we have learned how to create a Flutter desktop application and build a release executable file from the project. We will be posting more flutter related tutorials in the future. If you liked this tutorial, you might also be interested in checking out the following articles.


51 thoughts on “Create your first flutter desktop application – Flutter tutorial”