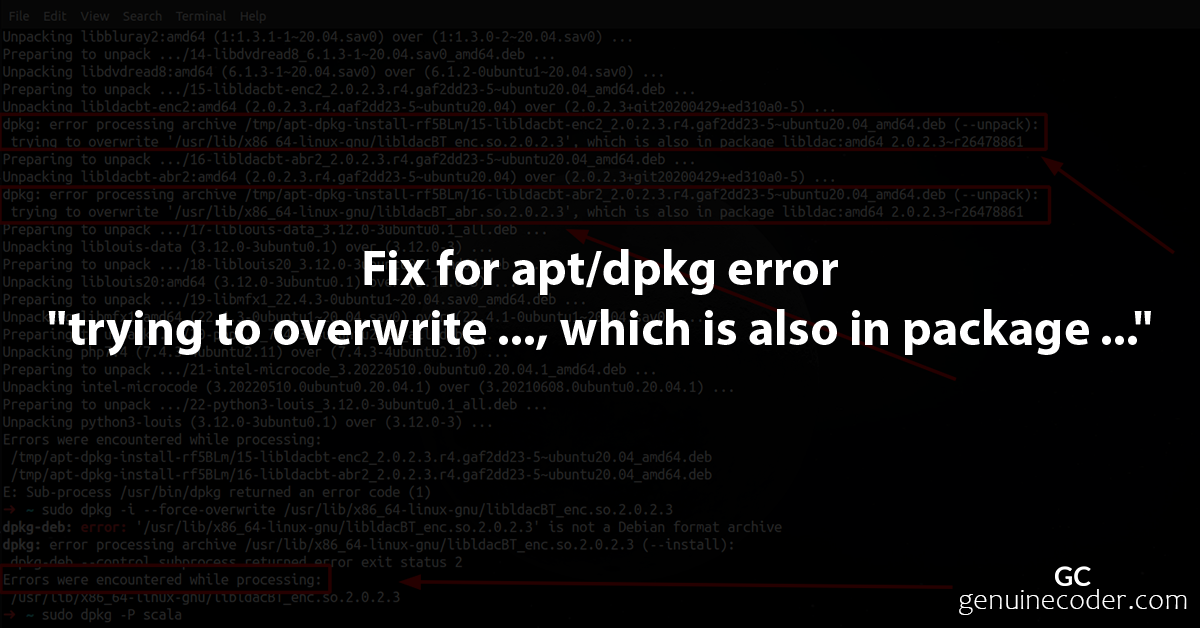
Let’s see how to solve the problem of apt or dpkg failing to install packages due to errors like the following. This is happening because the new package you are trying to install is overwriting a file that is part of another installed package.
Sample Error Message
dpkg: error processing archive /tmp/apt-dpkg-install-rf5BLm/15-libldacbt-enc2_2.0.2.3.r4.gaf2dd23-5~ubuntu20.04_amd64.deb (--unpack):
 trying to overwrite '/usr/lib/x86_64-linux-gnu/libldacBT_enc.so.2.0.2.3', which is also in package libldac:amd64 2.0.2.3~r26478861
Preparing to unpack .../16-libldacbt-abr2_2.0.2.3.r4.gaf2dd23-5~ubuntu20.04_amd64.deb ...
Unpacking libldacbt-abr2:amd64 (2.0.2.3.r4.gaf2dd23-5~ubuntu20.04) over (2.0.2.3+git20200429+ed310a0-5) ...
dpkg: error processing archive /tmp/apt-dpkg-install-rf5BLm/16-libldacbt-abr2_2.0.2.3.r4.gaf2dd23-5~ubuntu20.04_amd64.deb (--unpack):
 trying to overwrite '/usr/lib/x86_64-linux-gnu/libldacBT_abr.so.2.0.2.3', which is also in package libldac:amd64 2.0.2.3~r26478861
How to resolve the “trying to overwrite” Issue?
There are multiple solutions below based on when the error occurred. If you got the issue while running an apt command, then check the apt section. If it happened while running a dpkg command, then check the dpkg section.
With DPKG
If the error occurred while you were executing the apt command, then use the command as follows.
All programs require a nice-looking icon or logo on the taskbar and the window to make it look professional. JavaFX provides easy ways to set up an application icon using any image of your choice, whether it be JPG or PNG or something else. In this tutorial, let’s see how to set up an icon for the application
Set JavaFX Window/Stage icon from an image file
The usual method of attaching an icon to the JavaFX application is that, you simply include the icon image inside the JAR file as a resource and then use it. Let’s see how you can do that.
Step 1: Add the icon to the resource directory
First, add the image into the resource directory. You can use any supported image formats, like PNG, JPEG etc.
Step 2: Attach the icon to the application window
Now, let’s attach the image from the resource directory to the window, aka stage. The following code snippets show how to do that in an example program.
import javafx.application.Application;
import javafx.scene.Scene;
import javafx.scene.image.Image;
import javafx.scene.layout.StackPane;
import javafx.stage.Stage;

public class JavaFXIconExample extends Application {

  @Override
  public void start(Stage stage) {
    Scene scene = new Scene(new StackPane(), 320, 320);

    //Attach the icon to the stage/window
    stage.getIcons().add(new Image(JavaFXIconExample.class.getResourceAsStream("/logo.png")));

    stage.setTitle("Sample program!");
    stage.setScene(scene);
    stage.show();
  }

  public static void main(String[] args) {
    launch();
  }
}
So in the above example, we are attaching the icon to the primary stage (also known as root stage). If you want to add logo to the other stages you create, you can repeat the same process again to add icons to them as well, with just one line of code.
Now, let’s say you want to add the image dynamically from a URL instead of adding from an image file, that is also easily possible. This can be done with just one line of code, as shown below.
In this example, I have used genuine coder logo to dynamically load the application icon. The advantage of using the logo from a URL is that, you can change the logo in the server without touching your program once it is rolled out to your customers.
Conclusion
JavaFX provides a one-line option to attach images/logo to the windows. The logo image can be loaded from an image file or from a URL.
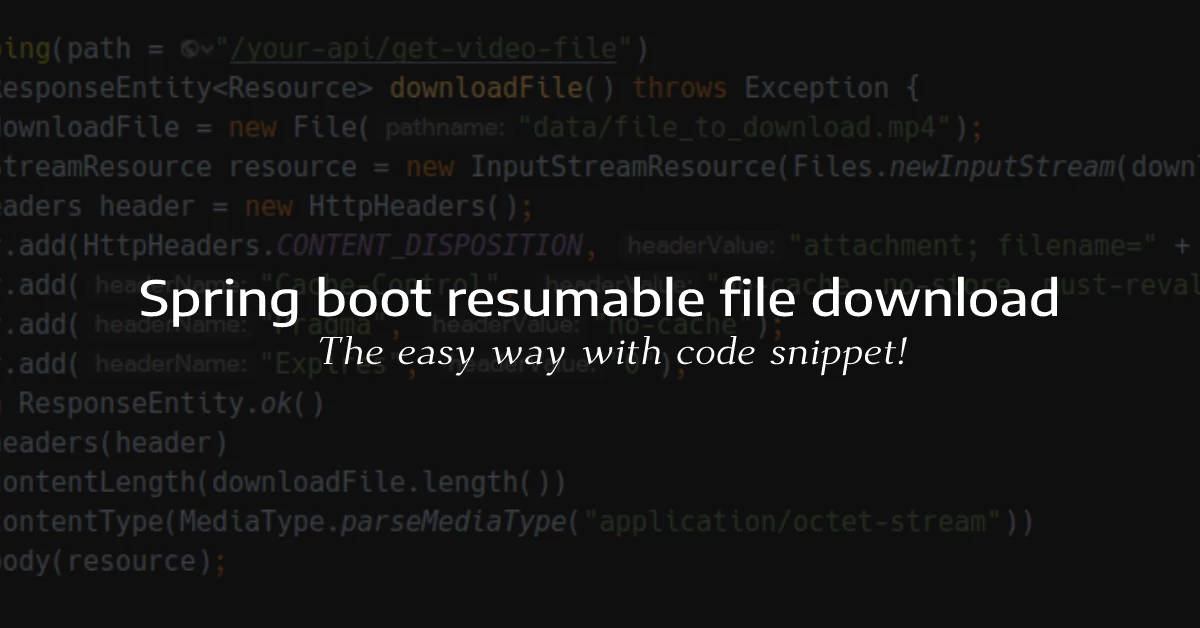
Sometimes, we will have to provide rest API endpoint for downloading certain files. In this article, we will see how to provide an option to download any file from a java spring rest API controller, with example code snippet. We will use spring-boot annotations here to make things easier and straightforward. This method provides the file download option with resume support.
Configure a file for download with spring controller
Let’s assume that you have a file that you want to provide for download at “data/file_to_download.mp4”. Then you can write the controller as follows to make it downloadable by any browser. Also, the REST API endpoint is given in the @GetMapping annotation.
The “application/octet-stream” media type is useful for providing the file as a raw type. The HttpHeader provides information about the file metadata, including the size of the file so that the browser can properly determine its size and create a proper download progress bar.
Providing spring boot file download based on GET parameter
Now, let’s say you want to provide multiple files for download and don’t want to write separate functions for each. In this case, you can simply accept the name of the file to be downloaded as a request parameter and use it to process the file downloading. Let’s see how this can be done in the following code snippet.
@GetMapping(path = "/your-api/download-file")
public ResponseEntity<Resource> downloadBenchmarkFile10Mb(@RequestParam("file-name") String fileName) throws Exception {
  File downloadFile = new File(fileName);
  //Return 404 error if the file is not found
  if (!downloadFile.exists()) {
    return ResponseEntity.noContent()
        .build();
  }
  InputStreamResource resource = new InputStreamResource(new FileInputStream(downloadFile));
  HttpHeaders header = new HttpHeaders();
  header.add(HttpHeaders.CONTENT_DISPOSITION, "attachment; filename=" + downloadFile.getName());
  header.add("Cache-Control", "no-cache, no-store, must-revalidate");
  header.add("Pragma", "no-cache");
  header.add("Expires", "0");
  header.add("hash", FileUtil.createFileHash(downloadFile));
  return ResponseEntity.ok()
      .headers(header)
      .contentLength(downloadFile.length())
      .contentType(MediaType.parseMediaType("application/octet-stream"))
      .body(resource);
}
Here, the file-name to be downloaded will be taken as an argument from the GET request and then will be used for resolving the file. If such a file is not available, then a 404 response will be returned, as you can see in the code comment. To download from the following REST GET endpoint, you can make a request as follows.
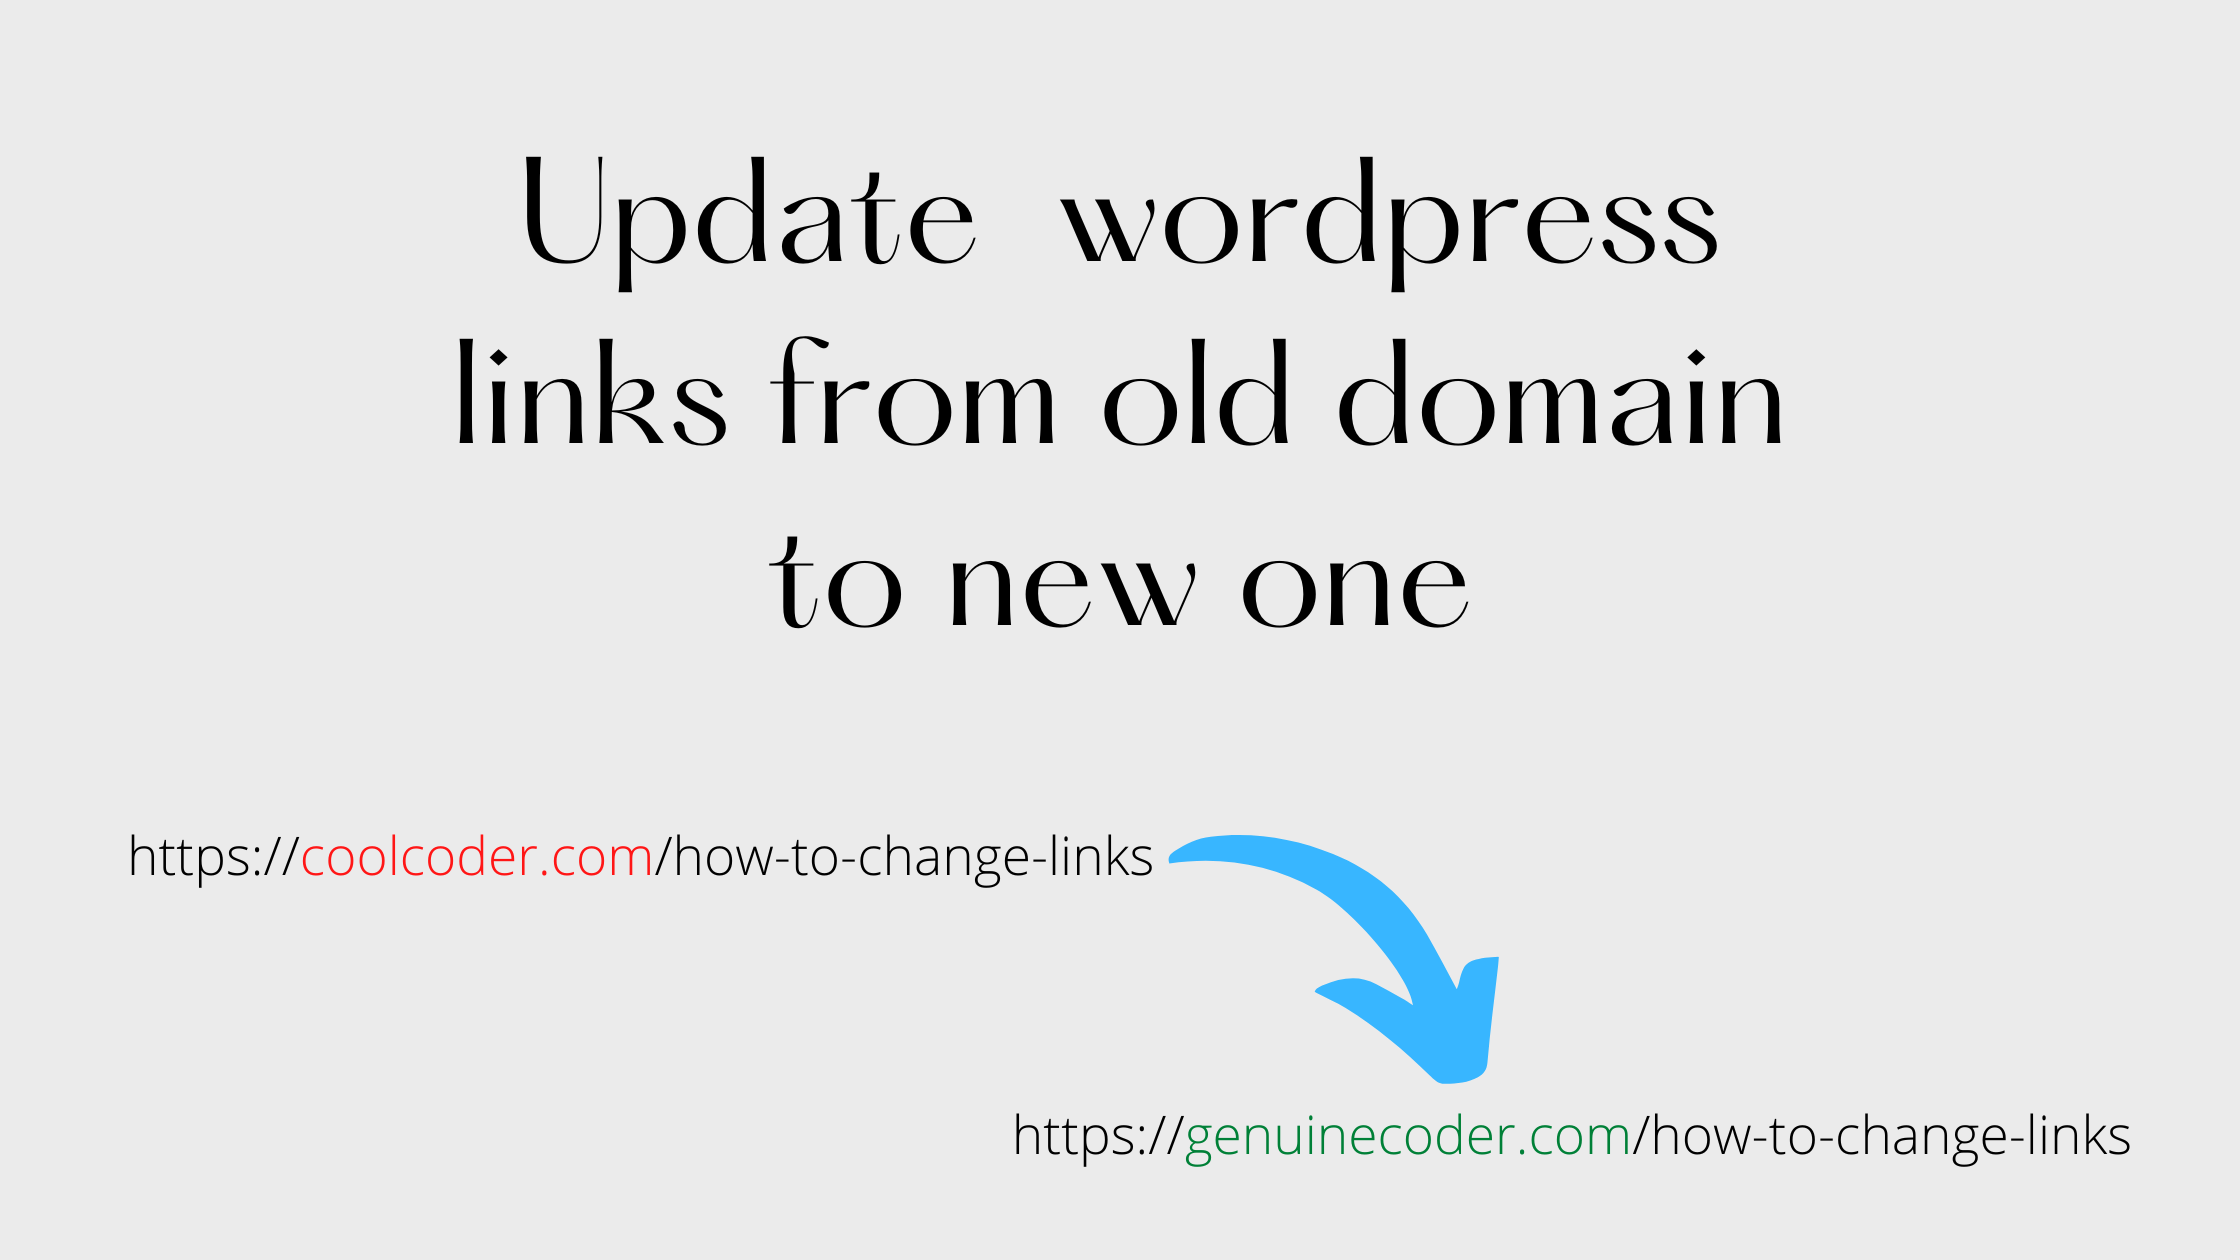
Updating all the URLs and resources in the WordPress site after migrating to a new domain or migrating to a domain from IP address is a painstaking task. Luckily, there is an easy way!
In this tutorial, I will show you the easy way to update all URLs thanks to SQL commands. The first thing you need is access to PhpMyAdmin tool or direct shell access to the database server. Once you have the database accesses, you can follow the below-mentioned steps to update all domains/IP address in your posts, comments, etc. to the new domain address.
PhpMyAdmin giving option for running SQL query
Find and update all the posts with old domain in the contents
The following SQL query lists all the posts that contain the old domain. This is only for seeing the posts that have the old domain.
SELECT * FROM wp_posts WHERE post_content LIKE '%YOUR_OLD_DOMAIN%'
Now, let’s replace all those old domain URLs with the new one with the following SQL command.
UPDATE wp_posts SET post_content = replace(post_content, 'YOUR_OLD_DOMAIN', 'YOUR_NEW_DOMAIN')
WHERE post_content LIKE '%YOUR_OLD_DOMAIN%'
Find and update all the comments with old domain
Similar to what we have done with post content, we can replace the old domain in the comments too.
The following SQL query lists all the comments that contain the old domain.
SELECT * FROM wp_comments WHERE comment_content LIKE '%YOUR_OLD_DOMAIN%'
Then to replace all those old domains in the comment, use the following SQL command
UPDATE wp_comments SET comment_content = replace(comment_content, 'YOUR_OLD_DOMAIN', 'YOUR_NEW_DOMAIN')
WHERE comment_content LIKE '%YOUR_OLD_DOMAIN%'
This should make all the URLs use your new domain.
Java Mail API allows to send emails from your Java application. Very often it will be necessary to send emails when you are developing a business related applications or simply hobby projects.
Using Java Mail API is relatively straightforward. First you need to add the API to your application. You can download the JAR file from https://javaee.github.io/javamail/
You need following data fields to send email
An account to send email from.
Password of your email account.
SMTP server host address
SMTP server port.
In the following example, we will use gmail account for sending email. For google, SMTP server host address is “smtp.gmail.com” and port is “587”.
Enable Less Secure Access in Gmail
Google recently updated their security by automatically disabling access from third-party application. So you have to enable less secure access from gmail settings in order to use that account from java application.
If you haven’t enabled it, you will get following email when you try to send email.
Sign-in attempt was blocked. Someone just used your password to try to sign in to your account from a non-Google app. Google blocked them, but you should check what happened. Review your account activity to make sure no one else has access.
Enable less secure app access from Google settings
Program for sending email using Java Mail API and Gmail account
    public static void sendMail(String recepient) throws Exception {
        System.out.println("Preparing to send email");
        Properties properties = new Properties();

        //Enable authentication
        properties.put("mail.smtp.auth", "true");
        //Set TLS encryption enabled
        properties.put("mail.smtp.starttls.enable", "true");
        //Set SMTP host
        properties.put("mail.smtp.host", "smtp.gmail.com");
        //Set smtp port
        properties.put("mail.smtp.port", "587");

        //Your gmail address
        String myAccountEmail = "[email protected]";
        //Your gmail password
        String password = "xxxxxxxx";

        //Create a session with account credentials
        Session session = Session.getInstance(properties, new Authenticator() {
            @Override
            protected PasswordAuthentication getPasswordAuthentication() {
                return new PasswordAuthentication(myAccountEmail, password);
            }
        });

        //Prepare email message
        Message message = prepareMessage(session, myAccountEmail, recepient);

        //Send mail
        Transport.send(message);
        System.out.println("Message sent successfully");
    }

    private static Message prepareMessage(Session session, String myAccountEmail, String recepient) {
        try {
            Message message = new MimeMessage(session);
            message.setFrom(new InternetAddress(myAccountEmail));
            message.setRecipient(Message.RecipientType.TO, new InternetAddress(recepient));
            message.setSubject("My First Email from Java App");
            String htmlCode = "<h1> WE LOVE JAVA </h1> <br/> <h2><b>Next Line </b></h2>";
            message.setContent(htmlCode, "text/html");
            return message;
        } catch (Exception ex) {
            Logger.getLogger(JavaMailUtil.class.getName()).log(Level.SEVERE, null, ex);
        }
        return null;
    }
When you begin with JavaFX, one problem you might come up with is the communication between different controllers to communicate between scenes. In this article, we will see how to properly communicate between two different controllers in JavaFX.
JavaFX Controller Communication Method
The solution here is to get the controller from FXMLLoader. We use JavaFX FXMLLoader for inflating fxml and loading new views. This loader has a method called getController(). getController method will return an instance of the controller corresponding to the view we are going to load.
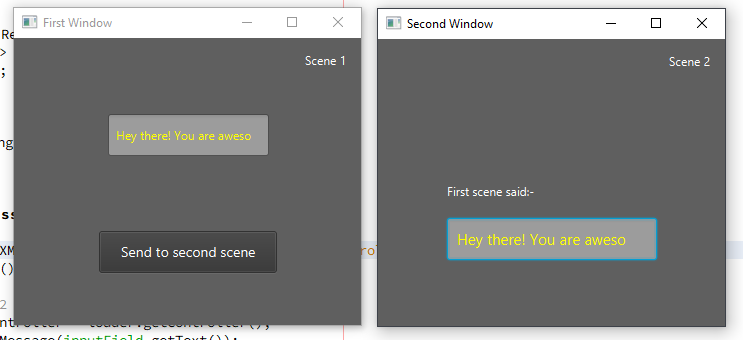
In this example, we take input to a text field from the user. When a button is clicked, new window will be opened and we pass the typed text to new window.
First Scene Controller
When the button actionBtn is clicked, a new window will be called which is the second scene window. We take the input from inputField textfield and pass it with transfer data.
public class Scene1Controller implements Initializable {
@FXML
private TextField inputField;
@FXML
private Button actionBtn;
@Override
public void initialize(URL url, ResourceBundle rb) {
//When button clicked, load window and pass data
actionBtn.setOnAction(event -&amp;amp;amp;amp;amp;amp;gt; {
loadSceneAndSendMessage();
});
}
private void loadSceneAndSendMessage() {
try {
//Load second scene
FXMLLoader loader = new FXMLLoader(getClass().getResource("/javafxcontrollercommunication/scene2/scene2.fxml"));
Parent root = loader.load();
//Get controller of scene2
Scene2Controller scene2Controller = loader.getController();
//Pass whatever data you want. You can have multiple method calls here
scene2Controller.transferMessage(inputField.getText());
//Show scene 2 in new window
Stage stage = new Stage();
stage.setScene(new Scene(root));
stage.setTitle("Second Window");
stage.show();
} catch (IOException ex) {
System.err.println(ex);
}
}
}
Second Scene Controller
This controller is elementary. You just have to write a method that accepts the string. Once the string is received, we set that in the display TextField.
public class Scene2Controller {
    @FXML
    private TextField display;

    //Receive message from scene 1
    public void transferMessage(String message) {
        //Display the message
        display.setText(message);
    }
}
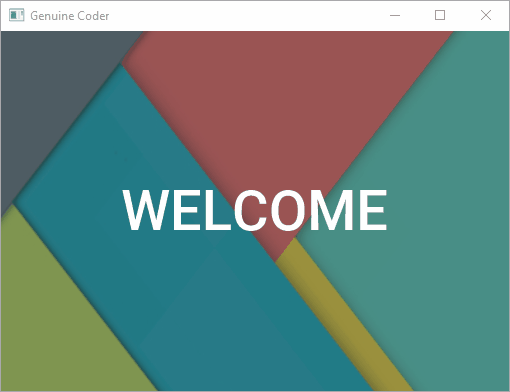
Splash screens are awesome. They allows to engage users when the application load in the background as a loading screen. In this article, we will talk about implementing JavaFX Splash Screen / Loading Screen with animation. For the splash screen, we will provide a fade-in and fade-out transition.
Splash Screen with Fade Animation
In this example, when the program starts, the splash screen will fade in. After some time, the flash screen will fade out.
The algorithm is as follows
Load Preloader with a fade-in effect using FadeTransition
Remove Preloader with a fade-out effect using Fade transition.
On the end of fade-out load the actual content to the frame.
Watch the implementation:-
Let’s have a look at the code. The code is properly commented.
private void loadSplashScreen() {
	try {
		//Load splash screen view FXML
		StackPane pane = FXMLLoader.load(getClass().getResource(("myAwesomeSplashDesign.fxml")));
		//Add it to root container (Can be StackPane, AnchorPane etc)
		root.getChildren().setAll(pane);

		//Load splash screen with fade in effect
		FadeTransition fadeIn = new FadeTransition(Duration.seconds(3), pane);
		fadeIn.setFromValue(0);
		fadeIn.setToValue(1);
		fadeIn.setCycleCount(1);

		//Finish splash with fade out effect
		FadeTransition fadeOut = new FadeTransition(Duration.seconds(3), pane);
		fadeOut.setFromValue(1);
		fadeOut.setToValue(0);
		fadeOut.setCycleCount(1);

		fadeIn.play();

		//After fade in, start fade out
		fadeIn.setOnFinished((e) -> {
			fadeOut.play();
		});

		//After fade out, load actual content
		fadeOut.setOnFinished((e) -> {
			try {
				AnchorPane parentContent = FXMLLoader.load(getClass().getResource(("/main.fxml")));
				root.getChildren().setAll(parentContent);
			} catch (IOException ex) {
				Logger.getLogger(MainController.class.getName()).log(Level.SEVERE, null, ex);
			}
		});
	} catch (IOException ex) {
		Logger.getLogger(MainController.class.getName()).log(Level.SEVERE, null, ex);
	}
}
How to show splash screen until loading gets completed
Sometimes you may want to do some actual work like loading a database or importing something. In this case, we will have to do it in the background while splash screen is shown.
You can do the heavy lifting tasks on the setOnFinished() method of fade-in transition.
fadeIn.setOnFinished((e) -> {
    //Do the loading tasks
    DatabaseImporter.import();
    SomeComplexTask.start();
    //...
    //After the background tasks are done, load the fadeout
    fadeOut.play();
});
Problem with this approach
The above code works fine when the background tasks are not that much (when the tasks complete within couple of seconds max). But if it is a long task, then the JavaFX UI Thread will hang. In this case, you might have to use a separate thread for processing the background tasks.
The reliable solution
You can make use of JavaFX Tasks or JavaFX Services. Then using a task complete listener, you can initiate fade out transition.
fadeIn.setOnFinished((e) -> {
    //Start the Worker Task
    BackgroundWorkerTask task = new BackgroundWorkerTask();
    task.start();
    //After the completion of the task, start fadeOut animation
    task.setOnSucceeded(successEvent -> {
      fadeOut.play();
    });
});
So, that’s how you implement a JavaFX Splash Screen.
In this video tutorial, you can see how to make a splash screen in a separate window without window borders. Here, splash screen uses a separate stage.
In this article, we will have a deep look at JavaFX Animation. JavaFX provides easy to use animation API (javafx.animation package). There are some predefined animation that can be used out of the box or you can implement custom animations using KeyFrames.
Following are the main predefined animations in JavaFX.
TranslateTransition
Translate transition allows to create movement animation from one point to another within a duration. Using TranslateTransition#setByX / TranslateTransition#setByY, you can set how much it should move in x and y axis respectively. It also possible to set precise destination by using TranslateTransition#setToX / TranslateTransition#setToY.
import javafx.animation.TranslateTransition;
import javafx.application.Application;
import javafx.scene.Group;
import javafx.scene.Scene;
import javafx.scene.control.Button;
import javafx.stage.Stage;
import javafx.util.Duration;

public class Animation extends Application {
    @Override
    public void start(Stage primaryStage) throws Exception {
        Button btn = new Button("ClickMe");
        Group group = new Group(btn);
        Scene scene = new Scene(group, 600, 600);

        //Duration = 2.5 seconds
        Duration duration = Duration.millis(2500);
        //Create new translate transition
        TranslateTransition transition = new TranslateTransition(duration, btn);
        //Move in X axis by +200
        transition.setByX(200);
        //Move in Y axis by +100
        transition.setByY(100);
        //Go back to previous position after 2.5 seconds
        transition.setAutoReverse(true);
        //Repeat animation twice
        transition.setCycleCount(2);
        transition.play();

        primaryStage.setScene(scene);
        primaryStage.show();
    }
    public static void main(String[] args) {
        Application.launch(args);
    }
}
ScaleTransition
Scale transition is another JavaFX animation which can be used out of the box that allows to animate the scale / zoom of the given object. The object can be enlarged or minimized using this animation.
import javafx.animation.ScaleTransition;
import javafx.application.Application;
import javafx.scene.Group;
import javafx.scene.Scene;
import javafx.scene.control.Button;
import javafx.stage.Stage;
import javafx.util.Duration;

public class Animation extends Application {

  @Override
  public void start(Stage primaryStage) throws Exception {
    Button btn = new Button("Genuine Coder");
    Group group = new Group(btn);
    Scene scene = new Scene(group, 600, 600);

    //Duration = 2.5 seconds
    Duration duration = Duration.millis(2500);
    //Create new scale transition
    ScaleTransition scaleTransition = new ScaleTransition(duration, btn);
    //Set how much X should enlarge
    scaleTransition.setByX(1.5);
    //Set how much Y should
    scaleTransition.setByY(1.5);
    scaleTransition.play();

    primaryStage.setScene(scene);
    primaryStage.show();
  }

  public static void main(String[] args) {
    Application.launch(args);
  }
}
RotateTransition
Rotate transition provides animation for rotating an object. We can provide upto what angle the node should rotate by toAngle. Using byAngle we can specify how much it should rotate from current angle of rotation.
import javafx.animation.RotateTransition;
import javafx.application.Application;
import javafx.scene.Group;
import javafx.scene.Scene;
import javafx.scene.control.Button;
import javafx.stage.Stage;
import javafx.util.Duration;

public class Animation extends Application {

  @Override
  public void start(Stage primaryStage) {
    Button btn = new Button("Genuine Coder");
    Group group = new Group(btn);
    Scene scene = new Scene(group, 600, 600);

    //Duration = 2.5 seconds
    Duration duration = Duration.millis(2500);
    //Create new rotate transition
    RotateTransition rotateTransition = new RotateTransition(duration, btn);
    //Rotate by 200 degree
    rotateTransition.setByAngle(200);
    rotateTransition.play();

    primaryStage.setScene(scene);
    primaryStage.show();
  }

  public static void main(String[] args) {
    Application.launch(args);
  }
}
FadeTransition
Fade transition creates a fade in / fade out effect by controlling opacity of the object. We can make fade in transition or fade out transition in JavaFX by setting the to and from value.
//Fade in transition
FadeTransition fadeInTransition = new FadeTransition(Duration.millis(1500), btn);
fadeInTransition.setFromValue(0.0);
fadeInTransition.setToValue(1.0);

//Fade out transition
FadeTransition fadeOutTransition = new FadeTransition(Duration.millis(1500), btn);
fadeOutTransition.setFromValue(1.0);
fadeOutTransition.setToValue(0.0);
PathTransition
Path transition provides option to move object through a specified path. The path can be anything from simple straight line to complex quadratic curves. Following code rotates button through a circular path locate at (200,200) with radius 50
import javafx.animation.PathTransition;
import javafx.application.Application;
import javafx.scene.Group;
import javafx.scene.Scene;
import javafx.scene.control.Button;
import javafx.scene.shape.Circle;
import javafx.stage.Stage;
import javafx.util.Duration;

public class Animation extends Application {

  @Override
  public void start(Stage primaryStage) {
    Button btn = new Button("Genuine Coder");
    Group group = new Group(btn);
    Scene scene = new Scene(group, 600, 600);

    //Create new path transition
    PathTransition pathTransition = new PathTransition();
    pathTransition.setDuration(Duration.millis(2500));
    //Set node to be animated
    pathTransition.setNode(btn);
    //Rotate button through a circular path locate at (200,200) with radius 50
    pathTransition.setPath(new Circle(200, 200, 50));

    pathTransition.play();

    primaryStage.setScene(scene);
    primaryStage.show();
  }

  public static void main(String[] args) {
    Application.launch(args);
  }
}
Combine Animation Sequentially with SequentialTransition
Sequential transition allows to combine two or more transition we have discussed so far. After the completion of one transition, the next will be started. The following code will apply rotate transition and scale transition sequentially.
//Create rotate transition
RotateTransition rotateTransition = new RotateTransition(Duration.seconds(1));
rotateTransition.setByAngle(180f);
//Create scale transition
ScaleTransition scaleTransition = new ScaleTransition(Duration.seconds(1));
scaleTransition.setByX(1.5f);

//First do rotateTransition, then do scaleTransition
SequentialTransition sequentialTransition = new SequentialTransition(rotateTransition, scaleTransition);
sequentialTransition.play();
Combine Animation Parallely with ParallelTransition
Parallel transition is very much similar to sequential transition. Except, it works on parallel. All the animations applied will be played in parallel. We can specify two or more transition to execute in parallel.
//Create rotate transition
RotateTransition rotateTransition = new RotateTransition(Duration.seconds(1));
rotateTransition.setByAngle(180f);
//Create scale transition
ScaleTransition scaleTransition = new ScaleTransition(Duration.seconds(1));
scaleTransition.setByX(1.5f);

//Play both rotateTransition as well as scaleTransition in prallel
ParallelTransition sequentialTransition = new ParallelTransition(rotateTransition, scaleTransition);
sequentialTransition.play();
KeyFrame Animation
KeyFrame animation is one of the most key features of JavaFX Animation. The API javafx.animation.KeyFrame can be used to animate any JavaFX property. For example, let’s say you want to animate width of your application window. You can use widthProperty with KeyFrame to animate the width of your application window.
Watch video on using KeyFrame animation to create slide-in effect in JavaFX.
The following example loads a scene with slide in effect using JavaFX KeyFrame API
Parent root = getNextSceneRoot();
parentContainer.getChildren().add(root);

//Create a timeline instance
Timeline timeline = new Timeline();
//Create a keyValue. We need to slide in -- We gradually decrement Y value to Zero
KeyValue kv = new KeyValue(root.translateYProperty(), 0, Interpolator.EASE_IN);
//Create keyframe of 1s with keyvalue kv
KeyFrame kf = new KeyFrame(Duration.seconds(1), kv);
//Add frame to timeline
timeline.getKeyFrames().add(kf);

//Start animation
timeline.play();
In this chapter we familiarized with JavaFX animation API. JavaFX provides a good set of predefined animation set and a powerful KeyFrame animation API.
When you try to clone private repositories for the first time from an account, you may get following error.
Permission denied (publickey).
Permission denied (publickey) fatal : Could not read from remote repository

Please make sure you have the correct access rights
and the repository exists.
This article helps you on fixing this issue. The root cause here is that the remote repository don’t trust you. In order to gain access to the repo, you have to create an SSH key and register that key in your git repository.
Steps to add SSH key in Gitlab
Run CMD/Powershell/Terminal with administrative (sudo) privilege. (In windows run cmd as administrator. In linux execute ‘sudo su’ to get root privilege).
Type ssh-keygen.
You will see the following. Here you will be asked for the location where the SSH key will be saved. Press enter to accept default or enter your custom location.
Generating public/private rsa key pair.
Enter file in which to save the key (C:\Users\yourUsername/.ssh/id_rsa):
Git will ask you to save the key to the specific directory.You will be asked for a password. Make sure you remember it since it will be needed for cloning.
Enter passphrase (empty for no passphrase):
The public key will be created to the specific directory.
Now go to the directory you have specified in Step 2 and open .ssh folder.
You’ll see a file id_rsa.pub. Open it on notepad. Copy all text from it.
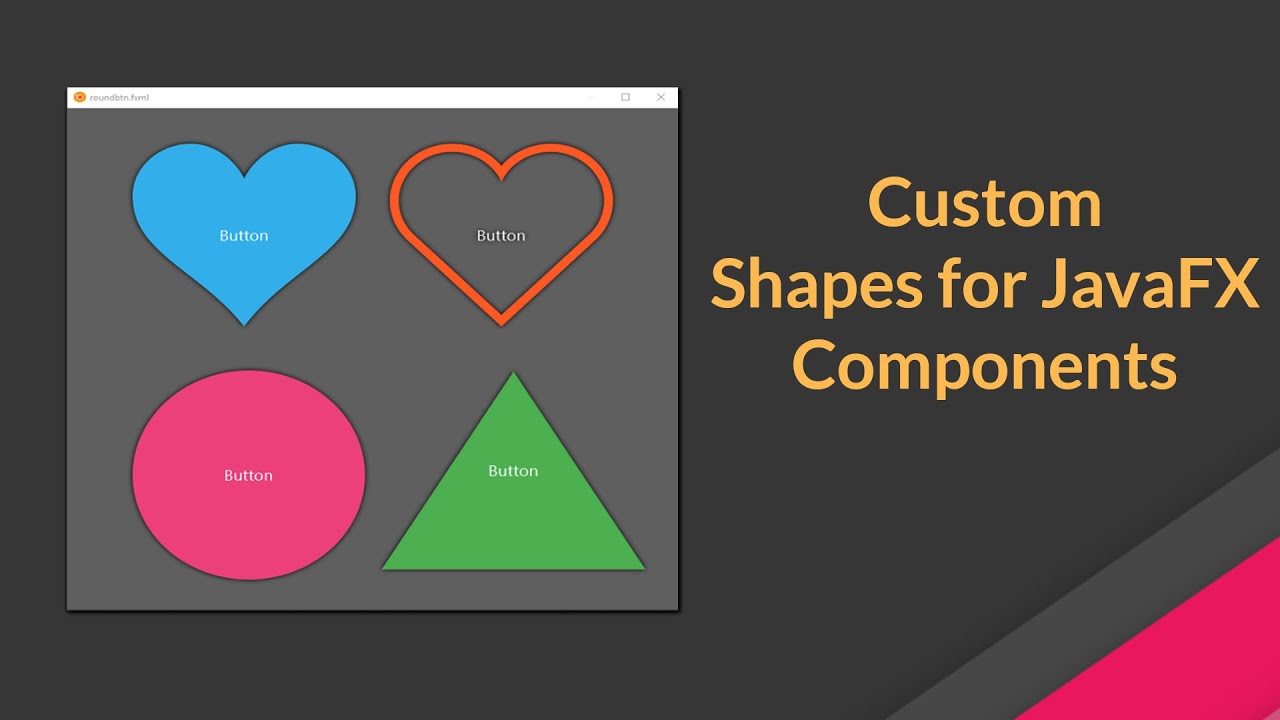
JavaFX allows great customization options. You can easily customise and reuse component designs using CSS. In this article, we will see how to apply custom shapes for any GUI component*.
Which components support custom shapes ?
All the components extending javafx.scene.layout.Region supports custom shapes with -fx-shape CSS. So, this can be applied to almost all the components including but not limited to Containers, Charts, Buttons, ListViews etc.
SVG Path
-fx-shape takes SVGPath. SVGPath is simply a string that can be interpreted as a complex shape. For example, following SVGPath creates a heart shape.
JavaFX provides an easy option to get screen dimensions (screen size) of all the monitors connected. This can be done using the javafx.stage.Screen class.
Get Screen Size of Primary Monitor
import javafx.application.Application;
import javafx.geometry.Rectangle2D;
import javafx.stage.Screen;
import javafx.stage.Stage;

public class Main extends Application {

  @Override
  public void start(Stage primaryStage) {
    //Get primary screen bounds
    Rectangle2D screenBounds = Screen.getPrimary().getBounds();
    System.out.println(screenBounds);
    System.exit(0);
  }
}
We all love JavaFX for its modern look and easy to use user interface APIs. In this article we will discuss about JavaFX Scene Switch (Change) animation. I have implemented two types of scene change animation. Fading Scenes and Sliding Scenes.
By default, JavaFX animation api does not provide a direct option animate a scene change. But we can use the following way.
Load primary stage with a scene. Enclose this scene in a root container. This container can be of your preference. StackPane, Group etc can be used.
When changing scenes, remove everything from this root container.
Load the scene to be loaded to a variable. Add it new scene to the root container with animation.
Sliding Scene Transition
In this animation, we will get a nice sliding effect for the scenes. You can see the preview in the following GIF.
JavaFX Scene Sliding Animation
The idea here is to load the new scene beyond the visibility of the screen. For example, if the window height is 500px, then load the new scene at 500px. Then using KeyFrame animation, take the scene translateY to 0. This creates a slide in effect from bottom. Using translateX, we can implement slide in effect from sides.
Let’s see this in code. Following file is the first scene’s controller. When loadSecondScene() is called, second scene will be added.
/**
 * Removed Imports for code simplicity
 * FILE - Scene 1 Controller. On button Click, Scene 2 will be loaded
 * @author Genuine Coder
 */
public class FirstSceneController implements Initializable {
    @FXML
    private AnchorPane anchorRoot;
    @FXML
    private StackPane parentContainer;

    @FXML
    private void loadSecondScene(ActionEvent event) throws IOException {
        Parent root = FXMLLoader.load(getClass().getResource("myscene2.fxml"));
        Scene scene = anchorRoot.getScene();
        //Set Y of second scene to Height of window
        root.translateYProperty().set(scene.getHeight());
        //Add second scene. Now both first and second scene is present
        parentContainer.getChildren().add(root);

        //Create new TimeLine animation
        Timeline timeline = new Timeline();
        //Animate Y property
        KeyValue kv = new KeyValue(root.translateYProperty(), 0, Interpolator.EASE_IN);
        KeyFrame kf = new KeyFrame(Duration.seconds(1), kv);
        timeline.getKeyFrames().add(kf);
        //After completing animation, remove first scene
        timeline.setOnFinished(t -> {
            parentContainer.getChildren().remove(anchorRoot);
        });
        timeline.play();
    }
}
Watch the Slide Transition in action from Genuine Coder Channel
Fading Scene Transition
Fading screen transition can also be implemented with a similar concept as of Sliding Screen transition. The idea is, we apply a fade out transition for the first scene. After completion of fade out transition of first scene, we add second scene. The second scene will be added with zero opacity. Then using fade in transition we make the second scene visible.
You can see the program in action in the following Genuine Coder Tutorial video.
Programming can only be learned properly with continuous practice. When you work on a complete software project, you’ll have to understand how to put things together and how to implement data communication between various modules etc. So, I decided to share a complete javafx project development series.
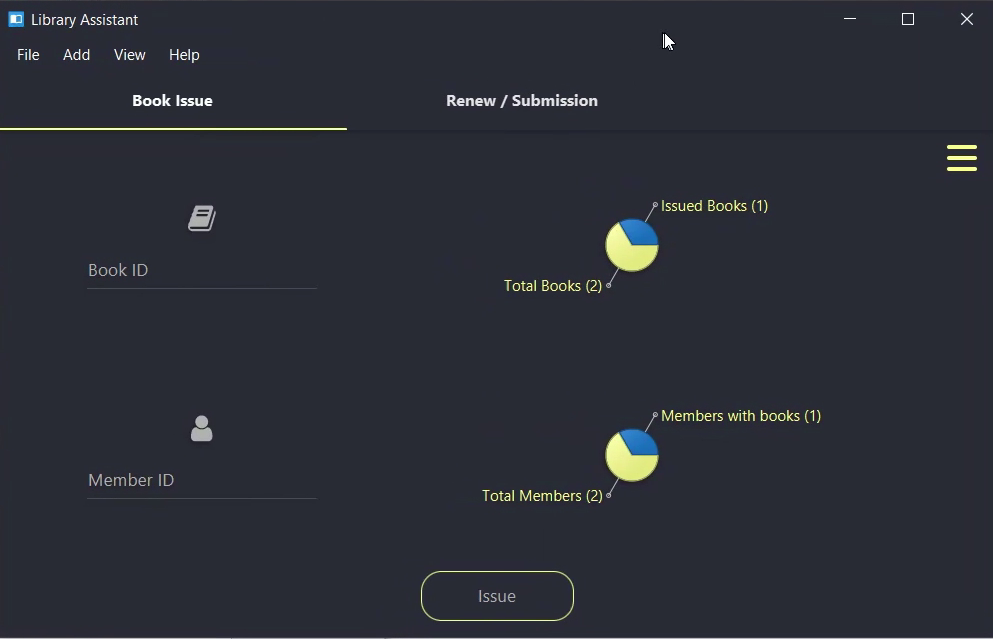
I am publishing a series of tutorial videos on YouTube about developing a complete Library Management Software using JavaFX. This tutorial series start with basic designing and continue towards more complex programming like database integration, multi level user interface design, material design etc. I have tried my best to keep things as simple as possible.
Apache Derby database is used for storing member, book and other informations. Derby is a lightweight, purely java based relational database. It has common sql syntax. So you can get things done without any issues. I have used Scene Builder for designing user interfaces. Additionally CSS is used to get some nice effects for buttons, text fields etc.
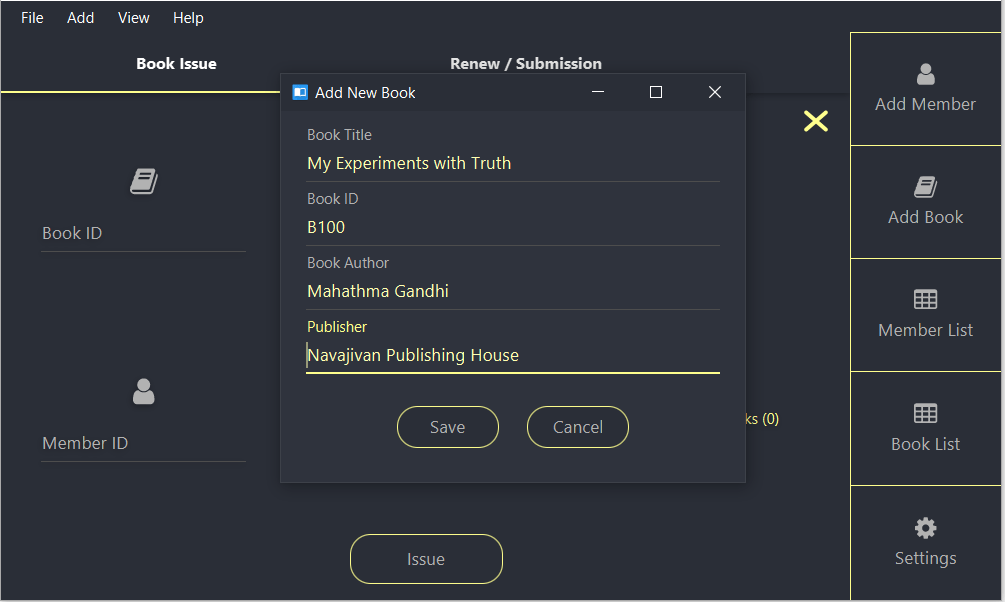
Dashboard
For development, I am using NetBeans IDE with Scene Builder. Make sure that you have the latest java installed. Some of the libraries used in the project requires JDK 8u40 or better. So it is better to have the latest java version installed.
I hope you find this tutorial series useful. Learning component by component is a little tedious task. This set of videos will help you to understand how to coordinate various components together. You can find the source code of this application at GitHub. I have committed at the end of almost all tutorial videos so that you can find the exact code that i have used for explanation.
Moving to Material Design
Material design is an awesome concept. It defines a new method for designing and developing user interfaces across multiple platforms. For making this software materialistic, I have used JavaFX material design library named JFoenix. It provides built-in material design based components that can be easily styled with CSS.
Library Software login screen
The above image shows login screen from new design. There are only 3 colors and every components has it own padding and spacing. If you just give enough spacing for your components on the screen, it will tremendously improve the overall look.
I have recorded the complete development as tutorial. You can find them in the following PlayList. Subscribe to Genuine Coder YouTube channel for more tutorials in the future.
Navigation drawer provides an intuitive way to keep main navigation controls of the UI clean. The drawer will only be made visible to the user on certain actions like button click so that we can make use of that space for much more important things yet keeping controls reachable with single click.
Android introduced the material design Navigation bar or side pane or whatever you call, with its Material design goodness. JFoenix library provides JFXDrawer component.
I have made a video to make things more clear. You can watch it right here.
If you are the kind of person who do not like to watch tutorial videos, read from here. I will explain it step by step.
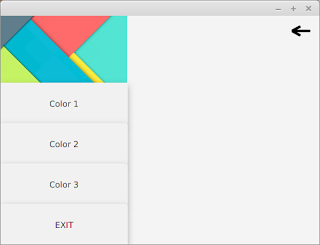
Step 1 : Design Content For Navigation Drawer
At first, you have to create an FXML layout for the Navigation bar itself. This layout can then be inflated to the navigation bar holder later. The above image shows a pretty simple VBox layout that consists of 4 Buttons and one image view. This content can the be loaded to a VBox variable in our code (from the main controller) using the following code
Now we have the navigation bar content. In this step, you have to design the main application window. The JFXDrawer can be added using scene builder by drag and drop. Once you position the drawer on the space you want, you can set the drawer direction to LEFT, RIGHT, TOP or BOTTOM from the Properties section of Scene Builder.
I have added a JFXHamburger for material design look and feel. I have thouroughly explained how to use JFXHamburger in this video https://www.youtube.com/watch?v=rCnPY9Kj4J0 . If you don’t like to have a Hamburger, you can use a simple button. Add an action listener to your button and add this code.
@FXML
//Accessing FXML Element
JFXDrawer drawer;
//Add this in ActionListener
if(drawer.isShown())
drawer.close();
else
drawer.open();
The navigation drawer can be made visible by using the open() method. It can be made invisible through the function call close().
Step 3 : Setting the content of Drawer
Now we have two separate components. The Drawer and Main window. We can attach the box loaded in step 1 to our drawer in main window using the following code.
drawer.setSidePane(box);
Step 4 : There is no 4th step. You are done !
I used to get happier when things get completed sooner that expected. That’s why there is a step 4 🙂
Run the code now. When you click on your button or Hamburger,you should see the navigation drawer like this. If you have some alignment issues for the drawer, increase the value of “Default Drawer Size” from the Scene Builder.
Recently, as part of library management software tutorial, I have created more elaborate tutorial about creating Navigation Drawer. It contains more complex buttons with icons and CSS styling. Watch those tutorial videos from the following link.
One problem I have faced when developing java applications was the old look. Even after the introduction of Nimbus look and feel, the user interface components felt too static and dead. Then JavaFX came in to the scene and provided a much better interface and control elements.
In this post, I would like to discuss on how to design our JavaFX applications using material design components. The developers at JFoenix had done an impressive job on developing material library for JavaFX. All that we have to do is to download the library and add it into Scene Builder and our application. I have made a video tutorial on setting-up the JFoenix library and making a material login interface.
Adding JFoenix to Scene Builder
First, download the library from https://github.com/jfoenixadmin/Jfoenix. Once you get the Jar file, you have to add it into Scene Builder. Once you add this library to Scene Builder, you can use components available in JFoenix library in your project with just drag and drop.
Within SceneBuilder GUI, there is a setting button, as you can see in the following screenshot. Once you click on it, you will get a context menu. Select JAR/FXML manager which will open the library manager window.
JavaFX Scene Builder JAR/FXML manager
Then, select Add Library/FXML from file system from the window. This will open a file selection window. Select the JFoenix Jar file. This will open another window listing all the components available in the library. Just select all. Once you successfully add this library, it can be seen under installed libraries/FXML files list.
External library window
After adding the components to Scene Builder, It’s pretty much drag drop. For JFXButton, you can set ripples, set it as RAISED…. oh my goodness! I have been developing desktop applications for a long time and this is the first time getting my hands on these much cool UI components.
Watch Video Tutorial about using JFoenix library to make a login Application
I have posted a video tutorial in Genuine Coder YouTube channel about using JFoenix library. Watch it right from here.
Download Sample Project Source Code : Google Drive
Download Sample Project Application : Google Drive
Complete JFoenix Components Tutorial
Watch JFoenix tutorial from following playlist. Contains 19 videos about JFoenix components.
JavaFX Material Design Library Management Software Development
I have created a complete library management program using JavaFX and JFoenix based on Material Design. The Complete tutorial of the development is available in Genuine Coder YouTube Channel. Read more about this project
JavaFX provides a powerful set of Charts/Graphs that can be added very easily to your programs. Frankly, It is even easier than adding a Table in JavaFX. Graphical charts are available in the javafx.scene.chart package.
Bar Chart
This video describes how to add Bar Chart to your JavaFX program.
Bar Chart data can be represented using an XYChart.Series object. All that you have to do is to make a new object and add data to it.
XYChart.Series set1 = new XYChart.Series<>();
Data can be added to this set using the code. Here XYChart.Data() takes two parameters. First one is for the X-Axis(Horizontal) and the second one is for Y-Axis(Vertical).
Finally, Connect the created series with your JavaFX Bar Chart object using getData().addAll() method.
SalaryChart.getData().addAll(set1);
AddAll() method allows to add more than one series of data to your chart. For example if i have set1,set2 and set3 then i can add all of them by using a comma seperated list.
SalaryChart.getData().addAll(set1,set2,set3);
Pie Chart
JavaFX Pie Chart uses an ObservableList which is very similar to XYSeries.Series we used for Bar Chart. This video explains how to use pie chart.
ObservableList<PieChart.Data> pieChartData

= FXCollections.observableArrayList(

new PieChart.Data("Cars", 13),

new PieChart.Data("Bikes", 25),

new PieChart.Data("Buses", 10),

new PieChart.Data("Cycles", 22));

pieChart.setData(pieChartData);
Here i have created an ObservableList and added 4 values. The pie chart takes all of these values and allocate a percentage for each one.
For eg, Percentage of cars = 13/(13+25+10+22) = 18.5%
The data then can be associated with the chart using the same code used for Bar chart or using a simple alternative
pieChart.setData(pieChartData);
provided, pieChart is the Pie Chart object and pieChartData is the ObservableList.
Line Chart
Construction of Line Chart in Java is very much similar to Bar Chart. It takes the same XYChart.Series object.
XYChart.Series series = new XYChart.Series(); //Make a new XYChart object

//Add Data

series.getData().add(new XYChart.Data(“1”, 23));

series.getData().add(new XYChart.Data(“2”, 14));

series.getData().add(new XYChart.Data(“3”, 15));
Finally, associate the data with Line Chart.
LineChart.getData().addAll(series);
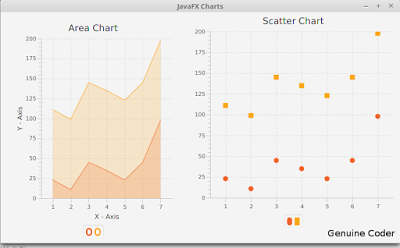
Area Chart and Scatter Chart
These two are explained together because, both of these Charts takes same type of data. Yes, the XYChart.Series object. We can use the same example used above.
XYChart.Series series = new XYChart.Series(); //Make a new XYChart object

//Add Data

series.getData().add(new XYChart.Data(“1”, 23));

series.getData().add(new XYChart.Data(“2”, 14));

series.getData().add(new XYChart.Data(“3”, 15));
We all like to have a short yet meaningful domain names for our website or blog. But searching for available domains on GoDaddy or Big Rock is very time consuming and frustrating. In my case, I wanted a simple domain name related to programming. I searched and searched. Finally bought www.genuinecoder.comfrom GoDaddy. The truth is, I named this blog as Genuine Coder after purchasing the domain name.
So that’s not your case, right? Well, there are a number of ways to find out available domain names. Let’s see how we can find a perfect domain name for you.
Lean domain search asks to enter a word that you want your domain name to include. I have used “programming” and got 3,875 available domains. Lean domain search provides options to sort result according to popularity, length or alphabetical order. Moreover, it searches on twitter to find out whether “@yourdomain” is available on twitter.
When sorted based on popularity, I got “ProgrammingMarket.com” as the first result
When sorted according to length of the domain, I got “ExProgramming.com”.
Sorting based on alphabetical order gave me “AbacusProgramming.com”
Lean domain search also provides Search Term Filter that helps to filter the result based on domain names starting with search term or ending with search term.
Domains bot work like Lean domain search. Once you enter a keyword, you will get list of available domains. You can choose whether you want particular TLD (Top Level Domain) like .com, .org etc. It is also possible to choose the words from English, Deutsch, Español, Italiano, Français and Dutch.
Name Mesh is also a good choice. Simply enter in your keywords and results will be sorted into eight categories of results, including Common, New, Short, Extra, Similar, SEO, Fun and Mix. You can refine your result by limiting the maximum characters or showing only ones that available with particular registrar like GoDaddy or BlueHost.
Domainr is a simple tool to find available domains. It has less options compared to above ones. When you search for a specific keyword in domainr, you will get a list of .com, .org, .co.in etc variations. Unlike above tools, it does not provide any added keywords as prefix and suffix.
I searched for eye and got eye.com, eye.net etc. as taken and eye.org for sale.
Conclusion
It is better to do a thorough research before buying a domain. Because After setting one domain for your website/blog, it is hard to change since all the search engine entries and back-links will be lost. Moreover, you will loose your precious Alexa ranking too.
All of these tools are very helpful. Yet, I prefer LeanDomainSearch and NameMesh since they have a lot of search refining options.
Android Emulators are simply the best way to test our application during development or when we want to use apps on PC. Currently, fingerprint smartphones are not that common, but surely, it will become one of the basic features like Bluetooth or Camera. So it is necessary to start making maximum use of the fingerprint scanner.
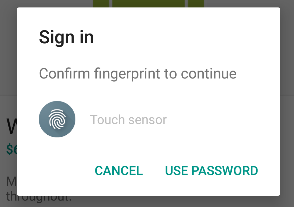
Android Fingerprint Prompt
When i started developing applications with a fingerprint scanner, I had to find a way to emulate the scanner in my emulator. Thanks to Android Developer website.
Before explaining how to Emulate a fingerprint scanner, you have to make sure that the following requirements are satisfied in your system.
Currently, the Fingerprint API is only supported from Marshmallow. Make sure your emulator is running on Android M (API 23) or better.
Android SDK Tools Revision 24.3 or better.
Watch my video on How to use fingerprint for emulator
Steps for adding Fingerprint in Android Emulator
Activate Screen lock from Settings -> Security. Then Go to Fingerprint option to add new fingerprint
When prompt to place your finger on the scanner, emulate the fingerprint using ADB command.
Facebook is currently the best place to promote our websites. It is always a better idea to start a dedicated Facebook page for your blog or website. You will be astonished by the amount of traffic it can provide. Moreover, sharing links across social medias will help to build a sold set of backlinks, which are one of the important parameters for search engine rankings.
Copy and paste your Facebook page address. My page address is facebook.com/thegenuinecoder. You can get this address by simply visiting the page and copy address from address bar.
It is possible to set Width and Height of the widget by giving required values in the proper text fields. But you can leave it empty if you want to.
A live preview will be generated after you paste the URL. Now it is time to integrate this to website. Click on the ‘Get Code’ button.
Copy The Step 2 Code. Paste it on your website, just below the <body> tag. [If you are using blogger, get HTML code from Template->Edit HTML option. Then Press ‘Save Template’]
Now copy the code under Step 3 and place where you want this plugin to appear. [ In blogger, Add HTML/Java Script widget with this code ]. Save changes.
Refresh your page. You will see a beautiful widget of your page. If you can’t, then carefully read and repeat the above steps.
Keywords : Add beautiful Facebook page plugin to your website.
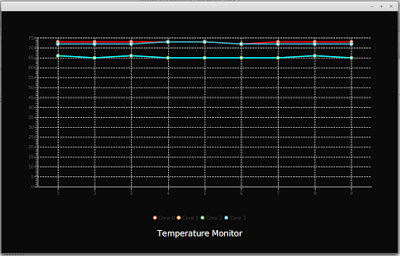
Today i am going to show you how to create a system temperature monitor program in JavaFX. This program use Line Chart from JavaFX library. In order to get the temperature readings, i have given a connection to the system terminal so that i can execute terminal commands within the Java program itself.
Process proc = Runtime.getRuntime().exec("sensors");
BufferedReader reader = new BufferedReader(new InputStreamReader(proc.getInputStream()));
This code will create a new process and will attach to the ‘sensors’ command. This program will work only on linux and the number of temperature readings will change from system to system. Using the process’s input stream we can read the output of the command passed through a Buffered Reader.
After the establishment of connection with sensors, I have added an infinite loop with 1000ms sleep so that the temperature information will be updated each second. The returned data from process is taken and matched with a pattern [+]…. which will help to select the required temperature information alone. For this purpose, i have made use of Matcher and Pattern class in standard Java Library.
The processed data is then associated with 4 streams of XYData.Series() data structure to represent 4 different lines on the graph. Extensive CSS styling is used in this program to illustrate the capability of CSS to improve the look and feel of program (if it did :-)). The animations that can be seen on the video is the primitive animation associated with JavaFX LineChart.
Watch the development in Action. Subscribe for more programs and tutorials


