Tag: JavaFX GUI

  • JavaFX Image Button Tutorial

    JavaFX Image Button Tutorial

    In this tutorial, we will learn how to create image buttons in JavaFX. By default, there is no special component named ImageButton. However, we can easily extend the default JavaFX Button to create a button with image.

    JavaFX Image Button with Text

    To create a button with image, we can make use of the Button#setGraphic(Node) function. We can set the image we want to attach to the button through the setGraphic() method. Let’s see an example code to understand it better.

    import javafx.application.Application;
    import javafx.scene.Scene;
    import javafx.scene.control.Button;
    import javafx.scene.control.ContentDisplay;
    import javafx.scene.image.Image;
    import javafx.scene.image.ImageView;
    import javafx.scene.layout.Region;
    import javafx.scene.layout.StackPane;
    import javafx.stage.Stage;
    
    public class JavaFXImageButton extends Application {
    
      private static final double BUTTON_HEIGHT = 100;
    
      public void start(Stage stage) {
        //Create a Button
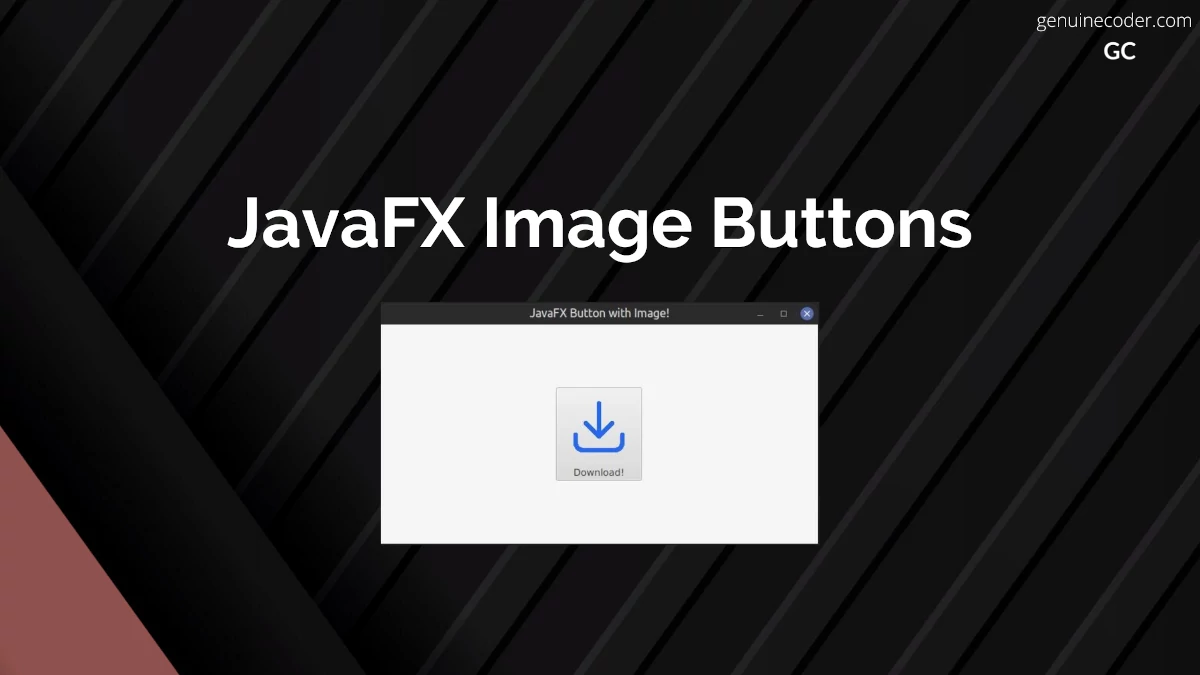
        Button button = new Button("Download!");
        button.setPrefSize(Region.USE_COMPUTED_SIZE, BUTTON_HEIGHT);
    
        //Create imageview with background image
        ImageView view = new ImageView(new Image("download.png"));
        view.setFitHeight(BUTTON_HEIGHT);
        view.setPreserveRatio(true);
    
        //Attach image to the button
        button.setGraphic(view);
        //Set the image to the top
        button.setContentDisplay(ContentDisplay.TOP);
    
        Scene scene = new Scene(new StackPane(button), 600, 300);
        stage.setTitle("JavaFX Button with Image!");
        stage.setScene(scene);
        stage.show();
      }
    
      public static void main(String[] args) {
        launch(args);
      }
    }
    
    JavaFX Image Button With Text
    JavaFX Image Button With Text

    You can see the result above. We have added the image icon on the top and text on the bottom. You can change the position of the text with respect to the image by changing the setContentDisplay() option.

    //Set button text to the right of the image
    button.setContentDisplay(ContentDisplay.RIGHT);
    //Set button text to the left of the image
    button.setContentDisplay(ContentDisplay.LEFT);
    

    JavaFX Image Only Button

    Now, if you would like to implement a button without any text that fits the button fully, let’s see how that can be achieved. When you want a clickable button with just an image and no text, you can still use the setGraphic(Node) function. Let’s understand it with an example code. We should make use of the no-arg constructor of javafx.scene.control.Button() to create button without any text.

    private static final double BUTTON_HEIGHT = 100;
    
    public void start(Stage stage) {
    
      //Creating a Button without any text
      Button button = new Button();
      button.setPrefSize(Region.USE_COMPUTED_SIZE, BUTTON_HEIGHT);
    
      //Create imageview with background image
      ImageView view = new ImageView(new Image("background.jpg"));
      view.setFitHeight(BUTTON_HEIGHT);
      view.setPreserveRatio(true);
    
      //Attach image to the button
      button.setGraphic(view);
    
      Scene scene = new Scene(new StackPane(button), 600, 300);
      stage.setTitle("JavaFX Button with Image!");
      stage.setScene(scene);
      stage.show();
    }
    

    This will create the following output.

    JavaFX Image Only Button
    JavaFX Image Only Button

    Q. How to remove the padding between the button graphic image and the button edge?
    If you want to get rid of the padding between the image and the button edge, you need to manually set the button padding to zero. This can be done using the setPadding(Inset) option.

    button.setPadding(Insets.EMPTY);
    

    JavaFX Image Button with CSS

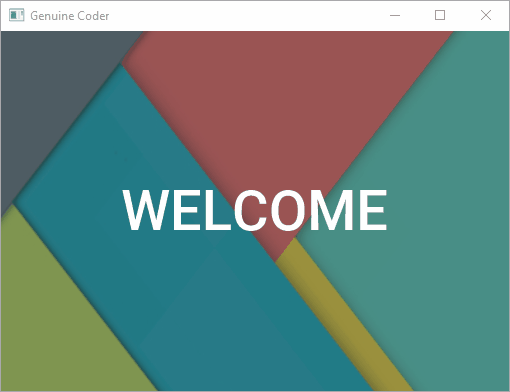
    We can also create ImageButton with the help of JavaFX CSS. Set the image as the background for the Button using -fx-background-image CSS styling. Let’s see how we can create our ImageButton with CSS. The disadvantage of using a background image is that, the text will be on top of the image, and we will have to make sure that the text color is readable in the image background.

    import javafx.application.Application;
    import javafx.scene.Scene;
    import javafx.scene.control.Button;
    import javafx.scene.layout.StackPane;
    import javafx.stage.Stage;
    
    public class JavaFXImageButton extends Application {
    
      public void start(Stage stage) {
        //Creating a Button without any text
        Button button = new Button();
        button.setPrefSize(200, 100);
        button.setStyle("-fx-background-image: url(background.jpg);-fx-text-fill: white;-fx-font-size: 20px");
        button.setText("Download!");
    
        Scene scene = new Scene(new StackPane(button), 600, 300);
        stage.setTitle("JavaFX Image Button with CSS!");
        stage.setScene(scene);
        stage.show();
      }
    
      public static void main(String[] args) {
        launch(args);
      }
    }
    
    JavaFX Image Button using CSS
    JavaFX Image Button using CSS

    Conclusion

    In this tutorial, we have learned how to create JavaFX Buttons with Images. We have created button with image and text, button with only image and Image Button with CSS styling. If you liked this article, you might also want to checkout some of the other interesting articles I have written.

  • JavaFX CheckComboBox

    JavaFX CheckComboBox

    JavaFX CheckComboBox is a special UI control provided by ControlsFX. It is used for giving option to users to select more than one item from a Combobox. It is an extremely useful component you can use to provide a rich user experience. In this tutorial, we will explore the component usage with an example and style it using CSS. The basic idea of this component is Checkbox + ComboBox so that ComboBox can have multiple parallel selections.

    Adding ControlsFX to Project

    Since the component is from ControlsFX library, you need to include the dependency on your project. If you are using the maven, add the dependency as follows.

    <dependency>
      <groupId>org.controlsfx</groupId>
      <artifactId>controlsfx</artifactId>
      <version>11.1.1</version>
    </dependency>
    

    If you are using Gradle, add the following line to your build.gradle file.

    implementation 'org.controlsfx:controlsfx:11.1.1'
    

    How to use CheckComboBox

    The usage of CheckComboBox is similar to the normal JavaFX ComboBox. You can create a list of item you want to add and then attach it to the CheckComboBox.
    In the following example, we will make use of CheckComboBox to keep things simlpe. Let’s see the usage on a sample code.

    JavaFX CheckComboBox<String> Example

    //Reduced import code
    import org.controlsfx.control.CheckComboBox;
    
    public class JavaFXCheckComboBoxTutorial extends Application {
    
      private CheckComboBox<String> createCheckComboBox() {
        // Create the list of items to be shown on the combobox
        ObservableList<String> programmingLanguages = FXCollections.observableArrayList(
            "Java",
            "Cpp",
            "Python",
            "C#",
            "Kotlin"
        );
        // Attach the list to the Combobox
        CheckComboBox<String> checkComboBox = new CheckComboBox<>(programmingLanguages);
        //As soon as an item is selected or selection is changed, display all the selected items
        checkComboBox.getCheckModel().getCheckedItems().addListener(new InvalidationListener() {
          @Override
          public void invalidated(Observable observable) {
            System.out.printf("\nSelected items: %s", getSelectedItems(checkComboBox));
          }
        });
        return checkComboBox;
      }
    
      /**
       * Get the currently selected items from the CheckComboBox
       */
      private List<String> getSelectedItems(CheckComboBox<String> checkComboBox) {
        return checkComboBox.getCheckModel().getCheckedItems();
      }
    
      @Override
      public void start(Stage stage) {
        VBox contentPane = new VBox(10);
        contentPane.setAlignment(Pos.CENTER);
        contentPane.getChildren().addAll(new Label("CheckComboBox Example"), createCheckComboBox());
    
        Scene scene = new Scene(contentPane, 400, 500);
        stage.setScene(scene);
        stage.show();
      }
    
      public static void main(String[] args) {
        launch();
      }
    }
    

    To get the list of selected items from the CheckComboBox, you can use

    checkComboBox.getCheckModel().getCheckedItems()

    It will return an ObservableList with all the selected items.

    Customize CheckComboBox with CSS

    Now, let’s see how to style the CheckComboBox with JavafX CSS styling. This component can be styled using combo-box-base CSS. By applying the following CSS, the CheckComboBox is customized with a lighter background.

    .combo-box-base {
      -fx-background-color: -fx-shadow-highlight-color, -fx-outer-border, -fx-inner-border, white;
      -fx-background-insets: 0 0 -1 0, 0, 1, 2;
      -fx-background-radius: 3px, 3px, 2px, 1px;
    }
    
    .combo-box .combo-box-popup .list-cell:hover {
      -fx-text-fill: yellow ;
      -fx-background-color: green ;
    }
    
    .combo-box .combo-box-popup .list-view, .combo-box .combo-box-popup .list-cell {
      -fx-background-color: black ;
      -fx-text-fill: white ;
    }
    

    JavaFX CheckComboBox Custom CSS

    Conclusion

    In this tutorial, we have discussed how to make use of the CheckComboBox in code and style it using CSS. ControlsFX has a lot of such useful extra components. You might also be interested to checkout the following articles.

  • JavaFX Custom Shaped Buttons

    JavaFX Custom Shaped Buttons

    JavaFX provides effective ways to customize the shape of most of the components. In this tutorial, we will learn how to set a custom shape for the JavaFX Button component.

    Creating custom shaped buttons

    We can make use of -fx-shape CSS property to set the button to any custom shape. Let’s see how we can make a heart shaped button using -fx-shape styling. We will create two buttons, one normal button without any special styling and one with heart-shape. The -fx-shape css property accepts SVG paths as shape. Thanks to the SVG support, we can actually make any shape by providing the corresponding svg parameters. You can learn more about SVG shapes from w3.org.

    import javafx.application.Application;
    import javafx.geometry.Pos;
    import javafx.scene.Scene;
    import javafx.scene.control.Button;
    import javafx.scene.layout.HBox;
    import javafx.stage.Stage;
    
    public class HeartShapedButtonTutorial extends Application {
    
      @Override
      public void start(Stage stage) {
        HBox contentContainer = new HBox(50d, createNormalButton(), createHeartShapedButton());
        contentContainer.setAlignment(Pos.CENTER);
        Scene scene = new Scene(contentContainer, 500, 500);
        stage.setTitle("JavaFX Button Tutorial");
        stage.setScene(scene);
        stage.show();
      }
    
      private Button createNormalButton() {
        Button button = new Button("Normal Button!");
        button.setPrefSize(200, 200);
        return button;
      }
    
      private Button createHeartShapedButton() {
        Button button = new Button("Custom Button!");
        button.setStyle(
            "-fx-shape: \"M23.6,0c-3.4,0-6.3,2.7-7.6,5.6C14.7,2.7,11.8,0,8.4,0C3.8,0,0,3.8,0,8.4c0,9.4,9.5,11.9,16,21.26.1-9.3,16-12.1,16-21.2C32,3.8,28.2,0,23.6,0z\";"
        );
        button.setPrefSize(200, 200);
        return button;
      }
    
      public static void main(String[] args) {
        launch();
      }
    }
    

    This will create the following output. The normal JavaFX button is added as the first child to the HBox. The custom shaped button is added as the second child.
    JavaFX Custom Shaped Button

    You can also make use of this styling on special buttons like JavaFX Material Design Button, JFXButton.

    Full tutorial on JavaFX Custom Shaped Button

    If you are interested in exploring this further, checkout my video tutorial on Genuine Coder YouTube channel.

    Circular Button

    We can make the button circular by applying the following CSS code.

    .circlular-javafx-button{
        -fx-background-radius: 150;
        -fx-pref-width: 300;
        -fx-pref-height: 300;
        -fx-background-color: green;        
    }
    
    JavaFX Circular Button
    JavaFX Circle Shaped Button

    Triangle Shaped Button

    We can make triangle buttons by applying the following CSS code.

    .balloon{
        -fx-shape: "M150 0 L75 200 L225 200 Z";
        -fx-background-color: #4DD0E1;
    }
    
    JavaFX Triangle Shaped Button
    Triangle Shaped Button

    Conclusion

    JavaFX allows setting custom shapes for its GUI components via -fx-shape option. We have explored the option and created variety of different buttons with heart-shape, circle-shape and triangle shape. You can make the button any shape you want by giving proper SVG path. If you have enjoyed this article, you might also be interested in the following.

  • JavaFx DatePicker Tutorial

    JavaFx DatePicker Tutorial

    In this tutorial, we will talk about JavaFX DatePicker basic usage, how to format the selected date using DateTimeFormatter to string value, and customize the component using JavaFX CSS.

    Using JavaFx DatePicker

    DatePicker is a standard component in the JavaFX SDK. It can be added from the SceneBuilder via FXML file as well. In the following code snippet, we will add the DatePicker to a simple scene without using FXML.

    import java.time.LocalDate;
    import javafx.application.Application;
    import javafx.beans.value.ChangeListener;
    import javafx.beans.value.ObservableValue;
    import javafx.scene.Scene;
    import javafx.scene.control.DatePicker;
    import javafx.scene.layout.StackPane;
    import javafx.stage.Stage;
    
    public class JavaFXDatePickerTutorial extends Application {
    
      @Override
      public void start(Stage stage) {
        Scene scene = new Scene(new StackPane(createDatePicker()), 400, 500);
        stage.setTitle("JavaFX DatePicker Tutorial");
        stage.setScene(scene);
        stage.show();
      }
    
      //Create a date picker and attach and event listener.
      private DatePicker createDatePicker() {
        DatePicker datePicker = new DatePicker();
        //Set Current date to today's date
        datePicker.setValue(LocalDate.now());
        //Add an event listener for date selection change
        datePicker.valueProperty().addListener(new ChangeListener<LocalDate>() {
          @Override
          public void changed(ObservableValue<? extends LocalDate> observable, LocalDate oldValue, LocalDate newValue) {
            //Print date change to console
            System.out.println("New date selected: " + newValue);
          }
        });
        return datePicker;
      }
    
      public static void main(String[] args) {
        launch();
      }
    }
    

    JavaFX DatePicker

    Get date as string from JavaFX DatePicker

    We can get the currently selected date anytime from the DatePicker calendar using the datePicker.getValue() function. It will return a LocalDate object representing the currently selected date.

    When we need to display these dates somewhere, we need to convert the object to a formatted string. It can be easily done through Java DateTimeFormatter.

    As an example, let’s convert the selected date to dd/MM/yyyy format.

    private String getFormattedDateFromDatePicker(DatePicker datePicker) {
      //Get the selected date
      LocalDate selectedDate = datePicker.getValue();
      //Create DateTimeFormatter
      DateTimeFormatter formatter = DateTimeFormatter.ofPattern("dd/MM/yyyy");
      //Convert LocalDate to formatted String
      return selectedDate.format(formatter);
    }
    

    If you want the date to be formatted in some other way, DateTimeFormatter can be customized. You can prepare your own pattern using the DateTimeFormatter.ofPattern() function. Following section shows some supported symbols you can use to prepare your own date format.

      Symbol  Meaning                     Presentation      Examples
      ------  -------                     ------------      -------
       G       era                         text              AD; Anno Domini; A
       u       year                        year              2004; 04
       y       year-of-era                 year              2004; 04
       D       day-of-year                 number            189
       M/L     month-of-year               number/text       7; 07; Jul; July; J
       d       day-of-month                number            10
    
       Q/q     quarter-of-year             number/text       3; 03; Q3; 3rd quarter
       Y       week-based-year             year              1996; 96
       w       week-of-week-based-year     number            27
       W       week-of-month               number            4
       E       day-of-week                 text              Tue; Tuesday; T
       e/c     localized day-of-week       number/text       2; 02; Tue; Tuesday; T
       F       week-of-month               number            3
    
       V       time-zone ID                zone-id           America/Los_Angeles; Z; -08:30
       z       time-zone name              zone-name         Pacific Standard Time; PST
       O       localized zone-offset       offset-O          GMT+8; GMT+08:00; UTC-08:00;
       X       zone-offset 'Z' for zero    offset-X          Z; -08; -0830; -08:30; -083015; -08:30:15;
       x       zone-offset                 offset-x          +0000; -08; -0830; -08:30; -083015; -08:30:15;
       Z       zone-offset                 offset-Z          +0000; -0800; -08:00;
    

    Customize DatePicker with CSS

    Now, let’s say you would like to customize the DatePicker. It is easily possible with JavaFX CSS styling. The following code snippet shows all the CSS customizations you can apply on the DatePicker for full customization. With the following CSS applied, the DatePicker will look as shown in this screenshot.

    JavaFX CSS Customized DatePicker

    * {
      -fx-primary-color: #c26000;
      -fx-secondary-color: #864500;
      -fx-light-grey-color: #d1d1d1;
      /*Set focus color*/
      -fx-focus-color: -fx-secondary-color;
      /*Increase font size*/
      -fx-font-size: 1.5em;
    }
    
    /*-----------------------------------------
    Customize the right button background color
    -------------------------------------------*/
    .date-picker .arrow-button {
      -fx-background-color: -fx-primary-color;
      -fx-background-radius: 0;
    }
    
    .date-picker .arrow-button:hover {
      -fx-background-color: -fx-secondary-color;
    }
    
    .date-picker .arrow-button .arrow {
      -fx-background-color: white;
    }
    
    /*-----------------------------------------
    Customize popup content
    -------------------------------------------*/
    .date-picker .cell {
      -fx-background-color: white;
    }
    
    .date-picker .cell:hover {
      -fx-background-color: -fx-primary-color;
    }
    
    .date-picker .cell:focused {
      -fx-background-color: -fx-primary-color;
    }
    
    /*-----------------------------------------
    Customize the selected cell
    -------------------------------------------*/
    .date-picker .selected {
      -fx-background-color: -fx-primary-color;
      -fx-text-fill: white;
    }
    
    .date-picker .selected:focused {
      -fx-background-color: -fx-primary-color;
      -fx-text-fill: white;
    }
    
    .date-picker-popup {
      -fx-border-color: transparent;
    }
    
    .date-picker-popup .month-year-pane {
      -fx-background-color: -fx-primary-color;
    }
    
    .date-picker-popup .month-year-pane .label {
      -fx-text-fill: white;
    }
    
    .date-picker-popup .week-number-cell {
      -fx-text-fill: -fx-secondary-color;
    }
    
    /*-----------------------------------------
    Customize left and right arrow
    -------------------------------------------*/
    .date-picker-popup .spinner .button .left-arrow,
    .date-picker-popup .spinner .button .right-arrow {
      -fx-background-color: #c2d70e;
    }
    

    Conclusion

    In this tutorial, we have learned how to use DatePicker, format the date, and customize it fully with CSS. You might also be interested in having a look into the following tutorials as well, or checkout our JavaFX tutorial page.

    1. JavaFX animation tutorial
    2. JavaFX scene switching animation
    3. JavaFX icon setup
  • JavaFX Application Icon Setup

    JavaFX Application Icon Setup

    All programs require a nice-looking icon or logo on the taskbar and the window to make it look professional. JavaFX provides easy ways to set up an application icon using any image of your choice, whether it be JPG or PNG or something else. In this tutorial, let’s see how to set up an icon for the application

    Set JavaFX Window/Stage icon from an image file

    The usual method of attaching an icon to the JavaFX application is that, you simply include the icon image inside the JAR file as a resource and then use it. Let’s see how you can do that.

    Step 1: Add the icon to the resource directory

    First, add the image into the resource directory. You can use any supported image formats, like PNG, JPEG etc.

    JavaFX Add Image Resource

    Step 2: Attach the icon to the application window

    Now, let’s attach the image from the resource directory to the window, aka stage. The following code snippets show how to do that in an example program.

    import javafx.application.Application;
    import javafx.scene.Scene;
    import javafx.scene.image.Image;
    import javafx.scene.layout.StackPane;
    import javafx.stage.Stage;
    
    public class JavaFXIconExample extends Application {
    
      @Override
      public void start(Stage stage) {
        Scene scene = new Scene(new StackPane(), 320, 320);    
    
        //Attach the icon to the stage/window
        stage.getIcons().add(new Image(JavaFXIconExample.class.getResourceAsStream("/logo.png")));
    
        stage.setTitle("Sample program!");
        stage.setScene(scene);
        stage.show();
      }
    
      public static void main(String[] args) {
        launch();
      }
    }
    

    So in the above example, we are attaching the icon to the primary stage (also known as root stage). If you want to add logo to the other stages you create, you can repeat the same process again to add icons to them as well, with just one line of code.

    stage.getIcons().add(new Image(JavaFXIconExample.class.getResourceAsStream("/logo.png")));
    

    JavaFX Application With Custom Icon

    Set icon from an image URL

    Now, let’s say you want to add the image dynamically from a URL instead of adding from an image file, that is also easily possible. This can be done with just one line of code, as shown below.

    stage.getIcons().add(new Image("https://genuinecoder.com/wp-content/uploads/2022/06/genuine_coder-3.png"));
    

    In this example, I have used genuine coder logo to dynamically load the application icon. The advantage of using the logo from a URL is that, you can change the logo in the server without touching your program once it is rolled out to your customers.

    Conclusion

    JavaFX provides a one-line option to attach images/logo to the windows. The logo image can be loaded from an image file or from a URL.

  • JavaFX Splash Screen

    JavaFX Splash Screen

    Splash screens are awesome. They allows to engage users when the application load in the background as a loading screen. In this article, we will talk about implementing JavaFX Splash Screen / Loading Screen with animation. For the splash screen, we will provide a fade-in and fade-out transition.

    Splash Screen with Fade Animation

    In this example, when the program starts, the splash screen will fade in. After some time, the flash screen will fade out.

    The algorithm is as follows

    • Load Preloader with a fade-in effect using FadeTransition
    • Remove Preloader with a fade-out effect using Fade transition.
    • On the end of fade-out load the actual content to the frame.

    Watch the implementation:-

    Let’s have a look at the code. The code is properly commented.

    private void loadSplashScreen() {
    	try {
    		//Load splash screen view FXML
    		StackPane pane = FXMLLoader.load(getClass().getResource(("myAwesomeSplashDesign.fxml")));
    		//Add it to root container (Can be StackPane, AnchorPane etc)
    		root.getChildren().setAll(pane);
    
    		//Load splash screen with fade in effect
    		FadeTransition fadeIn = new FadeTransition(Duration.seconds(3), pane);
    		fadeIn.setFromValue(0);
    		fadeIn.setToValue(1);
    		fadeIn.setCycleCount(1);
    
    		//Finish splash with fade out effect
    		FadeTransition fadeOut = new FadeTransition(Duration.seconds(3), pane);
    		fadeOut.setFromValue(1);
    		fadeOut.setToValue(0);
    		fadeOut.setCycleCount(1);
    
    		fadeIn.play();
    
    		//After fade in, start fade out
    		fadeIn.setOnFinished((e) -> {
    			fadeOut.play();
    		});
    
    		//After fade out, load actual content
    		fadeOut.setOnFinished((e) -> {
    			try {
    				AnchorPane parentContent = FXMLLoader.load(getClass().getResource(("/main.fxml")));
    				root.getChildren().setAll(parentContent);
    			} catch (IOException ex) {
    				Logger.getLogger(MainController.class.getName()).log(Level.SEVERE, null, ex);
    			}
    		});
    	} catch (IOException ex) {
    		Logger.getLogger(MainController.class.getName()).log(Level.SEVERE, null, ex);
    	}
    }
    

    How to show splash screen until loading gets completed

    Sometimes you may want to do some actual work like loading a database or importing something. In this case, we will have to do it in the background while splash screen is shown.

    You can do the heavy lifting tasks on the setOnFinished() method of fade-in transition.

    fadeIn.setOnFinished((e) -> {
        //Do the loading tasks
        DatabaseImporter.import();
        SomeComplexTask.start();
        //...
        //After the background tasks are done, load the fadeout
        fadeOut.play();
    });
    
    Problem with this approach

    The above code works fine when the background tasks are not that much (when the tasks complete within couple of seconds max). But if it is a long task, then the JavaFX UI Thread will hang. In this case, you might have to use a separate thread for processing the background tasks.

    The reliable solution

    You can make use of JavaFX Tasks or JavaFX Services. Then using a task complete listener, you can initiate fade out transition.

    fadeIn.setOnFinished((e) -> {
        //Start the Worker Task
        BackgroundWorkerTask task = new BackgroundWorkerTask();
        task.start();
        //After the completion of the task, start fadeOut animation
        task.setOnSucceeded(successEvent -> {
          fadeOut.play();
        });
    });
    

    So, that’s how you implement a JavaFX Splash Screen.

    See example on GitHub

    JavaFX Splash Screen without Borders

    In this video tutorial, you can see how to make a splash screen in a separate window without window borders. Here, splash screen uses a separate stage.